Ethereum
 Hyperliquid
 Solana
 Arbitrum
 BNB Smart Chain
 Base
Base Polygon
 TRON
TRON Sui
Sui MegaETH


Avalanche subnets tutorial series: Running a local Avalanche node on Fuji testnet
This is the second article in Avalanche subnet tutorial series. Check out the other articles here:
- What is a subnet.
- Running a local Avalanche node on Fuji testnet. <– You are here.
- Creating a subnet, then create a blockchain on it.
- Deploying a smart contract.
- Indexing subnet with The Graph.
In this article, we’ll guide you for educational purposes in setting up a personal Avalanche node on a local machine and making it a validator. Also, talk to us if want a subnet set up with Chainstack.
The entire process is split into three parts:
- Setting up Git with GitHub and Go.
- Running a local Avalanche node.
- Getting AVAX and stake the node to make a validator node.
Warning: this tutorial is crafted for macOS. Developers should adjust accordingly depending on their system.
Setting up Go
The first step is setting up Go. Go is exceedingly popular for blockchain VMs, and it is also the default language for AvalancheGo. Blockchain developers using a recent version of macOS should already have Go on their machine—run go version in your terminal to confirm. If Go is not installed, download and install the package.
In rare instances, developers may have issues running the AvalancheGo build script. That is because of a missing environment variable. If that happens, try adding $GOPATH/bin to your $PATH by running the following command:
export PATH="$PATH:$(go env GOPATH)/bin" Setting up Git
Git is another must-have tool for developers. Run the following command to check if it is already installed.
git versionIf not, install it.
Setting up node
Download the AvalancheGo source code:
git clone [email protected]:ava-labs/avalanchego.gitIf it does not work and shows the following error message:
[email protected]: Permission denied (publickey). This is because the SSH key is missing from the SSH agent. Follow this article to resolve this issue. When Git is ready to go, run the command again to download the source code.
After the download is finished, navigate to the avalanche go folder:
cd avalanchegoTo build the source code, run:
./scripts/build.shWhen it is done, run the following command to start the node for Fuji testnet.
./build/avalanchego --network-id=fujiIn the terminal, you will see:
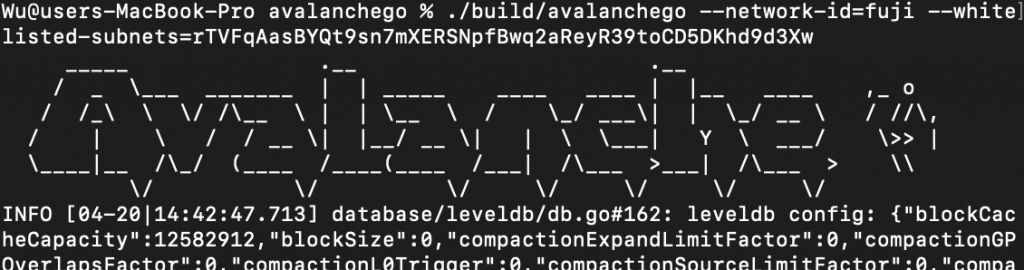
This means the node is up and running. If it is the first time it runs, it needs to synchronize data with the Avalanche primary network. The bootstrapping process takes approximately 50–100 hours and requires 100 GB of space. The node is unusable before it is done. The endpoints are reachable, but most RPC calls respond with error messages.
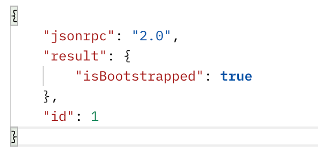
The bootstrapping status can be checked by sending the following cURL request:
curl -X POST --data '{
   "jsonrpc": "2.0",
   "method": "info.isBootstrapped",
   "params":{
    "chain":"X"
   },
   "id": 1
}' -H 'content-type:application/json;' 127.0.0.1:9650/ext/info
Now it is wait time.
********
*****
***
**

Or is it more like:

The good news is that shutting down the node does not terminate the process. The next time the node is turned on, it’ll start from where it was left.
When the process is complete, you will see:
Hooray, your node is up and running.

It is not a validator yet, but it is part of the Avalanche primary network already and developers can now access all three chains through this endpoint.
Run Avalanche validator node
The official documentation explains how to set a validator node on the mainnet and the steps are 90% the same for the Fuji testnet.
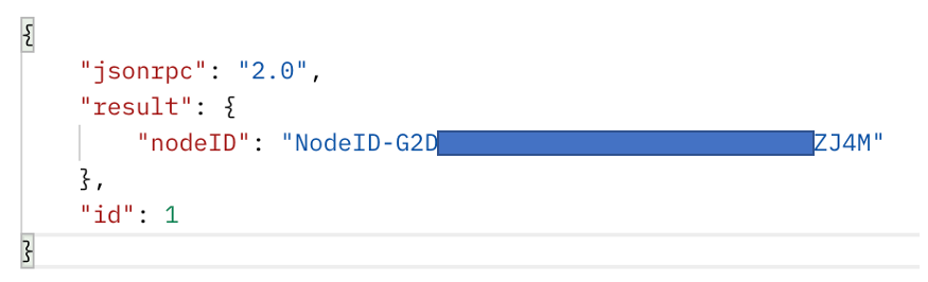
First, get your node ID by running the following cURL request:
curl -X POST --data '{
"jsonrpc":"2.0",
"id" :1,
"method" :"info.getNodeID"
}' -H 'content-type:application/json;' 127.0.0.1:9650/ext/info
The response is:
Now visit Avalanche’s official wallet website and create a new wallet for your validator. Remember to change the network to Fuji.
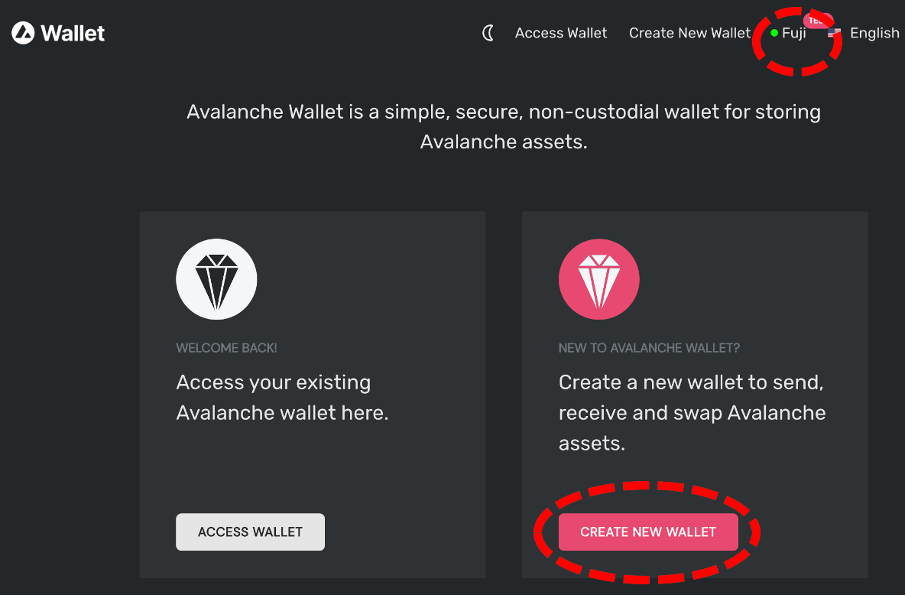
Since it is a new wallet, it is empty. The validator node needs some AVAX to start validating transactions. To get testnet AVAX, copy its X-chain address.

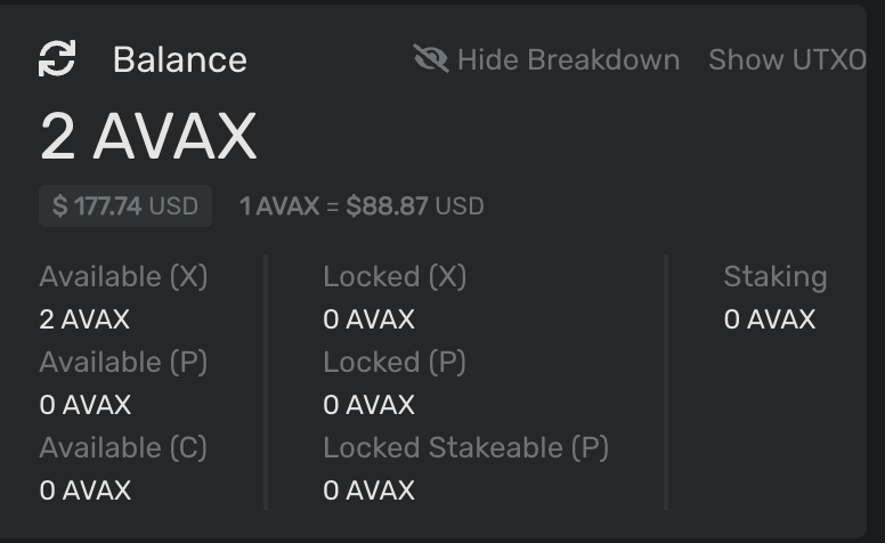
Go to the official faucet page to request for testnet faucet. You should receive 2 AVAX on the X-chain.
Go to the cross-chain tab, and transfer 1 AVAX to P-chain.

Go to the Earn tab and click Add validator.
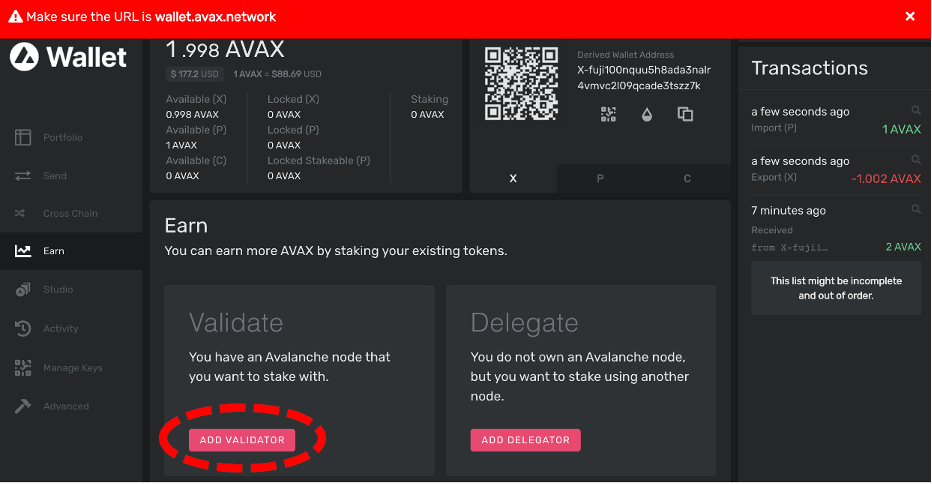
Fill in the node ID and AVAX and click on Confirm.
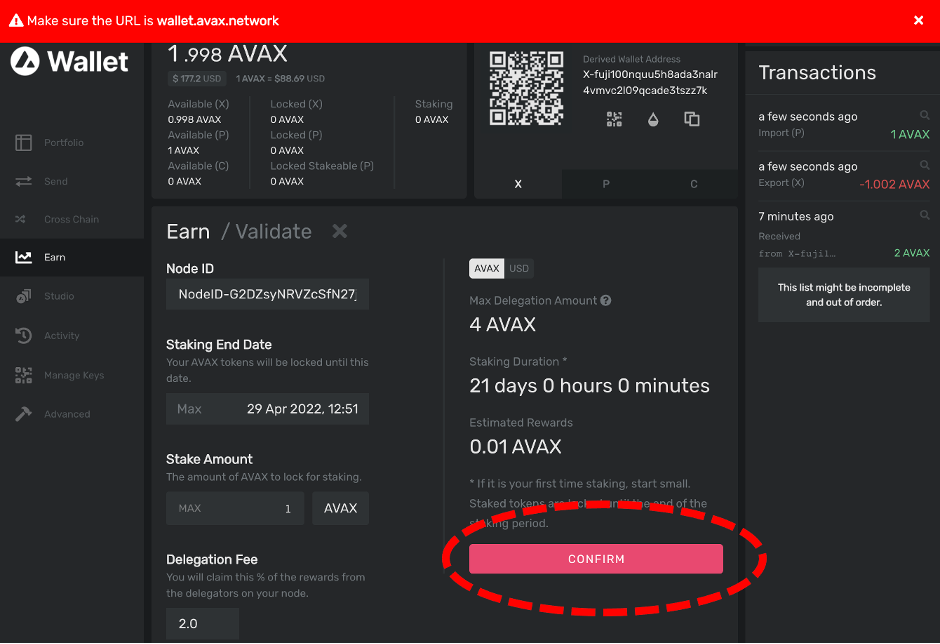
Congratulations, you have a validator node now!
Conclusion
In this article, we have shown you how to set up and run an Avalanche node locally and make it a validator of the Fuji testnet. In the next article, we will go into creating our own subnet, so make sure you will not miss them.
If you need any help or have questions, feel free to reach us on our Discord channel!
Happy coding.
- Discover how you can save thousands in infra costs every month with our unbeatable pricing on the most complete Web3 development platform.
- Input your workload and see how affordable Chainstack is compared to other RPC providers.
- Connect to Ethereum, Solana, BNB Smart Chain, Polygon, Arbitrum, Base, Hyperliquid, Tempo, MegaETH, Monad, Plasma, Avalanche, Optimism, Scroll, Aptos, Cronos, Gnosis Chain, Kaia, Moonbeam, Celo, Aurora, TON, Ronin, and Bitcoin mainnet or testnets through an interface designed to help you get the job done.
- Fast access to blockchain archive data and gRPC streaming on Solana.
- To learn more about Chainstack, visit our Developer Portal or join our Telegram group.
- Connect your AI agent to Chainstack in seconds using Chainstack MCP — give Claude, Cursor, Codex, Gemini, and Windsurf live access to blockchain data, node management, and docs.
- Are you in need of testnet tokens? Request some from our faucets. Sepolia faucet, Base Sepolia faucet, Solana devnet faucet, Hoodi faucet, BNB faucet, zkSync faucet, Scroll faucet, Hyperliquid faucet, Monad faucet, Amoy faucet, Plasma faucet, TON faucet.
Have you already explored what you can achieve with Chainstack? Get started for free today.