Ethereum
 Hyperliquid
 Solana
 Arbitrum
 BNB Smart Chain
 Base
Base Polygon
 TRON
TRON Sui
Sui Robinhood


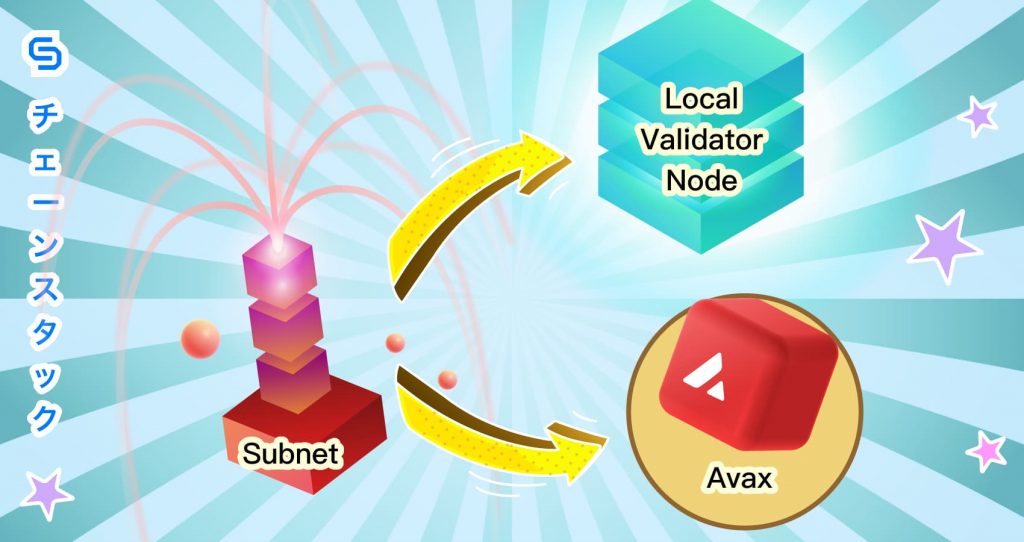
Avalanche subnets tutorial series: Creating an Avalanche subnet and a blockchain
This is the third article in Avalanche subnet tutorial series. Check out the other articles here:
- What is a subnet.
- Running a local Avalanche node on Fuji testnet.
- Creating a subnet, then create a blockchain on it. <– You are here.
- Deploying a smart contract.
- Indexing subnet with The Graph.
In the previous articles, we talked about Avalanche’s unique multiple chains setup, what subnets are, and even established a validator for our own. By now you should have a validator node for the Fuji testnet running locally.
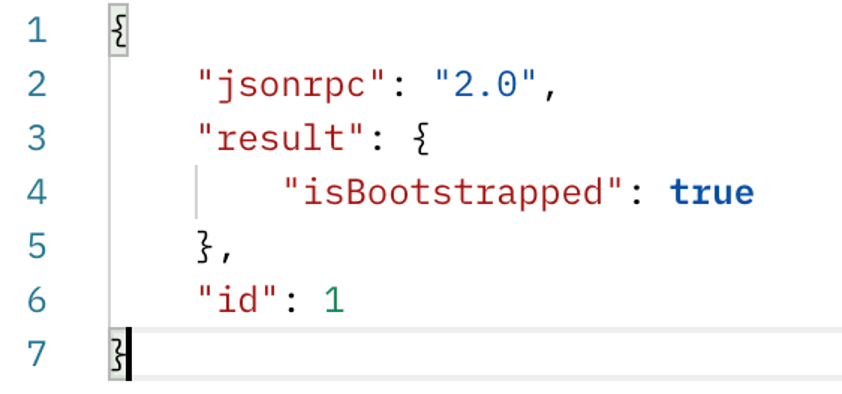
Check if the node is ready by calling info.isBootstrapped. If it is, the response will be the following:
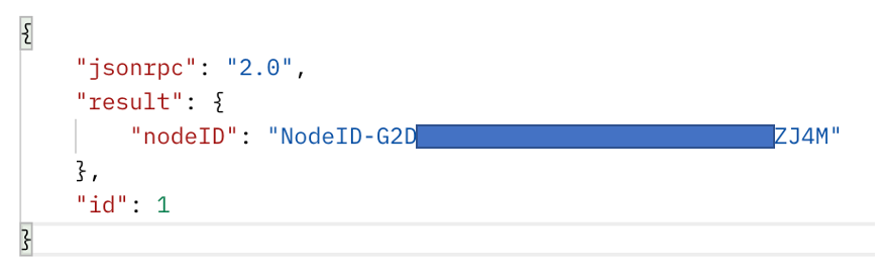
Then call info.getNodeID to retrieve its node ID. It is formatted as NodeID-********, write it down somewhere, as it will be used multiple times in this tutorial.
Call platform.getCurrentValidators to get a list of the current validators in the network, and make sure your node ID is in the list.
If you get all of this, it is time to move on to the next part: creating a subnet and starting a new blockchain.
Creating Avalanche subnets
Check the official Avalanche document about creating subnets. It is 70% identical to this tutorial, so please use it as a reference if needed.
The first thing to do is to create a user with the keystore API. The keystore username and password exist only on the initial node—they are not accessible from other nodes. Also, take note that the node operator has access to them too. Try to avoid using it on third-party nodes.
Call keystore.createUser to create a new user:
"id" :1,
"method" :"keystore.createUser",
"params" :{
"username":"chainstack",
"password":"Chainstack122!"
}
}' -H 'content-type:application/json;' 127.0.0.1:9650/ext/keystore
Make sure the password is at least 8 characters and contains both upper and lower case letters, as well as numbers and symbols. In this case, the username is chainstack and the password is Chainstack122!. Once it is created, this message shows:
Call platform.createAddress to get an address for control keys. The official tutorial uses two control keys, but one is sufficient.
curl -X POST --data '{
"jsonrpc": "2.0",
"method": "platform.createAddress",
"params": {
"username":"chainstack",
"password":"Chainstack122!"
},
"id": 1
}' -H 'content-type:application/json;' 127.0.0.1:9650/ext/P
Run it twice, get two addresses on P-chain. Copy them down for later. In case these keys are lost, call platform.listAddresses to retrieve them.

Then call platform.createSubnet to create a subnet. Fill in the control keys generated in the previous step.
curl -X POST --data '{
"jsonrpc": "2.0",
"method": "platform.createSubnet",
"params": {
"controlKeys":[
"P-fujiabcdefg*change this*",
"P-fujiabcdefg*change this*"
],
"threshold":2,
"username":"chainstack",
"password":"Chainstack122!"
},
"id": 1
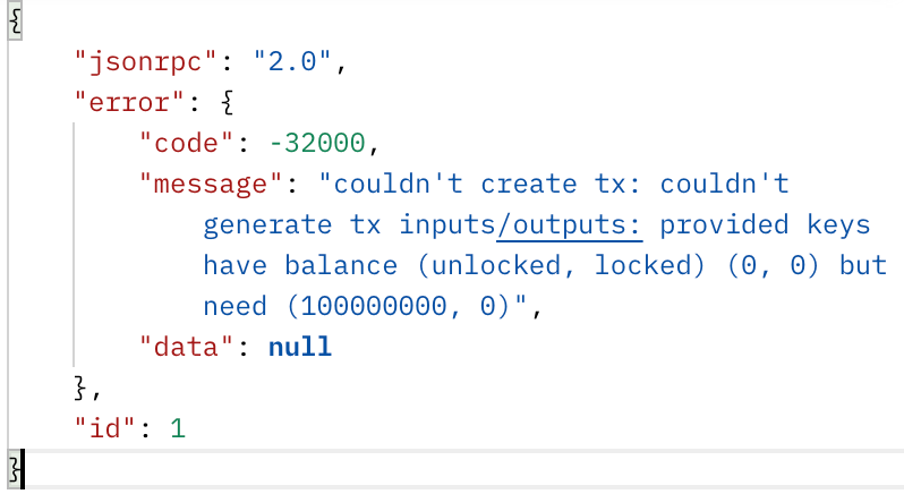
}' -H 'content-type:application/json;' 127.0.0.1:9650/ext/PIt will most likely return an error message: couldn't create tx: couldn't generate tx inputs/outputs: provided keys have balance (unlocked, locked) (0, 0) but need (100000000, 0).
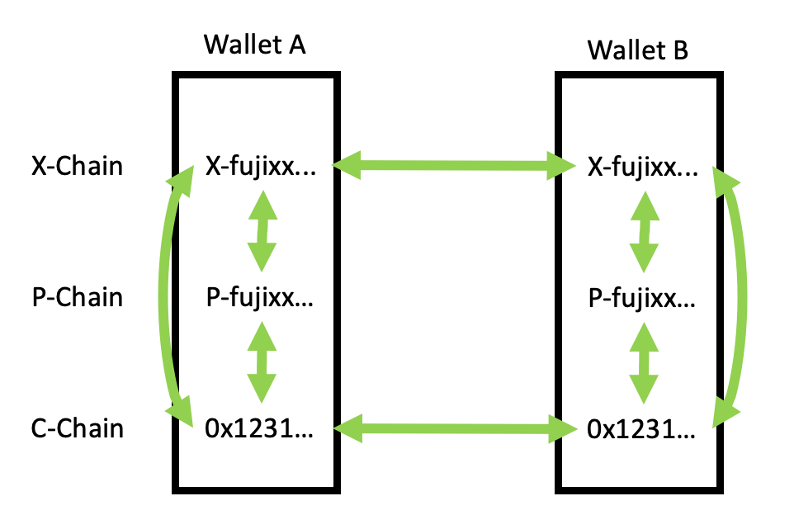
It means AVAX is needed for this operation. In the first article of this tutorial series, we mentioned how the P-chain is isolated from the rest of its folks; Therefore, topping up P-chain takes a few extra steps.
Firstly, call platform.exportKey to get the private keys of the first address. Copy it down.
curl -X POST --data '{
    "jsonrpc":"2.0",
    "id"     :1,
    "method" :"platform.exportKey",
    "params" :{
        "username" :"chainstack",
        "password": "Chainstack122!",
        "address": "P-fujiabcdefg*change this*"
    }
}' -H 'content-type:application/json;' 127.0.0.1:9650/ext/P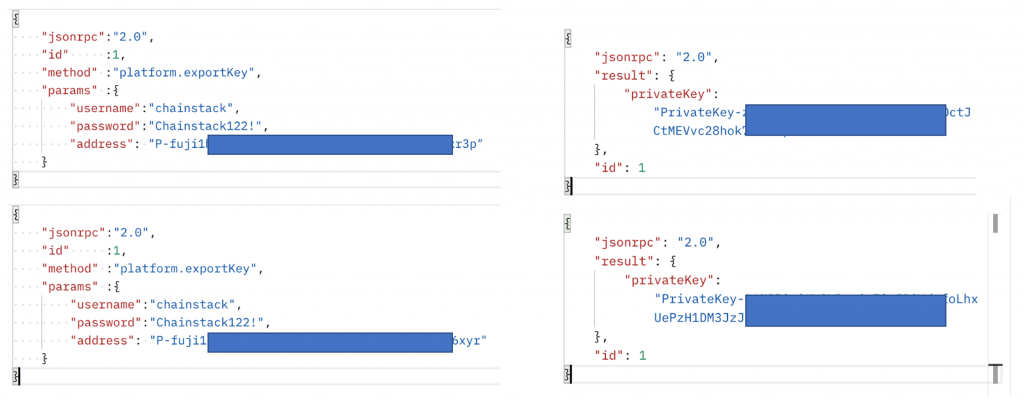
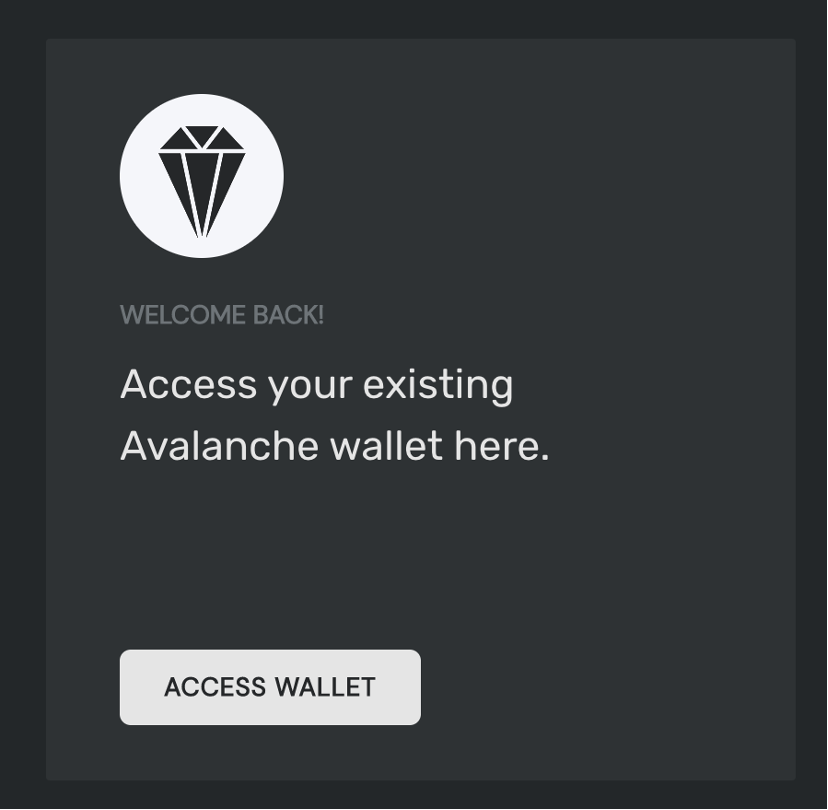
Go to Avalanche’s official wallet, and click Access wallet.
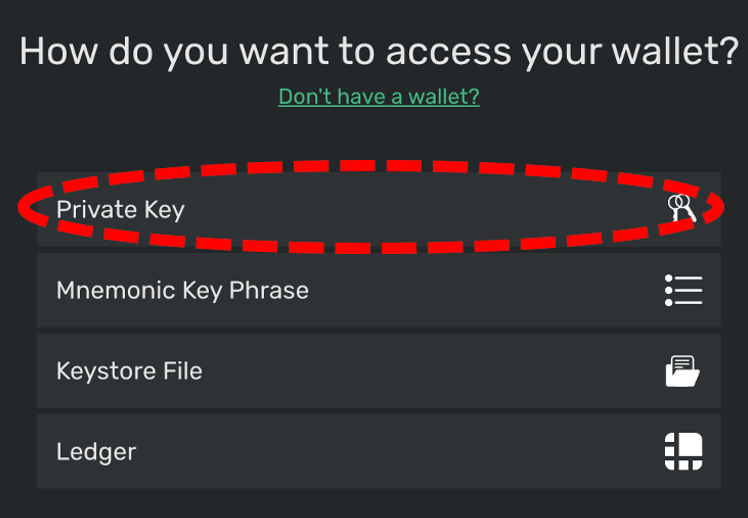
Log in with the private key.
Get some test AVAX from the faucet airdrop page. The detailed steps are in this previous article.
Transfer 1 AVAX to P-chain—see the steps in the previous article too.

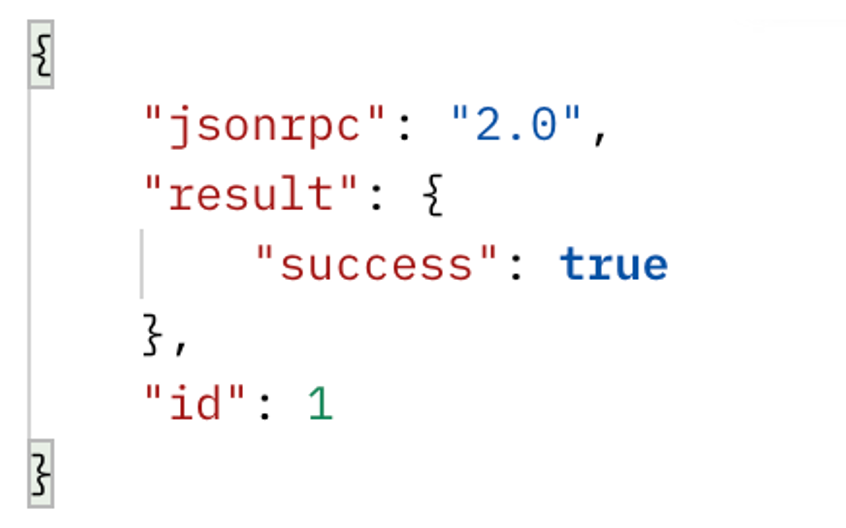
Call platform.createSubnet again. If this is shown:
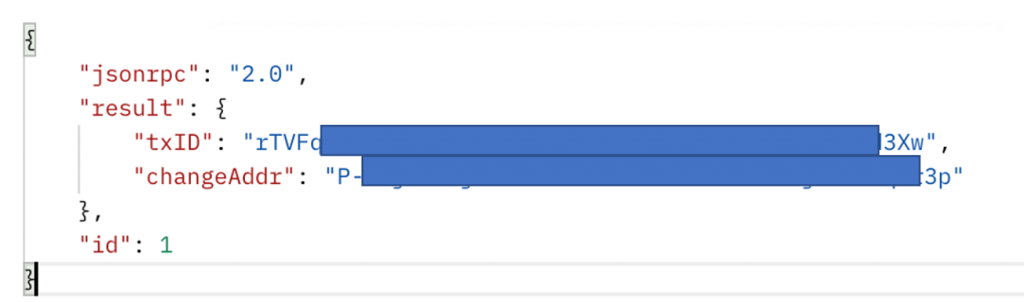

Congratulations! You have created a subnet!
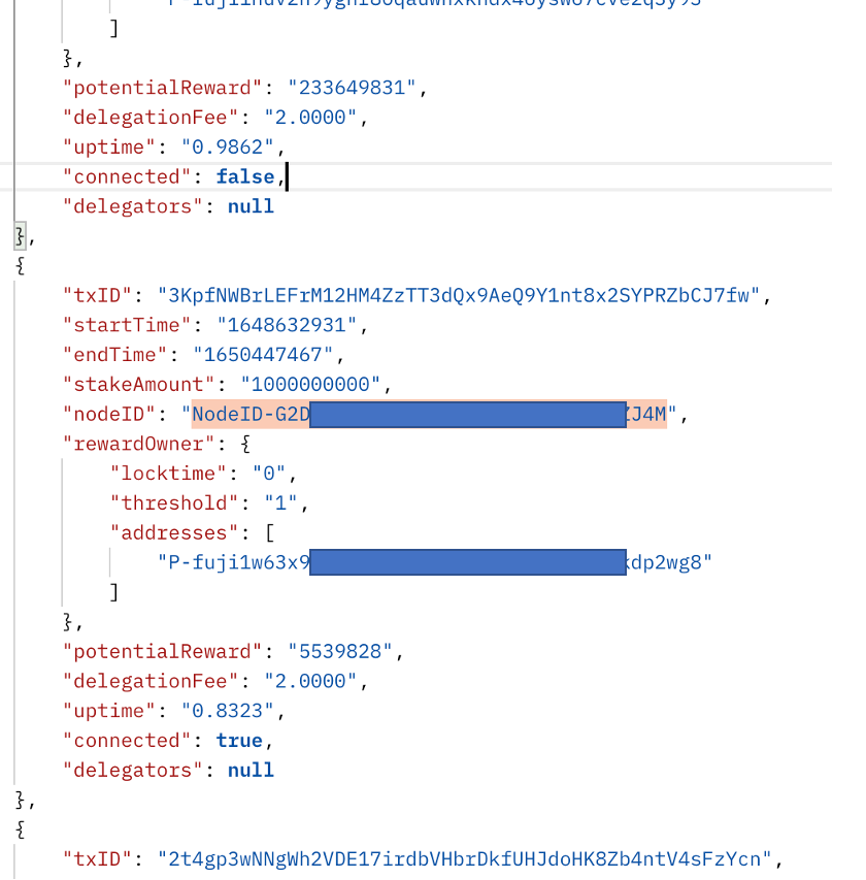
Now call platform.getSubnets, it gives all the subnets on Avalanche. Go through the list, look for a subnet with matching control keys and ID. Copy them down for later use.
curl -X POST --data '{
"jsonrpc": "2.0",
"method": "platform.getSubnets",
"params": {},
"id": 1
}' -H 'content-type:application/json;' 127.0.0.1:9650/ext/P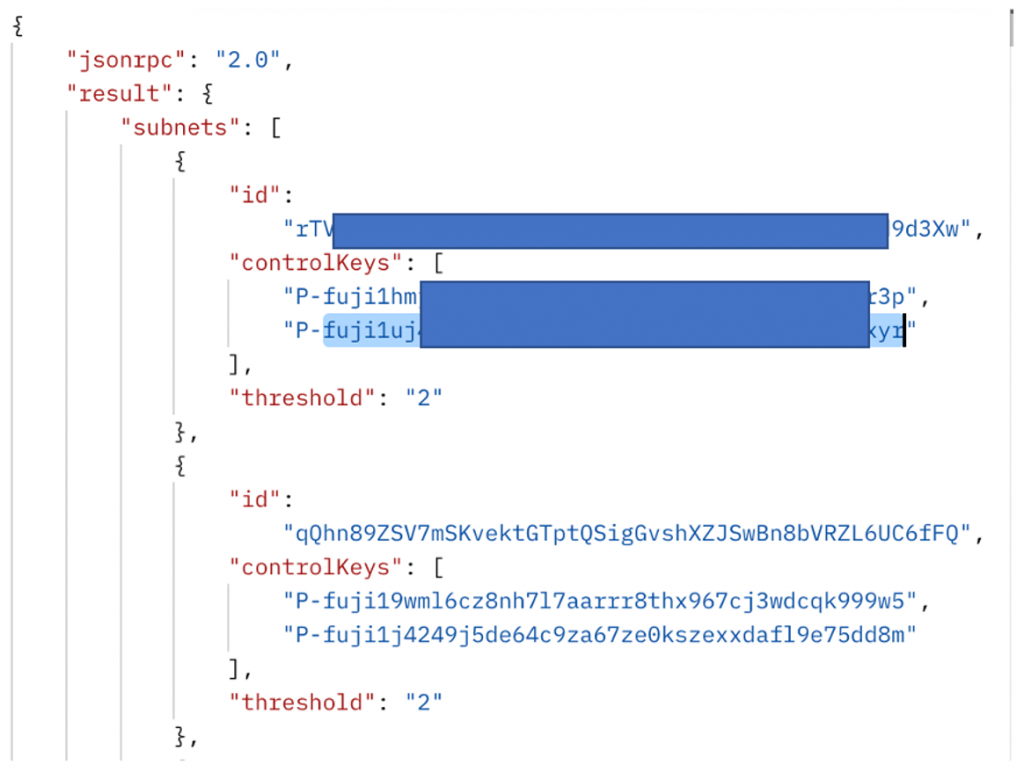
The next step is to add a validator node to the newly created subnet. It is done via calling platform.addSubnetValidator:
curl -X POST --data '{
"jsonrpc": "2.0",
"method": "platform.addSubnetValidator",
"params": {
"nodeID":"Fill in",
"subnetID":" Fill in",
"startTime":'$(date --date="10 minutes" +%s)',
"endTime":'$(date --date="30 days" +%s)',
"weight":30,
"username":" Fill in ",
"password":" Fill in "
},
"id": 1
}' -H 'content-type:application/json;' 127.0.0.1:9650/ext/P
Fill in the nodeID, subnetID, username, and password. The start time and end time can be strings in the Epoch & Unix timestamp format.
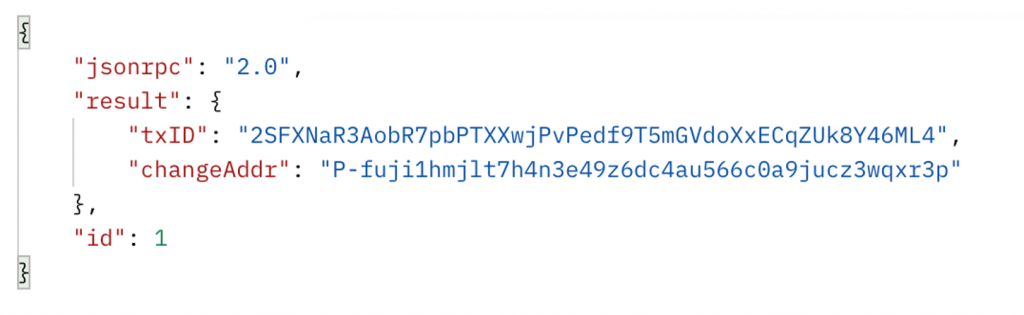
Below is a sample request and its response.
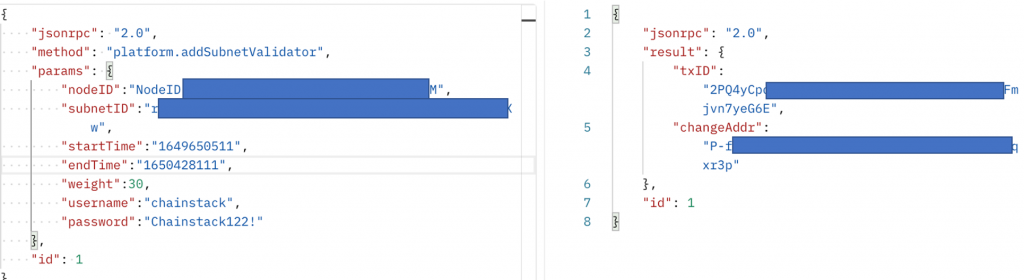
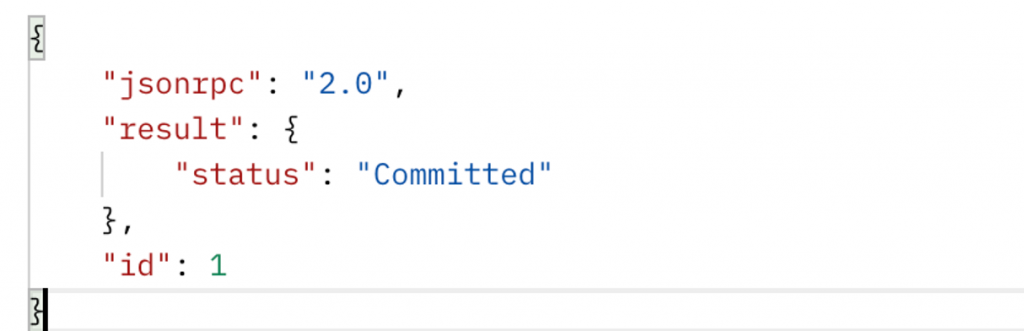
Copy the txID, call platform.getTxStatus to verify transaction status.
curl -X POST --data '{
    "jsonrpc": "2.0",
    "method": "platform.getTxStatus",
    "params": {
        "txID":"fill in txID from previous step"
   },
    "id": 1
}' -H 'content-type:application/json;' 127.0.0.1:9650/ext/P
If the status shows Committed, the transaction is successful.
Now go to terminal, terminate the avalancheGO instance by pressing CTRL-C. Restart it with a new parameter --whitelisted-subnet:
./build/avalanchego --network-id=fuji --whitelisted-subnets=3fbrm3z38NoDB4yMC3hg5pRvc72XqnAGiu7NgaEp1dwZ8AD9gChange the value to your own subnet ID, this will make your validator start working for the subnet.
After it is done, a new subnet is up and running but wait, we still have to create a blockchain in it.
Creating a blockchain
The next step is to create a blockchain. Avalanche supports 3 types of blockchains—AVM, EVM, and custom VM.
The Avalanche virtual machine (AVM) blockchain is identical to X-chain.
The Ethereum virtual machine (EVM) blockchain is an Ethereum instance; it is identical to the C-chain, as well as other Ethereum based blockchains.
The Custom virtual machine allows users to create their own blockchain.
For this tutorial, we’ll use an EVM blockchain as an example. This can be done by sending just one API call: platform.createBlockchain.
curl -X POST --data '{
"jsonrpc": "2.0",
"method": "platform.createBlockchain",
"params" : {
"subnetID": "your subnet ID",
"vmID":"the vmID",
"name":"any name is ok here",
"genesisData": "the genesis block byte data",
"username":"your username",
"password":"your password"
},
"id": 1
}' -H 'content-type:application/json;' 127.0.0.1:9650/ext/P
By now, the developer should have a subnetID, username, and password from the previous steps.
The only thing that is missing is the vmID and the genesisData.
Download the source code for EVM:
clone [email protected]:ava-labs/subnet-evm.gitBuild the source code by running:
cd subnet-evm
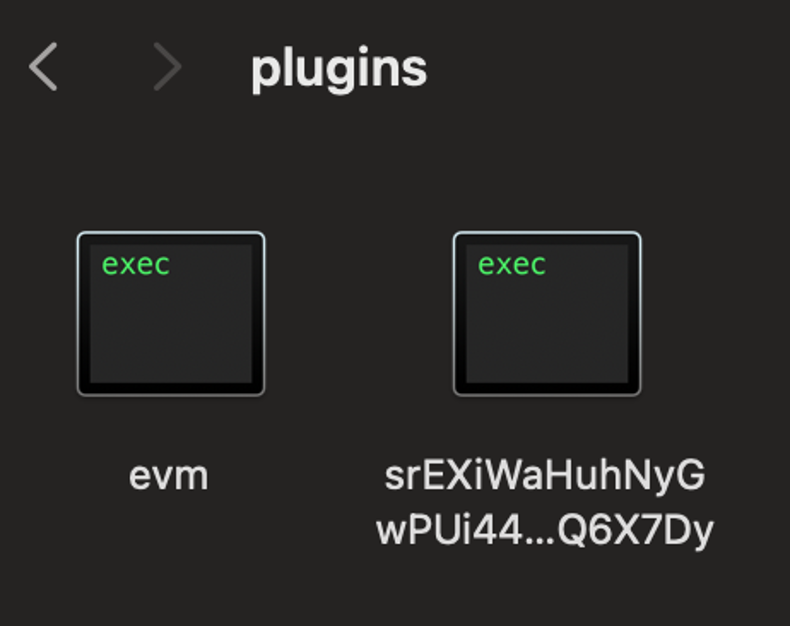
./scripts/build.sh ./build/srEXiWaHuhNyGwPUi444Tu47ZEDwxTWrbQiuD7FmgSAQ6X7DysrEXiWaHuhNyGwPUi444Tu47ZEDwxTWrbQiuD7FmgSAQ6X7Dy is the VM ID—it is the default ID and corresponds to the string subnetevm (zero-extended in a 32-byte array and encoded in CB58.)
Move the built binary into the AvalancheGO plugin folder: avalanchego/build/plugins.
Restart the node. Run avm.buildGenesis to get the genesis block byte data. The genesis block is the initial block in a blockchain, for an EVM it is defined as:
curl -X POST --data ' {
"jsonrpc": "2.0",
"id": 1,
"method": "subnetevm.buildGenesis",
"params": {
"genesisData": {
"config": {
"chainID": 13213,
"homesteadBlock": 0,
"eip150Block": 0,
"eip150Hash": "0x2086799aeebeae135c246c65021c82b4e15a2c451340993aacfd2751886514f0",
"eip155Block": 0,
"eip158Block": 0,
"byzantiumBlock": 0,
"constantinopleBlock": 0,
"petersburgBlock": 0,
"istanbulBlock": 0,
"muirGlacierBlock": 0,
"subnetEVMTimestamp": 0,
"feeConfig": {
"gasLimit": 8000000,
"targetBlockRate": 2,
"minBaseFee": 13000000000,
"targetGas": 15000000,
"baseFeeChangeDenominator": 36,
"minBlockGasCost": 0,
"maxBlockGasCost": 1000000,
"blockGasCostStep": 200000
},
"allowFeeRecipients": false
},
"alloc": {
"8db97C7cEcE249c2b98bDC0226Cc4C2A57BF52FC": {
"balance": "333333333333333333333"
}
},
"timestamp": "0x0",
"gasLimit": "0x7A1200",
"difficulty": "0x0",
"mixHash": "0x0000000000000000000000000000000000000000000000000000000000000000",
"coinbase": "0x0000000000000000000000000000000000000000",
"number": "0x0",
"gasUsed": "0x0",
"parentHash": "0x0000000000000000000000000000000000000000000000000000000000000000"
}
}
}
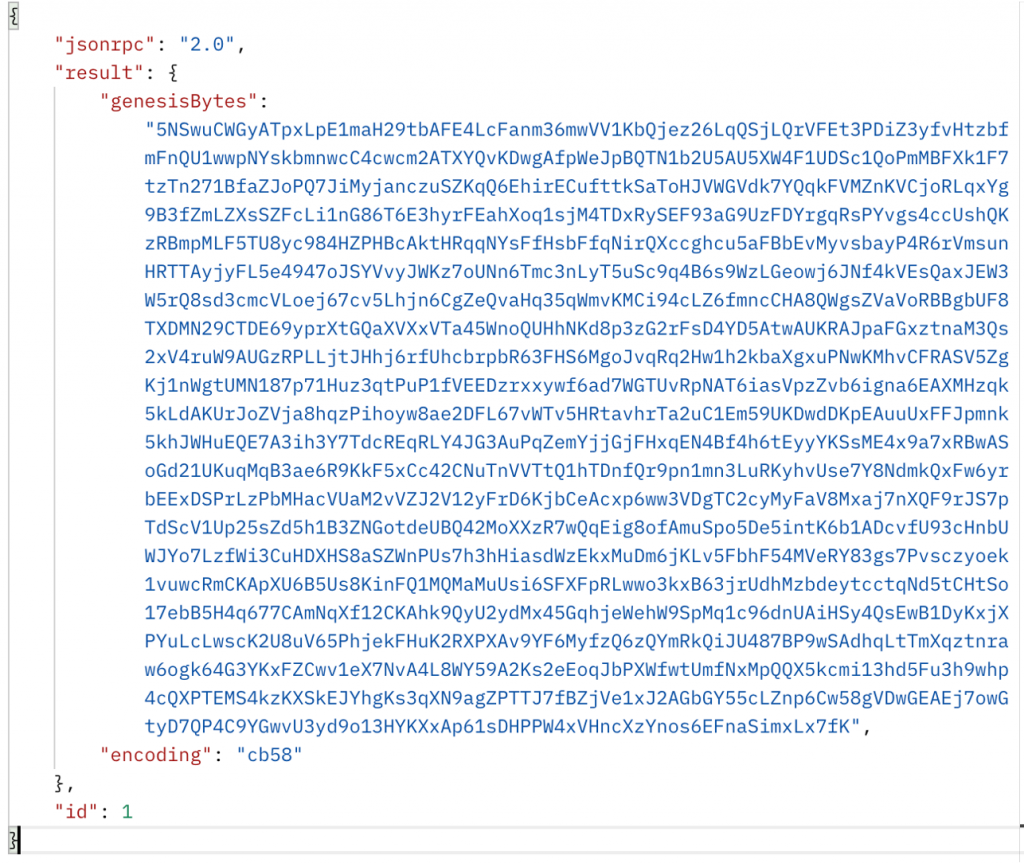
' -H 'content-type:application/json;' 127.0.0.1:9650/ext/vm/srEXiWaHuhNyGwPUi444Tu47ZEDwxTWrbQiuD7FmgSAQ6X7Dy/rpcAll these values can be copied and used directly, there is no need to modify them.
This returns the byte data for the genesis block. Copy it down
Now run platform.createBlockchain again with the vmID and the lengthy genesisData:
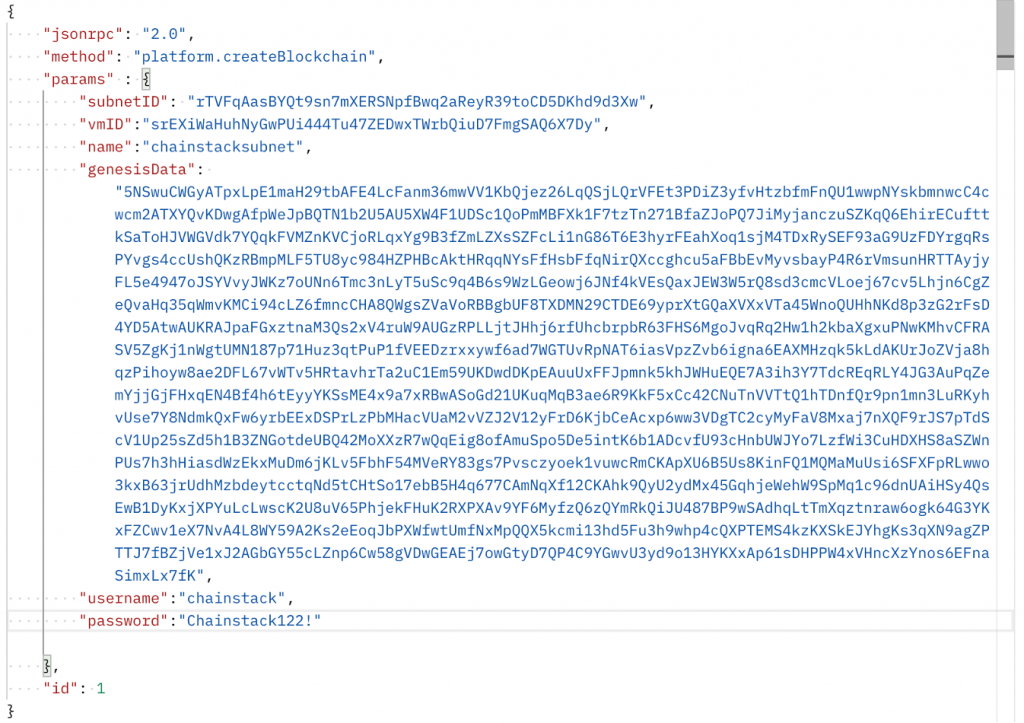
The response:
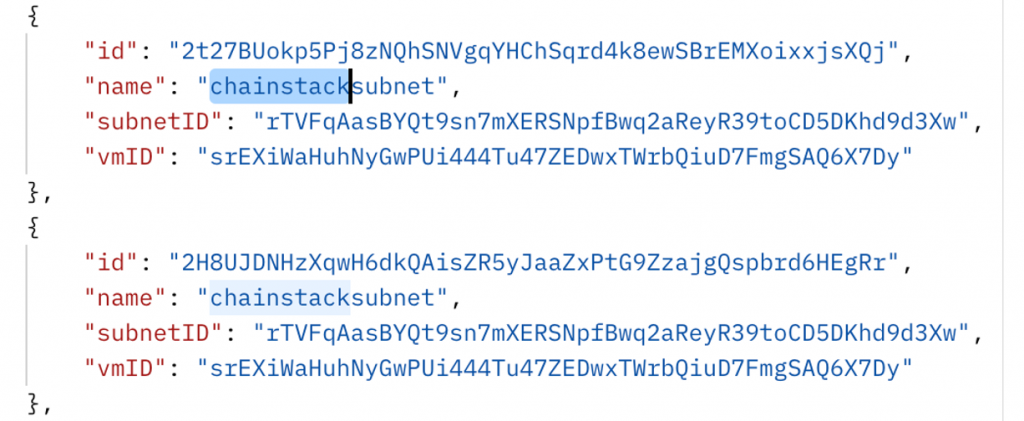
The blockchain is now created successfully. Check it by calling platform.getBlockchains:
curl -X POST --data '{
"jsonrpc":"2.0",
"id" :1,
"method" :"platform.getBlockchains",
"params" :{}
}' -H 'content-type:application/json;' 127.0.0.1:9650/ext/P
Find the newly created blockchain in the list.
Copy down the ID. Call platform.getBlockchainStatus.
curl -X POST --data '{
"jsonrpc": "2.0",
"method": "platform.getBlockchainStatus",
"params":{
"blockchainID":"your block chain id"
},
"id": 1
}' -H 'content-type:application/json;' 127.0.0.1:9650/ext/P
The status should be validating.


Congratulations. The blockchain is now up and running. It can be accessed from the RPC end point:127.0.0.1:9650/ext/bc/YOUR_BLOCKCHAIN_ID/rpc
For example: 127.0.0.1:9650/ext/bc/2t27BUokp5Pj8zNQhSNVgqYHChSqrd4k8ewSBrEMXoixxjsXQj/rpc
Minting a new token
To mint a new token, the user can do it via a precompiled contract. First, nativeMinterConfig needs to be set in genesis:
{
  "config": {
    "contractNativeMinterConfig": {
      "blockTimestamp": 0,
      "adminAddresses": ["0x8db97C7cEcE249c2b98bDC0226Cc4C2A57BF52FC"]
    }
  }
}
The detailed steps can be found here.
Conclusion
In this article we’re reviewed how to create a new subnet, whitelist it in our previously created validator, and created a new blockchain from scratch in it.
Hope it is helpful. If you have any questions, feel free to ping us on the Discord channel.
Happy coding.
- Discover how you can save thousands in infra costs every month with our unbeatable pricing on the most complete Web3 development platform.
- Input your workload and see how affordable Chainstack is compared to other RPC providers.
- Connect to Ethereum, Solana, BNB Smart Chain, Polygon, Arbitrum, Base, Hyperliquid, Robinhood Chain, Arc, Tempo, MegaETH, Monad, Plasma, Avalanche, Optimism, Aptos, Cronos, Gnosis Chain, Moonbeam, Celo, Aurora, TON, Ronin, and Bitcoin mainnet or testnets through an interface designed to help you get the job done.
- Fast access to blockchain archive data and gRPC streaming on Solana.
- To learn more about Chainstack, visit our Developer Portal or join our Telegram group.
- Connect your AI agent to Chainstack in seconds using Chainstack MCP — give Claude, Cursor, Codex, Gemini, and Windsurf live access to blockchain data, node management, and docs.
- Are you in need of testnet tokens? Request some from our faucets. Sepolia faucet, Base Sepolia faucet, Solana devnet faucet, Hoodi faucet, BNB faucet, zkSync faucet, Robinhood Chain faucet, Hyperliquid faucet, Monad faucet, Amoy faucet, Plasma faucet, TON faucet.
Have you already explored what you can achieve with Chainstack? Get started for free today.