Ethereum
 Hyperliquid
 Solana
 Arbitrum
 BNB Smart Chain
 Base
Base Polygon
 TRON
TRON Sui
Sui Robinhood


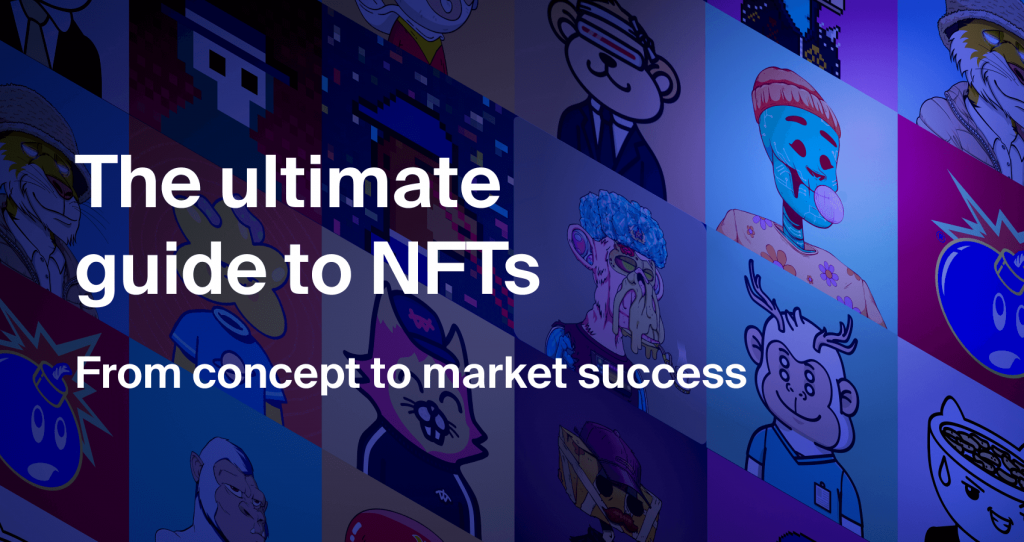
The ultimate guide to NFTs: From concept to market success
Non-fungible tokens
Non-fungible tokens, or NFTs, have become all the rage in the digital world. And for good reason! NFTs present a new way to own digital assets, and they’re opening up a brand-new world of possibilities for creators.
But what are NFTs really?
How do you make NFTs?
And how can you make sure you’re successful as a creator?
Despite all their popularity, questions like these still remain a mystery for plenty and in doing so prevent many creators from taking a bite out of the NFT apple. So, if you’re a creator who’s interested in getting into the NFT space, take a sigh of relief, for this beginner’s guide is just for you.
We’ll be covering everything you need to know about NFTs, from what they are and how they work, to tips on how to succeed as a creator in this new and exciting field. That being said, without further ado, let’s dive in and learn all about NFTs!
Non-fungible tokens 101: What are NFTs and how to succeed as a creator?
NFTs are essentially digital assets that are unique and cannot be replicated. They’re often used to represent ownership of digital items like art, music, or in-game items. Much like when owning real estate, or a piece of artwork, you are contractually listed as an owner, NFTs offer you a chance to do just that with any digital media on Web3.
When it comes to the process of creating an NFT, it is relatively straightforward, should you opt for minting through an NFT marketplace. The process usually involves creating a digital file, uploading it to a marketplace platform, and then setting a price for it. You can also do it via code, but we will get to that further in the article.
But while this does indeed sound simple, being successful with your NFT project hardly is. That is why to get a better understanding of what the key to success as an NFT creator really is, we will be reviewing a set of timeless advice across the entire journey—from planning and creating, all the way to post-release. But before we get started…
Before you get started: General advice for creators
Before you put down your pen, it is important to note that working with NFTs can be quite foreign, even for experienced digital creators. There are some vital things to consider when it comes to the entire process, which are better said now than having to worry about them later:
Make smart decisions
NFTs are digital assets that live on Web3 and as a Web3 property, they are essentially financial possessions in their essence. That is why it is imperative to think of NFTs in business terms first and foremost, and only then as digital creations. Why?
Because in order to put your works out there, you will ultimately need to pay a certain price for listing, whether it is the platform’s fee, or that to process the minting transaction itself. This highlights the need to think about your bottom line before making your first commit.

The NFT space is quite crowded and there are plenty of collections that do not generate a single sale, so even if this sounds demoralizing already, it is good to have it in mind throughout your journey. So don’t just mindlessly dive into the deep by investing a huge sum that you cannot afford to lose – stay cool and make smart business decisions.
Stay copyright-friendly
Everybody wants to make an NFT out of a relatable character they know and love, but sadly it is most likely someone else’s intellectual property already. And should you take such a risk you are essentially exposing yourself to preventable litigation for copyright violation.
Nobody wants to get sued into oblivion for a silly mistake, so before you embark on concept creation, it is best to do some research to make sure you are not violating anyone’s intellectual property. To do that you can check with a search query of the chosen name for your collection, or by consulting the database of a copyright office, like the US one, the World Intellectual Property Office, or that of Google.
And while this can be a long and exhausting process, a good rule of thumb is “If an original exists only in your head and is not derivative, it is good.” But even so, a quick check just in case should only help you in the end.

Keep things secure
Let’s go back to the line “NFTs are digital assets that live on Web3” for a second. Because of this, it is vital to prepare yourself for the way account security works with anything blockchain. To keep it simple, your wallet address is essentially your account – you use it for authenticating, minting, and storing your NFTs. And should you lose your access, you lose it all irreversibly.
That is because, unlike the centralized approach of Web2, where the platform can reset your access, or give you ample means of restoring it, Web3 offers no such options. Your public key (address), and private key, key file, or mnemonic phrase (password), are permanent and can never be changed. This means that if someone has access to your password, they basically have the key to the entire kingdom.
That is why is absolutely critical to be mindful of your means of access and commit to a secure process of handling and storing it. Here are a few timeless guidelines to get you started:

The drawing board: How to plan for minting NFTs
With this timeless, but basic advice out of the way, we can finally start with the first part of the cool stuff—planning. Even if you are itching to create already, take a deep breath and consider the following:
NFT marketplaces vs minting using code
As mentioned previously, there are two ways to mint your collection – via code and via an NFT marketplace. Minting via code is an excellent way to go your own way and keep your collection centralization-free, by avoiding marketplace platforms. It will also give you the real feel of minting NFTs, which is why we will be including the step necessary for code minting further in this guide.
So, even if you are an artist that is foreign to coding in general, this guide will offer you a means to make your first steps into Web3 development in a simple language you can replicate easily. Doing so will allow you to focus on creating first and foremost, without having to endure the pain of finding out how to do everything yourself. And the best thing about it? You will also get a complete code extract you can just copy-paste and adjust parameters accordingly to start minting.
When it comes to marketplace platforms, you have plenty of choice and they all follow a similarly straightforward process – upload assets, set the name, price, description, and other relevant parameters. Overall, it is mostly just filling out a form before you are asked to mint by committing a transaction.
Popular NFT marketplace platforms

Let’s review a few of the most notable NFT marketplace platforms without digging too much into them:
OpenSea
The original first NFT marketplace and by far the largest. OpenSea sports a huge volume of roughly $18M in daily trading and 50,000, in terms of daily traders. Naturally, the competition here is huge but so is the opportunity for success, because of discoverability. The platform supports four currencies at present—Ethereum (ETH), USDC, DAI, Polygon (MATIC), and Solana (SOL).
MagicEden
MagicEden is the top marketplace platform, on and working exclusively with the Solana network. Despite being on a single chain, this marketplace manages to accumulate a daily trading volume of give-or-take $1.8M and 20,000 daily traders. As it is Solana-exclusive, the only accepted currency is SOL.
X2Y2
One of the hottest new kids on the block, X2Y2 has only been around since the start of 2022, but despite its relatively short tenure has managed to make steady waves across the space. It currently clashes with MagicEden for the second place, in terms of daily trading volume, generating over $2M from just 4,000 daily traders, while working exclusively with ETH.
Rarible
Rarible is one of the most flexible NFT marketplaces mentioned in this list, when it comes to supported currencies—Ethereum (ETH), Polygon (MATIC), Solana (SOL), Flow, and Tezos (XTZ), while being open to more in the future. Founded in 2019, it has managed to accumulate almost $298,000 of trading volume over its history and over 105,000 traders.
Drafting a roadmap for your NFTs
You know the basics of working with Web3, and picked a marketplace platform where you want to list, or avoid that altogether, so what’s next? It’s time to pay your dues to the drawing board and map your journey ahead by drafting a roadmap for your NFT project. But why make the effort?
Because having a roadmap allows you to think ahead and plan just how far you want to take your course of minting. And despite this sounding like an absolute chore (and it is), it will pay off plenty once your project starts generating results. Should your NFTs become popular among your community there is no better way to navigate than having a detailed plan of approach.

That is especially true, considering that most of your revenue will be derived from secondary sale royalties, which highlights the importance of continuously adding value post-mint. That is why it is good to answer questions with your roadmap like:
- Do I want to do airdrops during launch or in the future in general?
- Do I want to add extensions that create new variants of my NFTs?
- Do I want to create a Decentralized Autonomous Organization (DAO) for the community?
- How will I promote my NFTs to reach new customers?
- How do I add more value to increase interest and commitment?
Creation phase: From concept to parameters
Roll up your sleeves for the time for the real moment of cool stuff galore is finally upon you! It’s time to put your creative muscle to action and well… get creative! Let’s give you a quick walk through the concept-creation phase:
Make your first NFT concept
Much like any digital artwork, NFTs also start with some concept art. You don’t have to start with all the details right off the bat—work with primitives or placeholders in other words. NFTs are usually modular artworks, so by starting off with primitives will provide you with the structure you need to create a ton of assets, originating from a single template.
For the sake of the example, we will be creating a character-based NFT collection. Regardless of the actual art style of the character, it all starts with a silhouette. Want your NFTs to be character busts only? Make a bust placeholder! Full size? Sketch out the entire thing! Not the best artist? Consult some of the many guides available online:

Once you are happy with your primitive you can start working on adding details with new layers on top, until you are happy with your first design. After that, all you have to do is introduce some diversity by cloning the detail layers and making the appropriate adjustments to create as many variants of your NFT character as you like.
Pricing NFTs and other parameters
With the artwork out of the way, it’s time to think about the key parameters of your NFT listing. And while name, description, and other such properties are relatively straightforward, pricing your NFTs isn’t. Naturally, there is no perfect NFT price, but you can consider the following actions to get a better idea:
- Examine NFT projects that are similar to yours on various marketplaces
- Get some feedback from the community on fair pricing
- Determine your options for secondary sale royalties
- Decide if you want more participants (lower prices), or more die-hard collectors (higher)
- Evaluate your roadmap and project vertical to see how pricing fits in the bigger picture:
- Common—large number of NFTs, easily tradeable, or gifted (from 0.01 to 0.04ETH)
- Rare—a balance between NFT number and tradeability (from 0.05 to 0.09ETH)
- Epic—low number of NFTs, highly collectible, harder to trade (0.1ETH and above)
How to generate NFTs with code
Minting NFTs via code is a tad bit more difficult than just using a marketplace platform to do it for you. Even so, it offers you more freedom and a chance to experience the true way it is done. To do a code mint you will first need some means to generate requests to the network of your choice. For this example, let’s go with Ethereum’s Goerli testnet, since it will be the primary testnet for after the Merge.
Step 1: Lay the initial foundation
1.1: Get a node endpoint
There is little need to run your own node, which can take ages to sync, instead, you can deploy a node in the time it takes to brew a fresh cup of coffee with Chainstack and at a fraction of the pain. So, hop on to the site, create an account for free, deploy a Goerli testnet node and get its HTTPS endpoint. Not sure how to do that? Check out the steps in our quick start guide:
1.2: Install Node.js and Web3.js
If you don’t have Node.js already go ahead and install it. After that, it’s time to make some space for your code base. To do that create a new folder at a location of your choosing and initialize your node project by typing the following in your CLI (Command Prompt/Terminal):
npm initThen, install the Web3.js library, which will provide you with the functionality needed to interact with your node:
npm i web3After the installation is complete, create a new JS file called “keys.js” and add the following lines to it to initialize some needed dependencies:
//Process dependencies
var Web3 = require('web3');
var web3 = new Web3(Web3.givenProvider || 'https://YOUR_CHAINSTACK_ENDPOINT_HERE');
1.3: Create and fund a wallet
Now it’s time to create a wallet address and fund it with some ETH, so you can move forward with the minting. To do that add the following to your “keys.js” file, then run your code by typing “node keys.js” in your CLI:
//Create new wallet-key pair then return values
var keys = web3.eth.accounts.create();
console.log(keys);
You should get a response like this:
address: ‘0xYOURNEWWALLETADDRESSHERE/’,
privateKey: 'YOURWALLETPRIVATEKEYHERE',
signTransaction: [Function: signTransaction],
sign: [Function: sign],
encrypt: [Function: encrypt]
Don’t mind anything else except the “address” and “privateKey” values. Just place them somewhere for safekeeping. After this, you are ready to fund your address. To do that hop on to the faucet here, input your address, and select “Ethereum Testnet Goerli.”
Now it’s time to check whether your balance has updated, so create a new JS file called “balance.js” and copy over what we have so far. You will use the script to confirm you received ETH from the faucet, which can take ~30 mins. The end result would look like this:
//Process dependencies
const endpoint = 'https://YOUR_CHAINSTACK_ENDPOINT_HERE;
const address = '0xYOURWALLETADDRESSHERE';
var Web3 = require('web3');
var web3 = new Web3(Web3.givenProvider || endpoint);

//Create new asynchronous function to get balance
const getbal = async (address) => {

//Await promise before returning balance
const balance = await web3.eth.getBalance(address);
console.log(balance);
};

//Don't forget to run!
getbal(address);
What stands out from the above is that we are creating an asynchronous function, which ensures your promise is not left pending by waiting for it to successfully resolve before printing to the console. Because of this, you will get a response like this, after running the code by typing “node balance.js” in your CLI once again:
Promise { '5000000000000000000' }Without this function you will be left with the following, which will hardly offer you any information:
Promise { <pending> } This is so because it takes time to process your request and the entire code segment will be executed long before you receive an adequate response.
1.4: Store values in .env
Let’s store all these values in a .env file for safekeeping. To do that first install dotenv via npm with:
npm i dotenvThen create a .env file in your project directory with the following contents:
ENDPOINT_URL = "https://YOUR_CHAINSTACK_ENDPOINT_HERE"
PUBLIC_KEY = "0xYOURWALLETADDRESSHERE"
PRIVATE_KEY = "YOURPRIVATEKEYHERE"
That being said, it is important to note that you should AVOID uploading your “.env” file to any PUBLIC repo, as it will reveal crucial information like your private key, for example, leaving your entire wallet completely exposed! Make sure to add “.env” to the “.gitignore” file, prior to publishing.
Now, go back to your “balance.js” file and process the “dotenv” dependency, while replacing the endpoint and address constants with a reference to “.env” file as outlined below:
require('dotenv').config();
const endpoint = process.env.ENDPOINT_URL;
const address = process.env.PUBLIC_KEY;
Your “balance.js” file will now look like this:
//Process dependencies
require('dotenv').config();
const endpoint = process.env.ENDPOINT_URL;
const address = process.env.PUBLIC_KEY;
var Web3 = require('web3');
var web3 = new Web3(Web3.givenProvider || endpoint);

//Create asynchronous function to get balance
const getbal = async (address) => {

//Await promise before returning balance
const balance = await web3.eth.getBalance(address);
console.log(balance);
};

//Don't forget to run!
getbal(address);
Now, it’s time for some final preparations before we move forward with the contract. Create a new JS file called “deploy.js” and input the following lines:
//Process dependencies
require('dotenv').config();
const endpoint = process.env.ENDPOINT_URL;
const address = process.env.PUBLIC_KEY;
const privKey = process.env.PRIVATE_KEY;
var Web3 = require('web3');
var web3 = new Web3(Web3.givenProvider || endpoint);
Step 2: Write, compile and deploy the smart contract
2.1: Create a contract draft
With all the prerequisites out of the way, it is time to create your smart contract. This may sound scary at first but you can breathe a sigh of relief, knowing that OpenZeppelin offers out-of-the-box contract samples, which are already audited for security. And the best thing about it? You use the wizard to create a contract that truly suits you best.
For our sample project we will be using the following settings:

Apart from the name and symbol which are pretty straightforward, we will be adding a “Mintable” option with “Auto increment Ids” checked. In doing this, we will allow privileged accounts (e.g. your account) to be able to mint new tokens. These can be new additions to your collection. The “URI Storage” option needs to be enabled as well since we want to add media files like an image to our NFTs. Lastly, we want to add the “Ownable” option as well, so we can perform admin actions.
There are more parameters that can be enabled with the wizard, but they are outside the scope of this tutorial. Even so, don’t be afraid to experiment with them should you wish to expand further o the basic functionalities we have implemented so far. As a final action in this step, make sure you have the OpenZeppelin dependencies available by typing in your CLI:
npm i @openzeppelin/contracts2.2: Compile your contract
It’s time to compile your contract. To do that copy the code from the OpenZeppelin wizard into a new file like “PCHNFT.sol” or click “Download” at the top right corner. Depending on your folder structure, you might need to make some adjustments to the import functions outlined in your smart contract code to correctly reference their paths.
For example, if you used the OpenZeppelin wizard to generate “PCHNFT.sol,” the import functions would most likely appear as such:
import "@openzeppelin/contracts/ERC721.sol";
import "@openzeppelin/contracts/utils/Counters.sol";
import "@openzeppelin/contracts/access/Ownable.sol";
Because of this, placing “PCHNFT.sol,” in your base path, installing the OpenZeppelin contract library via npm, and attempting to compile the contract would result in a parser error where the dependency files cannot be found. That is why, if you followed the process to the letter, you would also need to make the following adjustments:
import "./node_modules/@openzeppelin/contracts/token/ERC721/ERC721.sol";
import "./node_modules/@openzeppelin/contracts/utils/Counters.sol";
import "./node_modules/@openzeppelin/contracts/access/Ownable.sol";
import "./node_modules/@openzeppelin/contracts/token/ERC721/extensions/ERC721URIStorage.sol";
Doing so, should resolve any pathing errors and allow you to move forward with compiling. You can’t deploy a Solidity contract directly, however, instead, you need to get its Application Binary Interface (ABI), as well as its bytecode, which is the executable code.
Before you do that, however, make sure to globally install the “Solc.js” library, which will enable the Solidity compiler command-line tool you need to move forward:
npm install -g solcOnce done, hop back into your CLI and input the following, minding not to capitalize “ABI”, as it is case sensitive:
solcjs --abi --include-path ./ --base-path . PCHNFT.sol
solcjs --bin --include-path ./ --base-path . PCHNFT.sol
The first command will compile your contract and extract the ABI, while the second one the bytecode. We add the “–include-path ./ “ parameter to point to the Solidity compiler where it can find its dependencies within the appropriate parent folder. Upon successful compilation, there would be a total of 26 new files generated—13 pairs of ABI and bin files if you followed our example.
Attempting to compile will surely clarify, whether or not you have successfully resolved the parser error, and should it persist, be sure to double-check your folder structure. Another possible error you can encounter at this step can be a docstring parsing one. To resolve it, remove any excess code comments, especially such that spread across multiple lines.
When you are done compiling, find the abi and bin files containing “PCHNFT” in their names, which would be “PCHNFT_sol_PlaceholderHeroes.abi” and “PCHNFT_sol_PlaceholderHeroes.bin” in our case. To be able to read these files locally, we will need to use Node.js’ built-in fs (File System) library by referencing it in the code like this:
var fs = require('fs');
var contractABI = JSON.parse(fs.readFileSync('./PCHNFT_sol_PlaceholderHeroes.abi', 'utf8'));
var contractBIN = fs.readFileSync('./PCHNFT_sol_PlaceholderHeroes.bin', 'utf8');
Since both files are essentially strings in utf8 format, you need to first parse the ABI as a JSON object by adding “JSON.parse()” before attempting to read it with “fs.readFileSync.” Such actions won’t be necessary for the BIN file—you can just read it directly.
2.3: Deploy the contract to Goerli
Now let’s deploy the contract by creating a new function in your “deploy.js” file containing the following:
//Create asynchronous deploy function
const deploy = async () => {
   console.log('Attempting to deploy contract from: ', address);

//Create new contract object
const contractNFT = new web3.eth.Contract(contractABI, address);

//Deploy contract object as a transaction
const contractTX = contractNFT.deploy({

      //Set transaction data as the contract bytecode
      data: contractBIN,
   });

//Sign the transaction
const createTransaction = await web3.eth.accounts.signTransaction(
      {

//Define transaction parameters
         from: address,
         data: contractTX.encodeABI(),
         gas: '2968862',
      },
      privKey
   );

//Return transaction receipt
const createReceipt = await web3.eth.sendSignedTransaction(
      createTransaction.rawTransaction
   );

//Log contract address from receipt
   console.log('Contract successfully deployed at: ', createReceipt.contractAddress);
};

//Don’t forget to run the function!
deploy();
That’s it—your first NFT contract is now live on the Goerli network! And with that out of the way, it is time to set up the properties of each NFT prior to minting. But before we move forward with that, let’s turn the page in an appropriate manner by sharing the complete deployment script that successfully led us thus far. We won’t be making further changes to it after all.
//Process dependencies
require('dotenv').config();
const endpoint = process.env.ENDPOINT_URL;
const address = process.env.PUBLIC_KEY;
const privKey = process.env.PRIVATE_KEY;
var Web3 = require('web3');
var web3 = new Web3(Web3.givenProvider || endpoint);
var fs = require('fs');

//Read and parse ABI and BINary code files
var contractABI = JSON.parse(fs.readFileSync('./PCHNFT_sol_PlaceholderHeroes.abi', 'utf8'));
var contractBIN = fs.readFileSync('./PCHNFT_sol_PlaceholderHeroes.bin', 'utf8');

//Create asynchronous deploy function
const deploy = async () => {
   console.log('Attempting to deploy contract from: ', address);

//Create new contract object
const contractNFT = new web3.eth.Contract(contractABI, address);

//Deploy contract object as a transaction
const contractTX = contractNFT.deploy({

      //Set transaction data as the contract bytecode
      data: contractBIN,
   });

//Sign the transaction
const createTransaction = await web3.eth.accounts.signTransaction(
      {

//Define transaction parameters
         from: address,
         data: contractTX.encodeABI(),
         gas: '2968862',
      },
      privKey
   );

//Return transaction receipt
const createReceipt = await web3.eth.sendSignedTransaction(
      createTransaction.rawTransaction
   );

//Log contract address from receipt
   console.log('Contract successfully deployed at: ', createReceipt.contractAddress);
};

//Don’t forget to run the function!
deploy();
Step 3: Define and mint your NFTs
3.1: Set up dependencies and metadata
Let’s leave the contract deployment script for now and create a new file “mint.js” with the same “.env” parameters referenced from the start:
//Process dependencies
require('dotenv').config();
const endpoint = process.env.ENDPOINT_URL;
const address = process.env.PUBLIC_KEY;
const privKey = process.env.PRIVATE_KEY;
var contractABI = JSON.parse(fs.readFileSync('./PCHNFT_sol_PlaceholderHeroes.abi', 'utf8'));
var Web3 = require('web3');
var web3 = new Web3(Web3.givenProvider || endpoint);
Once done, we need to set up the metadata for your NFTs. To do that create a new json file with the name of a particular NFT (“testorius.json” in this case) and add some attributes like so:
{
	"description": "Your friendly neighbourhood mage.",
	"image": "",
	"name": "Testorius Testolf"
}
We have left the image attribute empty for now, as we will be hosting the images on the InterPlanetary File System (IPFS). In order to do that, hop over to the IPFS download page and install the interface of your choosing, then run. To keep things simple, we will be using the desktop GUI.
To have a smoother experience with IPFS, visit Pinata and create an account. Once you have taken care of that, click on your profile avatar and select “API keys,” then create a new API key making sure the “Admin” option is turned on.
Now open your IPFS desktop GUI, click on “Settings,” and then “Add Service.” From there pick “Pinata” and input your API key in the “Secret Access Token” field. The rest of the fields will fill out automatically. This concludes the setup, and you can move forward with the file upload.
With the IPFS interface open, navigate to “Files” then simply drag and drop your NFT images. After they have successfully uploaded click the three dots next to each file and select “Set pinning” and tick “Local node” and “Pinata.” This makes sure your file is accessible outside your local environment and via the Pinata API.
Now click the triple dots and select “Share link,” then paste the appropriate link into your image attributes in the “testorius.json” file. This ensures your images will never 404, as long as there are nodes that host them! This is how your file should ultimately look:
{
	"description": "Your friendly neighbourhood mage.",
	"image": "https://ipfs.io/ipfs/QmWatweTiTNcUjQUwePCWHxK1ZiqV3ueZ4Y3Q4DABuHXCd?filename=testolf.png",
	"name": "Testorius Testolf"
}
3.2: Minting your first collection
Check what your contract address was and refer to it with a new Web3 contract object in your “mint.js” file, then add previous dependencies like so:
//Process dependencies
require('dotenv').config();
const endpoint = process.env.ENDPOINT_URL;
const address = process.env.PUBLIC_KEY;
const privKey = process.env.PRIVATE_KEY;
const contractAdrs = process.env.CONTRACT_KEY;
var fs = require('fs');
var contractNFT = JSON.parse(fs.readFileSync('./PCHNFT_sol_PlaceholderHeroes.abi', 'utf8'));
var Web3 = require('web3');
var web3 = new Web3(Web3.givenProvider || endpoint);

//Create new contract object
const contractObj = new web3.eth.Contract(contractNFT, contractAdrs)
That being said, we can move the “contractAdrs” to the .env file like so:
CONTRACT_KEY = "0xYOURCONTRACTADDRESSHERE"After that don’t forget to reference it in the “mint.js” file:
const contractAdrs = process.env.CONTRACT_KEY;Now let’s create a minting function, similar to the one you did for contract deployment. The end result would appear as this:
//Process dependencies
require('dotenv').config();
const endpoint = process.env.ENDPOINT_URL;
const address = process.env.PUBLIC_KEY;
const privKey = process.env.PRIVATE_KEY;
const contractAdrs = process.env.CONTRACT_KEY;
var fs = require('fs');
var metadata = 'https://ipfs.io/ipfs/YOUR_NFT_JSON_HERE';
var contractNFT = JSON.parse(fs.readFileSync('./PCHNFT_sol_PlaceholderHeroes.abi', 'utf8'));
var Web3 = require('web3');
var web3 = new Web3(Web3.givenProvider || endpoint);

//Create new contract object
const contractObj = new web3.eth.Contract(contractNFT, contractAdrs)

//Begin asynchronous mint function
const startMint = async (tokenId) => {
     console.log('Attempting to mint to: ', address);

//Wait for the completion of the following mint transaction
const mintTX = await web3.eth.accounts.signTransaction(
      {
         from: address,
         to: contractAdrs,
         data: contractObj.methods.safeMint(address, metadata).encodeABI(),
         gas: '2968862',
      },
      privKey
   );

//Wait for the completion of the mint transaction then return receipt
const createReceipt = await web3.eth.sendSignedTransaction(
      mintTX.rawTransaction
   );
   console.log('NFT successfully minted with hash: ', createReceipt);
};

//Don't forget to run the minting function!
startMint();
Once that is done, host your “testorius.json” on IPFS (making sure pinning is ticked for both “Local node” and “Pinata”), if you haven’t done so already, then copy its link (via “Share Link”) as a new variable called “metadata,” and run.
Congratulations, you have now minted the first NFT from your collection!
To add more, simply create a new JSON file with different parameters and rerun the minting function with the appropriate JSON file selected for the metadata variable.
3.3: Viewing your NFTs
If you have done all the previous successfully, then this one will be a piece of cake. Open your MetaMask wallet, or download it if you don’t have it yet, then log in and select the Goerli network at the top. Click on the icon in the top right corner (not the Metamask logo) and select “Import Account.” Choose “Private Key,” since that is how you created your address initially, and paste it in the appropriate field.
Then, hop on to the “Assets” tab and click “Import tokens” at the bottom. Paste your NFT contract’s address in the first field and it should automatically fill in the name, otherwise, just type it instead. Since your NFTs don’t have decimal places like a currency does set “Decimals” to 0. Finalize your input by tapping “Add Custom Token” and voila—your NFT is now visible in Metamask!

All tutorial files
Due to the sheer size of this tutorial, we thought it’d be best to leave you with a repository of all files used in this tutorial. You will also find a “.env” file template, where you can just replace the sample text with the values of your project to get things running. Make sure you avoid publishing the actual file containing live variables to any public location. Browse all the tutorial files here.
Post-release: Marketing your NFTs
Now that you have created and listed your NFTs, it is time to get to the hardest part – marketing. And considering just how saturated the entire space is, this should come as no surprise. But no matter how difficult standing out from the crowd may be, it all comes down to a few simple factors. That is why should you manage to excel in them, success will follow swiftly.
Building a supporter community
The success of your NFT project will ultimately be determined by your community. Whether you’re an indie artist trying to make money from selling NFTs, a Web2 brand looking to experience the space first-hand, or a Web3 developer making your first steps, your collectors should be your top priority.
The best time to launch your community is now. There will never be a perfect time, so don’t wait! Start growing your brand, by setting up Discord, Telegram, and Twitter to start engaging with potential buyers regularly. If you want to sell a successful NFT project and build a loyal following, you need to invest time in brand-building now.
Rest assured, nobody is asking you to be on every social media platform out there, quite the contrary – find out where your audience spends their time and focus your efforts there. And once you do commit yourself to regular interaction and start connecting with your potential customers. You won’t move the dial much at first, but that’s okay! Community building takes time to foster.
Getting people involved
One of the best ways to build a strong and loyal community is by getting people involved in your development journey. After all, it is one of the key factors that make the “Build in Public” enthusiasts so popular among plenty of other great developers. Be brave and authentic – share your progress, setbacks and lessons learned unashamed. Everybody fails all the time and owning your vulnerability is a sure-fire way to connect with your audience on a more human level.

And sometimes getting people involved means doing so literally and directly—ask them for feedback and involve them in your creative process to really foster a sense of belonging. This is also one of the reasons why businesses do a killing with User-Generated Content (UGC). Because by empowering your customers and making their voices heard, you kindle a fire in their hearts like no other.
That being said, do remember to leverage the authority figures that drive people’s opinions—influencers. In doing so, you can achieve excellent results, even if you do not have the hottest new celebrities on the bandwagon. Instead, go for smaller niche content creators that have a stronger bond with their followers, which will result in much more bang for your buck engagement-wise.
Communicating effectively
With “rug pulls” abound throughout the entire history of Web3, going AWOL into deafening silence is the worst mistake you can make. If there is a perfect way to ruin a good reputation and trust in your project, it would by far be found in irregular communication. Talk often, no matter how small it may be from time to time—just show your community you are still fighting the battle they eagerly follow.
A regular posting schedule is great, but it is not for everyone and can feel inorganic, when overdone. The more you grow, and the more budget becomes available, the closer the time comes for you to get a helping hand in managing communication for you. That is especially true if you are a developer, or an artist, who prefers to build, rather than talk. Get an intern and focus on what you do best!
But even when you have a team to do all the things you don’t want for you, never forget your roots. Find the time to drop by in the community channels from time to time and create some positive interactions with your audience. A strong and caring leader that is not afraid to show his face can be a powerful way to foster even more trust and excitement in your loyal follower base.

Bringing it all together
With this, we can put a definitive end to our comprehensive guide to NFTs. Thanks to this overview, you now have all the knowledge needed to set out on your first creator journey. From understanding the economics side of digital creations on Web3, through sketching out concepts and coding your way to production, all the way to post-release success, there is little more to be said.
Don’t feel ready? Worry not, for nobody really does. Sometimes diving straight into the action is how you learn best. Forget about building a unicorn project, more often than not it takes years of work to become an overnight success. So, be patient, enjoy the journey and embrace every step of the way.
And if there is one final piece of advice, we can leave you with, it would be to fail fast and pivot accordingly. After all, every mistake is but a building block that gets you closer to your goals, no matter how dire the situation may appear to be. Pick yourself up, put a smile on your face, and continue to BUIDL.
Power-boost your project on Chainstack
- Discover how you can save thousands in infra costs every month with our unbeatable pricing on the most complete Web3 development platform.
- Input your workload and see how affordable Chainstack is compared to other RPC providers.
- Connect to Ethereum, Solana, BNB Smart Chain, Polygon, Arbitrum, Base, Hyperliquid, Robinhood Chain, Tempo, MegaETH, Monad, Plasma, Avalanche, Optimism, Scroll, Aptos, Cronos, Gnosis Chain, Kaia, Moonbeam, Celo, Aurora, TON, Ronin, and Bitcoin mainnet or testnets through an interface designed to help you get the job done.
- Fast access to blockchain archive data and gRPC streaming on Solana.
- To learn more about Chainstack, visit our Developer Portal or join our Telegram group.
- Connect your AI agent to Chainstack in seconds using Chainstack MCP — give Claude, Cursor, Codex, Gemini, and Windsurf live access to blockchain data, node management, and docs.
- Are you in need of testnet tokens? Request some from our faucets. Sepolia faucet, Base Sepolia faucet, Solana devnet faucet, Hoodi faucet, BNB faucet, zkSync faucet, Scroll faucet, Hyperliquid faucet, Monad faucet, Amoy faucet, Plasma faucet, TON faucet.
Have you already explored what you can achieve with Chainstack? Get started for free today.