Ethereum
 Hyperliquid
 Solana
 Arbitrum
 BNB Smart Chain
 Base
Base Polygon
 TRON
TRON Sui
Sui Robinhood


Deploy a simple storage smart contract on StarkNet
StarkNet and zero-knowledge rollups are gaining in popularity lately due to their efficiency, so it’s time to learn how to develop on StarkNet. This tutorial will show you how to create a simple smart contract in Cairo to save and retrieve a variable and then deploy it on the StarkNet testnet using the StarkNet Foundry framework.
You can find the project with the smart contract and the compiled files in the protostar-project folder of the GitHub repository.
If you want to learn some StarkNet fundamentals, I recommend reading this article about StarkNet’s architecture and environment.
A Cairo smart contract
Cairo is a relatively new language that powers smart contracts on StarkNet; it is worth learning more about it! The smart contract you will deploy today is very similar to a simple storage contract you are probably familiar with in Solidity.
In this tutorial we’ll write a straightforward smart contract, but it will teach you how to declare a variable, write a getter function, and write a function to set the variable.
The smart contract head
The first thing we need is to declare it as a StarkNet contract and importing the ‘HashBuiltin’ package.
%lang starknet
from starkware.cairo.common.cairo_builtins import HashBuiltin
As you can notice, we are importing a package, the HashBuiltin it’s a struct specifying the hash builtin memory structure. You can learn more about this package from the StarkNet and Cairo Docs.
At this point, we can continue by declaring the variable.
Declare a variable
Like Solidity, we need to declare a variable to use it. In this example, the variable is a ‘felt’, named ‘my_value_storage’, where we can basically store a number.
@storage_var
func my_value_storage() -> (my_value_storage: felt) {
}
Storage variables are, by default, not visible from the ABI. They are similar to “private” variables in Solidity.
A storage variable can be read with ‘
var_name.read()‘ or written to with ‘var_name.write()'.
Getter function
When we use variables, it is good practice to declare a ‘getter‘ function. So we can add that too!
A getter is a view function that we can call to see the stored variable.
@view
func get_my_stored_value{syscall_ptr: felt*, pedersen_ptr: HashBuiltin*, range_check_ptr}() -> (
    my_stored_value: felt
) {
    let (my_stored_value) = my_value_storage.read();
    return (my_stored_value,);
}
For example, this function can be called from the StarkNet explorer and display the stored value.
Function to set the variable
Now that we have the variable declared, how do we modify it?
We could automatically set it up when the contract is deployed with a ‘constructor’, but for this tutorial, I want to create a function for it.
This is an ‘external‘ function, which can be called by another smart contract (or wallet), allowing us to modify that variable!
@external
func set_my_stored_value{syscall_ptr: felt*, pedersen_ptr: HashBuiltin*, range_check_ptr}(
my_value: felt,
) {
    my_value_storage.write(my_value);
    return ();
}
As you notice, in the function to set a stored value, we use my_value_storage.write(my_value), where my_value is the argument passed through the function.
Full smart contract
Now that we have all the separate parts, we can put them together. Here you’ll find the entire smart contract, with some comments.
%lang starknet
from starkware.cairo.common.cairo_builtins import HashBuiltin

// Store a variable
// Storage vars are by default not visible through the ABI. They are similar to "private" variables in Solidity.

// This variable is a felt and is called my_value_storage
// From within a smart contract, it can be read with my_value_storage.read() or written to with my_value_storage.write()

@storage_var
func my_value_storage() -> (my_value_storage: felt) {
}

// Declaring getters
// Public variables should be declared explicitly with a getter
// Function to return the variable's value.

@view
func get_my_stored_value{syscall_ptr: felt*, pedersen_ptr: HashBuiltin*, range_check_ptr}() -> (
    my_stored_value: felt
) {
    let (my_stored_value) = my_value_storage.read();
    return (my_stored_value,);
}

// Set the variable's value.

@external
func set_my_stored_value{syscall_ptr: felt*, pedersen_ptr: HashBuiltin*, range_check_ptr}(
my_value: felt,
) {
    my_value_storage.write(my_value);
    return ();
}
A Protostar project
For this example, we’ll use protostar, one of the Starknet framework.
First thing, install Protostar.
Note that Protostar is only supported on Linux and macOS.
Initialize a Protostar project
After we installed Protostar, let’s create a project by using the following command.
protostar init store-variableWhere store-variable is the name of the project.
The result of running protostar init is a configuration file protostar.toml, example files, and the following 3 directories:
- src — A directory for your code.
- lib — A default directory for external dependencies.
- tests — A directory storing tests.
The protostar.toml file is the configuration file where we specify the path to our contracts; in this case, you’ll already have a cairo.main example file.
In this case, we will generate a contract named main from our src folder.
["protostar.contracts"]
main = [
    "src/main.cairo",
]
Simply delete the example code and paste our smart contract’s code.
Compile the Cairo smart contract
We have initialized a Protostar project, and there is a Cairo smart contract is in the src folder; we are ready to compile.
From the project main directory, run the following command to compile.
protostar buildYou will receive a success message if the contract is compiled correctly.
16:23:13 [INFO] Built the project successfully
16:23:14 [INFO] Execution time: 2.96 s
After the contract has been compiled, you will notice a build directory in the project, where you can find the contract’s ABI and the compiled contract as main.json.
Deploy the smart contract on the StarkNet testnet
After the smart contract was compiled, we can finally use Protostar to deploy it on the StarkNet testnet.
Use the following command to deploy the compiled contract.
protostar deploy ./build/main.json --network testnetThe result will show you the transaction hash and the contract address and give you a link to the smart contract on the Voyager explorer.
[INFO] Deploy transaction was sent.
Contract address: 0x06a5ea9e42c921bd58e24b8da9d1fc91a488df0700b173f1c6bb0e453f68afec
Transaction hash: 0x1cbba90ba0d1fbfba09b1f7a0f987134dd9a02a845ca89244b3272374d37ede

https://goerli.voyager.online/contract/0x06a5ea9e42c921bd58e24b8da9d1fc91a488df0700b173f1c6bb0e453f68afec
Interact with the deployed contract
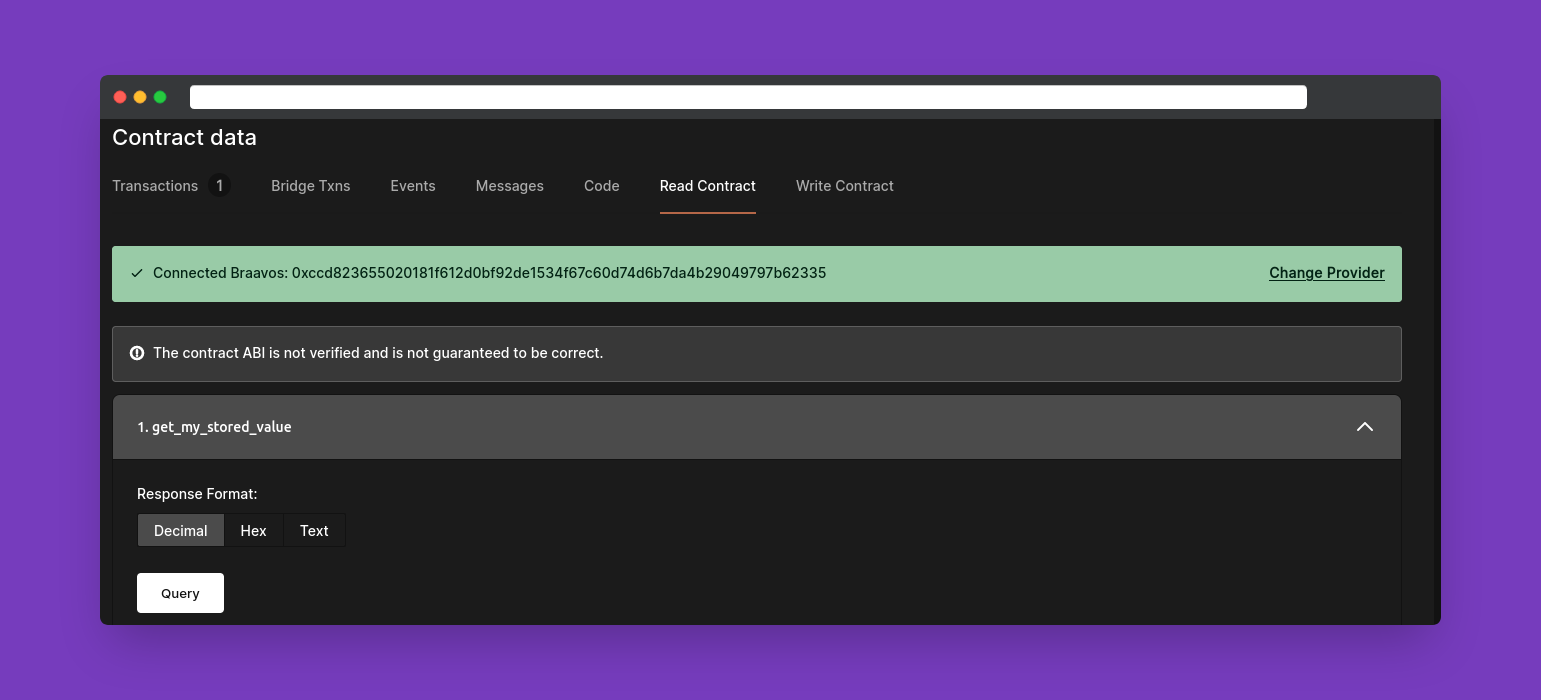
Now that the smart contract has been deployed on the StarkNet testnet, you can use the Voyager explorer to interact with it.
You can use the smart contract we deployed if you still need to deploy yours.
Use the Read Contract tab to call the view function and see the stored value.
Then you can use the Write Contract tab to call the external function and modify the value.
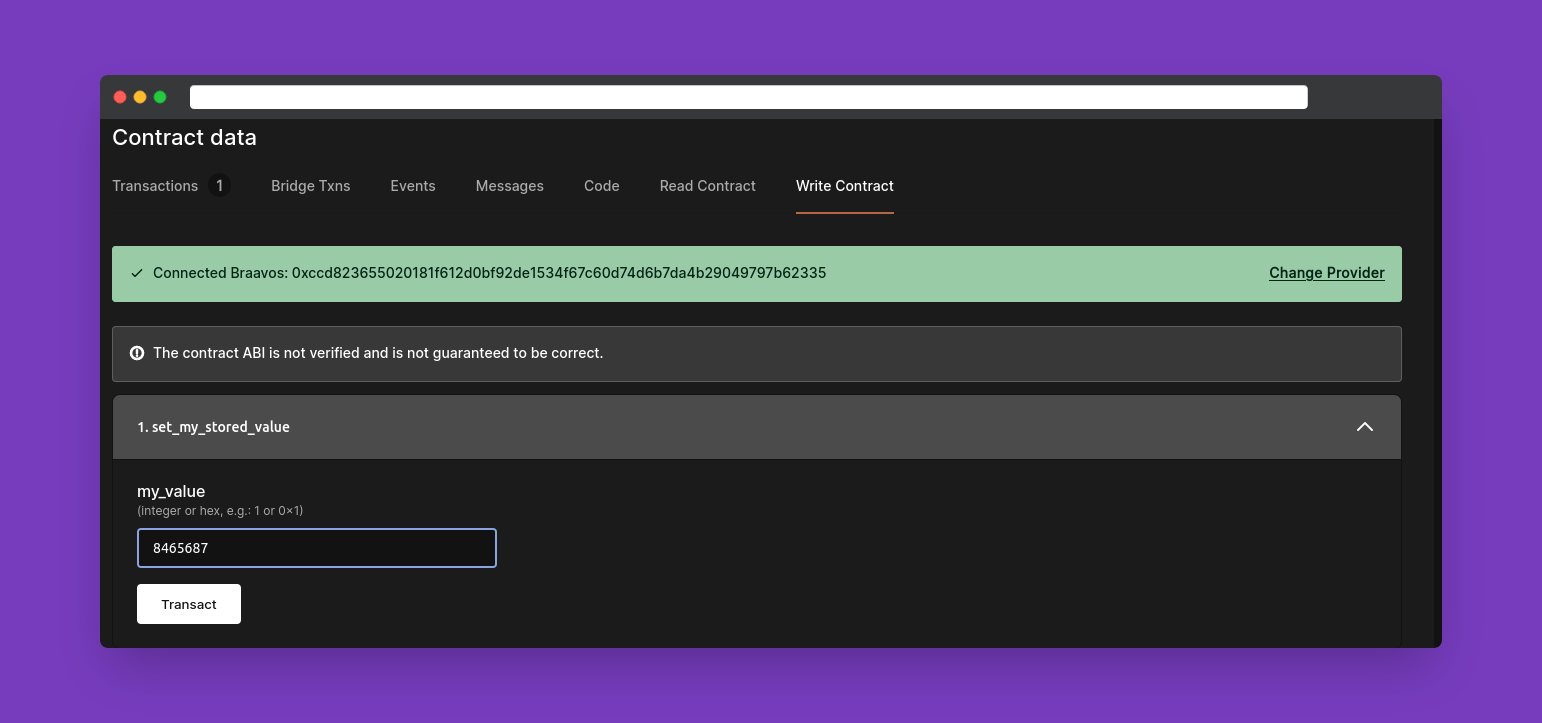
When writing to a contract, so change the state of the network; you will need to authorize the transaction, so remember to connect your wallet to the Voyager explorer and have some test ETH.
You can get some Goerli ETH on the L2 from the StarkNet faucet.
Conclusion
Congratulations on completing this tutorial. Today you learned how to write and deploy a simple smart contract in Cairo!
Check out our StarkNet odyssey series to learn more about Cairo and more developer tools available.
- Discover how you can save thousands in infra costs every month with our unbeatable pricing on the most complete Web3 development platform.
- Input your workload and see how affordable Chainstack is compared to other RPC providers.
- Connect to Ethereum, Solana, BNB Smart Chain, Polygon, Arbitrum, Base, Hyperliquid, Robinhood Chain, Arc, Tempo, MegaETH, Monad, Plasma, Avalanche, Optimism, Aptos, Cronos, Gnosis Chain, Moonbeam, Celo, Aurora, TON, Ronin, and Bitcoin mainnet or testnets through an interface designed to help you get the job done.
- Fast access to blockchain archive data and gRPC streaming on Solana.
- To learn more about Chainstack, visit our Developer Portal or join our Telegram group.
- Connect your AI agent to Chainstack in seconds using Chainstack MCP — give Claude, Cursor, Codex, Gemini, and Windsurf live access to blockchain data, node management, and docs.
- Are you in need of testnet tokens? Request some from our faucets. Sepolia faucet, Base Sepolia faucet, Solana devnet faucet, Hoodi faucet, BNB faucet, zkSync faucet, Robinhood Chain faucet, Hyperliquid faucet, Monad faucet, Amoy faucet, Plasma faucet, TON faucet.
Have you already explored what you can achieve with Chainstack? Get started for free today.