Ethereum
 Hyperliquid
 Solana
 Arbitrum
 BNB Smart Chain
 Base
Base Polygon
 TRON
TRON Sui
Sui MegaETH


How to create an EVM compatible blockchain bridge
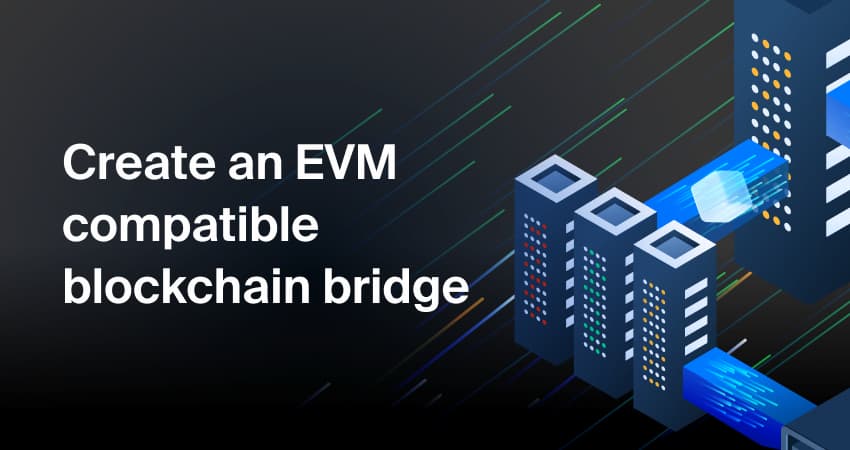
Blockchains are siloed systems. If you have some tokens or NFTs in your Ethereum wallet, they are not available for you to use or spend on Tempo, Solana, Arbitrum, or any other blockchain. Interoperability between blockchains is one of the most significant problems that the industry is trying to solve, and one of the solutions we currently have is cross-chain bridges.
Bridges allow users to “send” these tokens from one blockchain to another. This seems like an easy task, but it actually involves multiple pieces of code and smart contracts. In addition, production-ready bridges have to control any errors that could arise when sending tokens across to avoid losing them into the ether 😉
When bridging stablecoins, the choice of destination chain matters. Purpose-built payment chains like Tempo offer predictable gas costs and sub-second finality, making them attractive targets for enterprise stablecoin settlement compared to general-purpose networks.
In this article, we’re going to build a basic bridge between two EVM-compatible blockchains. And which better than the most popular, Ethereum, and the latest one supported by Chainstack, Harmony 😊
This project will help us get an overview of how bridges work behind the scenes.
Requirements
You’ll need access to blockchain RPC nodes on both sides of the bridge. To get started, check out the following links:
In addition, you’ll need some tokens for your target networks to pay for the smart contract deployments and the bridge transactions. This bridge was tested with the Ethereum Ropsten and Harmony testnets. You can get Ropsten ETH here and Harmony testnet ONE here.
Blockchain bridge overview
Our bridge will be very simple:
- When the bridge wallet receives tokens from the Ethereum side of the bridge, it should mint new tokens in the Harmony side and send them to the same user.
- When the bridge wallet receives tokens from the Harmony side of the bridge, it should burn those tokens and transfer back the same amount of tokens from the bridge wallet to the user.
The project is divided into three parts:
- Smart contracts: we need two ERC20 token contracts, one in each blockchain that we’re going to bridge. To create and deploy the smart contracts, I’m going to use Hardhat.
- Web app: the frontend that users will interact with to actually send their tokens accross. I’ll create it with Vue.js and use ethers.js to interact with the smart contracts.
- Backend job: we also need a process listening to tokens received in the bridge wallet. This job will be written in JavaScript to keep it simple. It’ll use web3.js to interact with our blockchain RPC nodes and smart contracts.
You can find all the code of this project in the following repository in GitHub.
Steps overview
- Create an ERC20 token contract for the Ethereum chain.
- Create an ERC20Burnable token contract for the destination chain.
- Override the
mintandburnFrommethods withonlyBridgemodifier.
- Override the
- Deploy contracts to the Ropsten and Harmony testnets.
- Create frontend to transfer tokens from user’s wallet to the bridge.
- Create a backend job that listens for Transfer events in both token contracts.
- Store the bridge wallet private key in the server.
- Methods to send
mint,burnFromandtransfertransactions from the server.
Create the ERC20 tokens
As mentioned, I’ll use Hardhat to create the contracts. I created a solidity folder to hold the Hardhat project. Run npx hardhat and select the Create sample project option to scaffold the project. It’ll generate a test contract and script for you. We’ll use standard ERC20 tokens on both sides of the bridge, so we have to install OpenZeppelin contracts with npm install @openzeppelin/contracts.
With all the dependencies installed, we can create the contract files inside the solidity/contracts folder. I created two files: OriginToken.sol and DestinationToken.sol.
OriginToken.sol: is a standard ERC20 token for the Ethereum side of the bridge. It mints all tokens once it’s deployed. In the constructor, we have to send a token name, symbol and an initial supply. I named this contract ChainstackDollars with the symbol CHSD.
// SPDX-License-Identifier: MIT
pragma solidity ^0.8.4;

import "hardhat/console.sol";

// Import ERC20
import {ERC20} from "@openzeppelin/contracts/token/ERC20/ERC20.sol";

contract ChainstackDollars is ERC20 {
    // create the token passing the name and symbol
    constructor(
        string memory _name,
        string memory _symbol,
        uint256 _initialSupply
    ) ERC20(_name, _symbol) {
        // mint all tokens and send them to the deployer's wallet
        _mint(msg.sender, _initialSupply * (10**uint256(18)));
        console.log("Tokens minted %s", _initialSupply);
        console.log("Deployed! Tokens sent to %s", msg.sender);
    }
}
Note: we’re minting the initial supply received multiplied by 10**18, as the ERC20 token has 18 decimals by default.
DestinationToken.sol: is an ERC20 and ERC20Burnable token for the Harmony side of the bridge. This means we can use themintandburnFrommethods to create and destroy tokens. Instead of using the defaultmint()andburnFrom()methods, we’ll override them to add theonlyBridgemodifier which will prevent any other sender, except the bridge, to call these methods. I named this token DChainstackDollars with symbol D-CHSD.
// SPDX-License-Identifier: MIT
pragma solidity ^0.8.4;

import "hardhat/console.sol";

// Import ERC20
import {ERC20} from "@openzeppelin/contracts/token/ERC20/ERC20.sol";
import {ERC20Burnable} from "@openzeppelin/contracts/token/ERC20/extensions/ERC20Burnable.sol";

contract DChainstackDollars is ERC20, ERC20Burnable {
    address bridge;

    constructor(address _bridge) ERC20("DChainstackDollars", "D-CHSD") {
        bridge = _bridge;
    }

    modifier onlyBridge() {
        require(
            bridge == msg.sender,
            "DChainstackDollars: only the bridge can trigger this method!"
        );
        _;
    }

    // @dev called from the bridge when tokens are locked on ETH side
    function mint(address _recipient, uint256 _amount)
        public
        virtual
        onlyBridge
    {
        _mint(_recipient, _amount);
        console.log("Tokens minted for %s", _recipient);
    }

    // @dev called from the bridge when tokens are received
    // on Harmony side
    function burnFrom(address _account, uint256 _amount)
        public
        virtual
        override(ERC20Burnable)
        onlyBridge
    {
        super.burnFrom(_account, _amount);
        console.log("Tokens burned from %s", _account);
    }
}
Note: this contract has no initial supply as it will only be minted when users bridge some ChainstackDollar tokens from the ETH side of the bridge.
Deploying the ERC20 token contracts
To deploy the contracts we first need to get Ropsten ETH from here and Harmony testnet ONE from here.
Once we have the “money”, we need to configure our target networks and account in the hardhat.config.js file. In my case, I created an .env file and loaded the values from it like this (you’ll have to install dotenv (npm i dotenv) for that):
require('@nomiclabs/hardhat-waffle')

//load env file
require('dotenv').config()

//....

module.exports = {
  solidity: '0.8.4',
  paths: {
    sources: './contracts',
    artifacts: '../web/src/artifacts',
    tests: './test',
  },
  networks: {
    hardhat: {
      chainId: 1337,
    },
    ganache: {
      chainId: 5777,
      url: 'http://127.0.0.1:7545',
    },
    // Eth side of the bridge
    origin: {
      url: process.env.DEPLOY_ENDPOINT_ORIGIN,
      accounts: [process.env.DEPLOY_ACC_KEY],
    },
    // Harmony side of the bridge
    destination: {
      url: process.env.DEPLOY_ENDPOINT_DESTINATION,
      accounts: [process.env.DEPLOY_ACC_KEY],
    },
  },
}
The URLs (DEPLOY_ENDPOINT_ORIGIN and DEPLOY_ENDPOINT_DESTINATION) are the HTTPS endpoint from your nodes, which you can get from the Chainstack console. The account is the private key of your wallet. Make sure you do not upload that private key to a repository or share it!
To deploy the contracts, I created two script files: solidity/scripts/deployOrigin.js and solidity/scripts/deployDestination.js:
They’re both pretty similar; the only difference is that in deployOrigin.js we have to pass a few parameters to the constructor: the token name, the symbol, and the supply while the deployDestination.js does not need those.
// File: solidity/scripts/deployOrigin.js

const main = async () => {
  const [deployer] = await hre.ethers.getSigners()
  const accountBalance = await deployer.getBalance()

  console.log('Deploying contracts with account: ', deployer.address)
  console.log('Account balance: ', accountBalance.toString())

  let contractFactory = await hre.ethers.getContractFactory('ChainstackDollars')
  let contract = await contractFactory.deploy(
    'ChainstackDollars',
    'CHSD',
    1000000
  )

  await contract.deployed()

  console.log(
    'contract ChainstackDollars deployed to address: ',
    contract.address
  )
}

const runMain = async () => {
  try {
    await main()
    process.exit(0)
  } catch (error) {
    console.error(error)
    process.exit(1)
  }
}

runMain()
To execute the scripts and deploy the contracts, we need to run npx hardhat run ./scripts/deployOrigin.js --network origin and npx hardhat run ./scripts/deployDestination.js --network destination.
If everything goes well, you’ll see something like this in the console:
> contract ChainstackDollars deployed to address: 0xASDF1234ASDF1234ASDF1234Remember to run both scripts and save the contract addresses, as we’ll need them for both the frontend and backend jobs.
Building the frontend
I’ll not explain step-by-step how I created the web app, but I’ll go through the main concepts.
I created a Vue.js application with two pages: Origin.vue and Destination.vue.
Each page has a form in which users can enter the number of tokens they want to bridge:

When the user clicks the Bridge to… button, MetaMask asks the user to authorize the transaction and the tokens are transferred to our bridge wallet. Here is the code from the Origin.vue file that triggers the transfer:
import ChainstackDollars from '@/artifacts/contracts/OriginToken.sol/ChainstackDollars.json'

const bridgeWallet = import.meta.env.VITE_BRIDGE_WALLET
const originTokenAddress = import.meta.env.VITE_ORIGIN_TOKEN_ADDRESS

const provider = new ethers.providers.Web3Provider(window.ethereum)
// get the account that will pay for the trasaction
const signer = provider.getSigner()

let contract = new ethers.Contract(
  originTokenAddress,
  ChainstackDollars.abi,
  signer
)

const sendTokens = async function () {
  const amountFormatted = ethers.utils.parseUnits(amount.value, 18)

  if (typeof window.ethereum !== 'undefined') {
    trxInProgress.value = true

    try {
      const transaction = await contract.transfer(
        bridgeWallet,
        amountFormatted.toString()
      )

      console.log('transaction :>> ', transaction)
      // wait for the transaction to actually settle
      // in the blockchain
      await transaction.wait()
      bridgedOk.value = true
      amount.value = ''
      trxInProgress.value = false
    } catch (error) {
      console.error(error)
      trxInProgress.value = false
    }
  }
}
As you can see, there are a lot of variables that we need to pre-load, like the contract address (VITE_ORIGIN_TOKEN_ADDRESS), the bridge wallet address (VITE_BRIDGE_WALLET), and the contract ABI. Again, I decided to load them from an .env file and provided an example in the repository.
The transfer method will transfer the indicated amount of CHSD tokens from the user’s wallet to the bridge wallet. The Destination.vue file is similar although it transfers the D-CHSD tokens instead.
Create the backend process
Now that we’re able to transfer tokens from the user’s wallets to the bridge wallet, we need a job that listens to those transfers and reacts accordingly. Remember:
- When the bridge wallet receives CHSD tokens from the ETH side of the bridge, it should mint new tokens in the Harmony side and send them to the same user.
- When the bridge wallet receives D-CHSD tokens from the Harmony side of the bridge, it should burn those tokens and transfer back CHSD tokens from the bridge wallet to the user.
The code for the backend job is stored in the backend folder and, as the rest of the pieces, requires some variables to be configured in an .env file like:
- WebSocket endpoints: we can get these from our Chainstack dashboard.
- Token contract addresses: we need the token addresses to listen to the events emitted by them and to
transfer,mint, andburntokens. - Bridge wallet: all transactions will be signed and sent from our bridge wallet, so we need to have the private key stored in the backend.
You can find an example env file for the backend in the repository.
ERC20 tokens emit a Transfer event that we can monitor to identify bridge transactions. Here is the part of the event-watcher.js file that starts a Transfer event listener:
const CHSD_ABIJSON = require('./ChainstackDollars.json')
const BRIDGE_WALLET = process.env.BRIDGE_WALLET

const BRIDGE_WALLET_KEY = process.env.BRIDGE_PRIV_KEY

const ORIGIN_TOKEN_CONTRACT_ADDRESS = process.env.ORIGIN_TOKEN_CONTRACT_ADDRESS

const originWebSockerProvider = new Web3(process.env.ORIGIN_WSS_ENDPOINT)
// adds account to sign transactions
originWebSockerProvider.eth.accounts.wallet.add(BRIDGE_WALLET_KEY)

const oriNetworkId = await originWebSockerProvider.eth.net.getId()

const originTokenContract = new originWebSockerProvider.eth.Contract(
  CHSD_ABIJSON.abi,
  ORIGIN_TOKEN_CONTRACT_ADDRESS
)
let options = {}

originTokenContract.events
  .Transfer(options)
  .on('data', async (event) => {
    await handleEthEvent(
      event,
      destinationWebSockerProvider,
      destinationTokenContract
    )
  })
  .on('error', (err) => {
    console.error('Error: ', err)
  })
console.log(`Waiting for Transfer events on ${ORIGIN_TOKEN_CONTRACT_ADDRESS}`)
We need to listen to the Transfer events of both token contracts and check if the destination address of the transfer is our bridge wallet address. If that’s the case, we can proceed with the bridge operations of minting, burning, or transferring tokens.
When the bridge wallet receives CHSD on the ETH side of the bridge, we need to mint the same amount of D-CHSD tokens in the Harmony side of the bridge and send them to the same user. To do so, I created the mintTokens method:
const BRIDGE_WALLET = process.env.BRIDGE_WALLET
const ORIGIN_TOKEN_CONTRACT_ADDRESS = process.env.ORIGIN_TOKEN_CONTRACT_ADDRESS
const DESTINATION_TOKEN_CONTRACT_ADDRESS =
  process.env.DESTINATION_TOKEN_CONTRACT_ADDRESS

const mintTokens = async (provider, contract, amount, address) => {
  try {
    const trx = contract.methods.mint(address, amount)

    const gas = await trx.estimateGas({ from: BRIDGE_WALLET })
    console.log('gas :>> ', gas)
    const gasPrice = await provider.eth.getGasPrice()
    console.log('gasPrice :>> ', gasPrice)
    const data = trx.encodeABI()
    console.log('data :>> ', data)
    const nonce = await provider.eth.getTransactionCount(BRIDGE_WALLET)

    console.log('nonce :>> ', nonce)

    const trxData = {
      // trx is sent from the bridge wallet
      from: BRIDGE_WALLET,
      // destination of the transaction is the ERC20 token address
      to: DESTINATION_TOKEN_CONTRACT_ADDRESS,
      data,
      gas,
      gasPrice,
      nonce,
    }

    console.log('Transaction ready to be sent')

    const receipt = await provider.eth.sendTransaction(trxData)
    console.log(`Transaction sent, hash is ${receipt.transactionHash}`)
    console.log(
      `mintTokens > You can see this transaction in ${process.env.DESTINATION_EXPLORER}${receipt.transactionHash}`
    )
  } catch (error) {
    console.error('Error in mintTokens >', error)
    return false
  }
}
As you can see, creating a valid transaction manually requires a lot of data. We need to get the gas price and amount, obtain the wallet’s transaction count (or nonce) and finally, send it and wait for it to be added to a block.
When the bridge receives D-CHSD tokens in the Harmony side of the bridge, the operation is more complex as we need to:
- Call
approveBurn()to authorise burning the tokens in the Harmony side. - Call
burnFrom()to actually burn the tokens in the Harmony side. - Call
transfer()to transfer tokens in the ETH side of the bridge.
For this, I created three different methods that you can review in this file of the repository.
Wrapping up
To test the bridge, you just need to start the backed process with npm start and the web app with npm run dev. The web should be available on localhost:3000, where you can send some tokens between chains. In addition, you should be able to see some logs in the backend terminal.
This bridge is a simplified version and it does not handle all possible errors when minting or burning tokens, but I hope it helps you understand how they work behind the scenes.
- Discover how you can save thousands in infra costs every month with our unbeatable pricing on the most complete Web3 development platform.
- Input your workload and see how affordable Chainstack is compared to other RPC providers.
- Connect to Ethereum, Solana, BNB Smart Chain, Polygon, Arbitrum, Base, Hyperliquid, Tempo, MegaETH, Monad, Plasma, Avalanche, Optimism, Scroll, Aptos, Cronos, Gnosis Chain, Kaia, Moonbeam, Celo, Aurora, TON, Ronin, and Bitcoin mainnet or testnets through an interface designed to help you get the job done.
- Fast access to blockchain archive data and gRPC streaming on Solana.
- To learn more about Chainstack, visit our Developer Portal or join our Telegram group.
- Connect your AI agent to Chainstack in seconds using Chainstack MCP — give Claude, Cursor, Codex, Gemini, and Windsurf live access to blockchain data, node management, and docs.
- Are you in need of testnet tokens? Request some from our faucets. Sepolia faucet, Base Sepolia faucet, Solana devnet faucet, Hoodi faucet, BNB faucet, zkSync faucet, Scroll faucet, Hyperliquid faucet, Monad faucet, Amoy faucet, Plasma faucet, TON faucet.
Have you already explored what you can achieve with Chainstack? Get started for free today.