Ethereum
 Hyperliquid
 Solana
 Arbitrum
 BNB Smart Chain
 Base
Base Polygon
 TRON
TRON Sui
Sui MegaETH


How to build and deploy a subgraph in 5 Minutes
⚠️ Important notice
This article refers to Chainstack Subgraphs, a service that is no longer available.
Subgraphs migrated to Ormi.
This guide will show you how to build & deploy your own subgraph in as little as 5 minutes.
This is the written version of a “Byte-Size BUIDLing” video that we recently published. Taking after the video, we will build a subgraph that indexes transfers of Bored Ape Yacht Club NFTs.
Let’s start by installing the graph client
We can do that with npm install.
npm install -g @graphprotocolNow let’s make a directory for our subgraph
mkdir Chainstack
cd Chainstack
Verify that we have The Graph client installed
To do this and ensure the installation was successful, you can run the following command.
graphStart a subgraph project
Run the following command that will start the initialization process. This process will take us through a number of general configurations which will be used to generate a project template.
graph initYou can start by choosing the protocol you’d like to deploy to
You will have multiple options, but for the sake of this tutorial, we’ll be choosing Ethereum.
Now you can choose between hosted service or Subgraph Studio
Because we are deploying our subgraph on Ethereum, we can go with the Subgraph Studio option, and of course, we will be deploying this through Chainstack, which we’ll touch on later in this tutorial.
Choose a slug
In our case, it’ll be BAYC.
Choose the directory to create the subgraph in
We can name it ChainstackSubgraph.
This will create a sub-directory in the main directory that we created earlier.
Choose the network where you are deploying to
Here we will pick Ethereum mainnet; named mainnet within the configuration menu.
Paste the smart contract address
The contract address of the Bored Ape Yacht Club contract is 0xBC4CA0EdA7647A8aB7C2061c2E118A18a936f13D
This will ask for a start block, but we’ll be defining that later on when we paste in our manifest files. Let’s set this at zero for now.
For the contract name, you can name this BAYC, and then select Yes.
Great, now we should have our basic directory filled out, so we can open that up with our file explorer
We need to fill in three main files in order to make this work properly
We are referring to the schema file (schema.graphql), the manifest file (subgraph.yaml), and the mappings files (TypeScript file(s) located in ./src).
subgraph.yaml
Replace the code with a copy of the code below
specVersion: 0.0.5
description: A subgraph to index data on the Bored Apes contract
features:
  - ipfsOnEthereumContracts
schema:
  file: ./schema.graphql
dataSources:
  - kind: ethereum
    name: BAYC
    network: mainnet
    source:
      address: "0xBC4CA0EdA7647A8aB7C2061c2E118A18a936f13D"
      abi: BAYC
      startBlock: 12287507
    mapping:
      kind: ethereum/events
      apiVersion: 0.0.7
      language: wasm/assemblyscript
      entities:
        - Transfer
        - BoredApe
        - Property
      abis:
        - name: BAYC
          file: ./abis/BAYC.json
      eventHandlers:
        - event: Transfer(indexed address,indexed address,indexed uint256)
          handler: handleTransfer
      file: ./src/bayc.ts
Here you can see things like the name of the contract, the contract address, the start block, the entities that are defined in the schema, and the event handlers that are defined in the TypeScript file.
Save it and now open your schema file.
schema.graphql
Replace the code with the sample provided below
type Transfer @entity(immutable: true) {
  id: Bytes!
  from: Bytes!
  to: Bytes!
  tokenId: BigInt!
  blockNumber: BigInt!
  transactionHash: Bytes!
}

type BoredApe @entity {
  id: ID!
  creator: Bytes!
  newOwner: Bytes!
  tokenURI: String!
  blockNumber: BigInt!
}

type Property @entity {
  id: ID!
  image: String
  background: String
  clothes: String
  earring: String
  eyes: String
  fur: String
  hat: String
  mouth: String
}
Here we have the transfer entity, which is the event that we are listening for, we have the Bored Ape, which is the NFT itself, and we have the property which is the metadata or the attributes of the NFT.
Now that we have our manifest defined and our schema defined, we have to define the event handler itself, which is the transfer event.
Mappings files (src folder)
Go to the TypeScript file and rename contract.ts with bayc.ts and then replace the code with the sample provided below.
import {
  Transfer as TransferEvent,
  BAYC,
} from "../generated/BAYC/BAYC"
import {
  BoredApe,
  Transfer,
  Property
} from "../generated/schema"

import { ipfs, json, JSONValue, log } from '@graphprotocol/graph-ts'

export function handleTransfer(event: TransferEvent): void {

  //Here we write the handler code for the Transfer entity
  let transfer = new Transfer(event.transaction.hash.concatI32(event.logIndex.toI32()))
  transfer.from = event.params.from
  transfer.to = event.params.to
  transfer.tokenId = event.params.tokenId
  transfer.blockNumber = event.block.number
  transfer.transactionHash = event.transaction.hash
  transfer.save()
  //The transfer entity handler code ends here

  //Here we write the handler code for the BoredApe entity
  let contractAddress = BAYC.bind(event.address);

  let boredApe = BoredApe.load(event.params.tokenId.toString());
  if (boredApe == null) {
    boredApe = new BoredApe(event.params.tokenId.toString());
    boredApe.creator = event.params.to;
    boredApe.tokenURI = contractAddress.tokenURI(event.params.tokenId);
  }
  boredApe.newOwner = event.params.to;
  boredApe.blockNumber = event.block.number;
  boredApe.save();
  //The BoredApe entity handler code ends here

  //Here we write the handler code for the metadata

  const ipfshash = "QmeSjSinHpPnmXmspMjwiXyN6zS4E9zccariGR3jxcaWtq"
  let tokenURI = "/" + event.params.tokenId.toString();

  let property = Property.load(event.params.tokenId.toString());

  if (property == null) {
    property = new Property(event.params.tokenId.toString());

    let fullURI = ipfshash + tokenURI;
    log.debug('The fullURI is: {} ', [fullURI]);

    let ipfsData = ipfs.cat(fullURI);

    if (ipfsData) {
      let ipfsValues = json.fromBytes(ipfsData).toObject();

      if (ipfsValues) {
        let image = ipfsValues.get('image');
        let attributes = ipfsValues.get('attributes');

        let attributeArray: JSONValue[];
        if (image) {
          property.image = image.toString();
        }
        if (attributes) {

          attributeArray = attributes.toArray();

          for (let i = 0; i < attributeArray.length; i++) {

            let attributeObject = attributeArray[i].toObject();

            let trait_type = attributeObject.get('trait_type');
            let value_type = attributeObject.get('value');

            let trait: string;
            let value: string;

            if (trait_type && value_type) {

              trait = trait_type.toString();
              value = value_type.toString();

              if (trait && value) {

                if (trait == "Background") {
                  property.background = value;
                }

                if (trait == "Clothes") {
                  property.clothes = value;
                }

                if (trait == "Earring") {
                  property.earring = value;
                }

                if (trait == "Eyes") {
                  property.eyes = value;
                }

                if (trait == "Fur") {
                  property.fur = value;
                }

                if (trait == "Hat") {
                  property.hat = value;
                }

                if (trait == "Mouth") {
                  property.mouth = value;
                }

              }

            }

          }

        }

      }
    }

  }

  property.save();

  //The Metadata entity handler code ends here

}
This code defines the Transfer event handler, handleTransfer.
If you look at the code, you can see that we have handleTransfer right there, as well as the Bored Ape entity, transfer to token id, transfer from token id, block number, transaction hash, NFT attributes, etc.
We will have a complete look over the transfers and the data that we are indexing here once our subgraph is deployed.
Now you should have all your files defined, your manifest file (subgraph.yaml), your schema file (schema.graphql) and your TypeScript file.
Build the subgraph
Open the terminal again.
Make sure that you are inside the sub-directory that we created
cd ChainstackSubgraphand start by running the following command
graph codegenThis will automatically generate some files based on the information that we entered in the subgraph.
Now go ahead and run
graph buildRecap on what we did until this point
1. We’ve created our subgraph
2. We’ve initialized it through the graph init function
3. We’ve defined our schema, manifest, and mappings files
4. We’ve run graph codegen to save all our changes
5. We’ve compiled the subgraph through graph build
This subgraph is now ready to go ahead and be deployed to the Chainstack hosted service
Deploy the subgraph
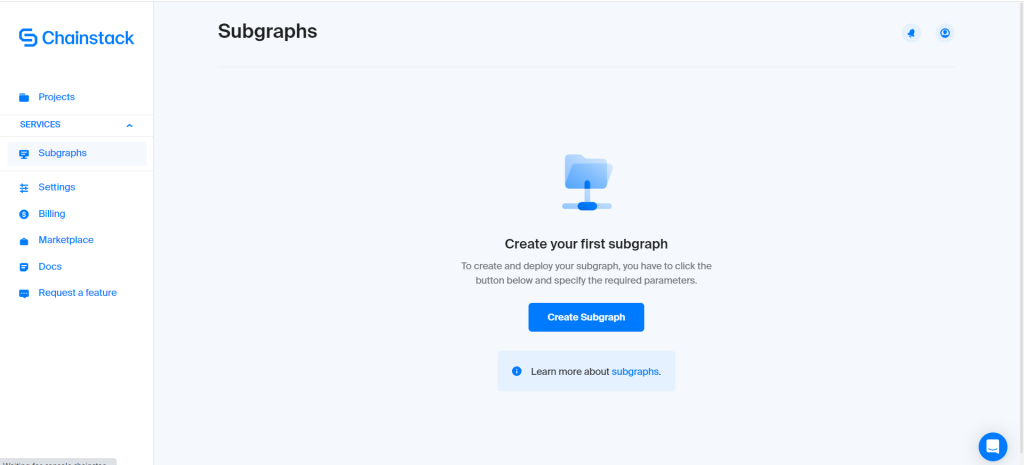
Log in to the Chainstack console https://console.chainstack.com/user/login and go to the “Subgraphs” tab. If you do not have an account yet, you can sign up for free here.
Click on “Create Subgraph”
Chose the blockchain that you are deploying to
For this tutorial, we will choose Ethereum Mainnet.
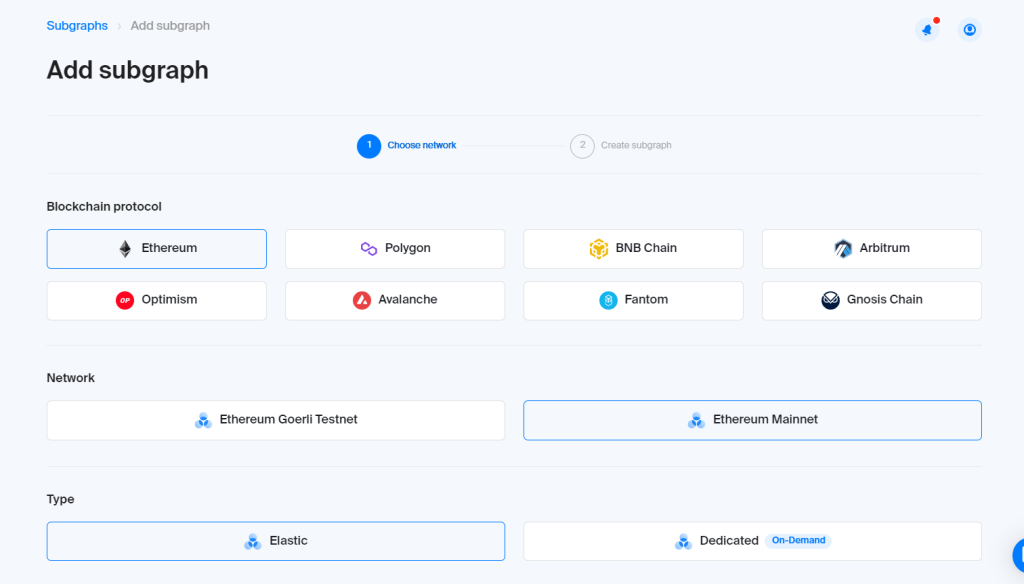
Type in a name and click “Add subgraph”

Go to the deployment command section and copy the code
See the sample command below. You’ll need to copy the equivalent snippet with your subgraph URL from the Chainstack console.
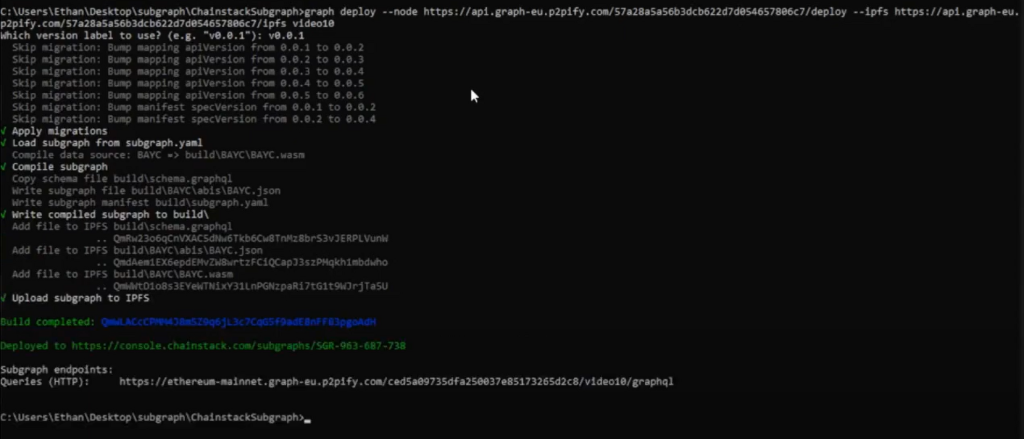
graph deploy --node https://api.graph-eu.p2pify.com/5b1413adbc6d4533af27469f79dfc4d8/deploy --ipfs https://api.graph-eu.p2pify.com/5b1413adbc6d4533af27469f79dfc4d8/ipfs ggfPaste the command into the directory of your subgraph.

Type in the version label

In our case, it was v0.0.1
This will compile the subgraph and then it’ll deploy to IPFS, and then it will be finally deployed to Chainstack’s hosted service.
If successful, you should see your HTTP endpoint.
If you go back to Chainstack’s console, you should see that your Subgraph is now deployed and syncing with the blockchain.
That’s a wrap. Congratulations if you’ve made it to the end. If you are looking for more tutorials like this, check out our developer portal and blog.
Power-boost your project on Chainstack
- Discover how you can save thousands in infra costs every month with our unbeatable pricing on the most complete Web3 development platform.
- Input your workload and see how affordable Chainstack is compared to other RPC providers.
- Connect to Ethereum, Solana, BNB Smart Chain, Polygon, Arbitrum, Base, Hyperliquid, Tempo, MegaETH, Monad, Plasma, Avalanche, Optimism, Scroll, Aptos, Cronos, Gnosis Chain, Kaia, Moonbeam, Celo, Aurora, TON, Ronin, and Bitcoin mainnet or testnets through an interface designed to help you get the job done.
- Fast access to blockchain archive data and gRPC streaming on Solana.
- To learn more about Chainstack, visit our Developer Portal or join our Telegram group.
- Connect your AI agent to Chainstack in seconds using Chainstack MCP — give Claude, Cursor, Codex, Gemini, and Windsurf live access to blockchain data, node management, and docs.
- Are you in need of testnet tokens? Request some from our faucets. Sepolia faucet, Base Sepolia faucet, Solana devnet faucet, Hoodi faucet, BNB faucet, zkSync faucet, Scroll faucet, Hyperliquid faucet, Monad faucet, Amoy faucet, Plasma faucet, TON faucet.
Have you already explored what you can achieve with Chainstack? Get started for free today.