Ethereum
 Hyperliquid
 Solana
 Arbitrum
 BNB Smart Chain
 Base
Base Polygon
 TRON
TRON Sui
Sui MegaETH


Smart contracts framework Ape by ApeWorX—What is it and how to use it

Ape is a smart contract development and testing framework by ApeWorX and new addition to the Chainstack marketplace. It is inspired by Brownie and has essentially the same syntax, but Ape focuses on a more modular approach, allowing us to build and use external plugins to add functionality.
This can appeal to developers because it allows us to deploy and test smart contracts in one environment. The ApeWorX team developed a collection of tools and frameworks to aid in testing and deploying tokens, markets, and oracles that integrate smart contracts with Web3.
The Ape framework requires Linux or macOS and Python 3.7.2 or later, so you will need to install the Windows Subsystem Linux (WSL) if you plan to use it on Windows. Make sure to check the ApeWorX docs to find the updated requirements.
By the way, you can find all the scripts shown in this guide in the ApeWorX Ape Chainstack tutorial repo on GitHub.
Table of contents
- Install Ape— how to and common errors
- Install the Chainstack plugin
- The Ape console
- Create a project with Ape
- Interact with an already deployed contract
- Conclusion
Install Ape— how to and common errors
Sometimes it can be frustrating to install frameworks and libraries, and often the installation process is the most challenging part; this is why I decided to spend some time showing you how to do it, as well as giving you the solutions for the most common errors.
As we already mentioned, you will need to meet these requirements first:
- Linux or macOS
- Python 3.7.2 or later, this guide explains how to install it in every OS.
- Windows Subsystem Linux (WSL) if you are operating on windows.
For this tutorial, I am installing and using Ape on Ubuntu 22.04 LTS.
To install Python in Ubuntu:
Update your local system’s repository list.
sudo apt updateInstall Python.
sudo apt install python3Once Python is installed, you can check if it was installed correctly by typing this command.
python3 --versionIt will return something like this if it was installed correctly.
Python 3.10.4We need one more preparatory step before starting the actual installation. It is good practice to work in a virtual environment as all the dependencies will be installed there; and will not create conflict with other projects. To do so in Ubuntu, follow these instructions:
Install PIP and virtual environments.
sudo apt install python3-pip
sudo pip install virtualenv
Create a virtual environment.
python3 -m venv /path/to/new/environmentKeep in mind that you can place the virtual environment where you prefer.
Then activate it.
source /bin/activateIf it all works correctly, you will see the name of your environment in between parentheses before your account name, like this:
(chainstack) name@name:~/Documents/Coding/python/chainstack $Now we are finally ready to install Ape. We can use PIP, and we can start by updating it.
pip install -U pipThen, install Ape.
pip install eth-apeThis is where you might encounter errors; I got this error, for example.
error: Setup script exited with error: command 'x86_64-linux-gnu-gcc'
failed with exit status 1
I solved it by installing python-dev and build-essential.
sudo apt-get install python3-dev
sudo apt-get install build-essential
Now you can try again with pip, and it should install Ape correctly.
Install the Chainstack plugin
One of the main concepts differentiating Ape from other frameworks is its modular approach that allows creating and installing plugins, which is suitable for customizing your development environment.
Here at Chainstack, we are all for helping developers to develop and make your life easier; that’s why we created a plugin that allows you to use your Chainstack endpoint directly into the Ape console. Currently, the Chainstack plugin is only compatible with the Ethereum network, but support for the other EVM-based chains and StarkNet will be released soon.
You can find the Chainstack plugin in its GitHub repository.
To install the Chainstack’s plugin run.
pip install ape-chainstackOr clone the repository and run setup.py.
git clone https://github.com/ApeWorX/ape-chainstack.git
cd ape-chainstack
python3 setup.py install
Once the installation is completed, you can verify that it was installed correctly by using the ape plugins list command, which will show you all the plugins installed in your system.
ape plugins listIt will show a result like this.
Installed Plugins:
  chainstack    0.4.0a1
This means that now you are ready to use your Chainstack endpoints.
The Ape console
The Ape framework comes with an interactive console that allows you to interact with the blockchain and your project; you can, for example, connect to a network with a custom endpoint, create and import accounts, query data from the blockchain, and more.
In this section, I will show you how to activate and use the console to create an account and query its balance, but the ApeWorX academy has a full tutorial about the console.

Set up the endpoint URL
Now that we installed the Chainstack plugin, we can use our endpoint to connect to a network and start getting our hands dirty; first of all, make sure you have a Chainstack endpoint, follow these steps to sign up on Chainstack, deploy a node, and find your endpoint credentials:
The next step will be to define the endpoint by creating an environment variable.
Open the terminal, and set the environment variable (I will be using a virtual environment and the Goerli testnet).
export CHAINSTACK_GOERLI_URL=YOUR_CHAINSTACK_ENDPOINT_URLYou can verify that it was set up correctly by displaying it in the console.
echo $CHAINSTACK_GOERLI_URLAnd it will return your endpoint URL if it is set up correctly.
Create and import accounts
Now before opening the console using the endpoint we set up, let’s create an account, which is one of the features available in Ape. First, we’ll use the ape accounts to generate “ACCOUNT_NAME” command.
ape accounts generate "chainstack"This command will prompt a few questions where you will add an “entropy” value (which can be anything you want) to add some extra randomness to the process and a passphrase.
Make sure to keep your passphrase accessible since you will need it to sign the transactions later on, and for the purpose of this tutorial, I recommend only using it for testing purposes without real funds.
Add extra entropy for key generation...:
Create Passphrase:
Repeat for confirmation:
SUCCESS: A new account '0xB6a6b3096e2E90780b745c676b842b9D2F657540' has been added with the id 'chainstack'
Congratulations, you just created a new account using Ape; you can now fund this account and use it on any EVM-compatible network. For example, you can use this Goerli faucet to get some testnet funds.
Create another account, so we can play a bit with them before jumping into deploying smart contracts with the ApeWorX— Ape framework.
Once you have created some accounts, use the ape accounts list command.
ape accounts listWhich will return a list with the addresses and aliases.
Found 2 accounts:
  0xB6a6b3096e2E90780b745c676b842b9D2F657540 (alias: 'chainstack')
  0x82D78356b4D18e0f24D56bE752454728d80C9897 (alias: 'test')
Ape allows us to also import accounts, so this is useful in case you already have accounts with funds and want to use them for your development.
To import an account, use the ape accounts import <ACCOUNT_NAME> command; you just need the account’s private key. The console will then prompt you to input a passphrase for you to use to sign transactions.
ape accounts import my_ape_account
Enter Private Key:
Now we can activate the console, query the balance and make transfers. But, first, start the console by adding the -- network flag to use our Chainstack endpoint to connect to Goerli.
ape console --network ethereum:goerli:chainstackThis will activate the console, where we can load and query our account. Remember that Ape is based on Python, so you will see many similarities; once in the console, we first create a variable for the account to query by using the accounts.load method, then we can query the balance.
In [1]: chainstack_account = accounts.load('chainstack')
In [2]: chainstack_account.balance / 1e18
Out[2]: 0.25
Make transfers between accounts
We can use the console to transfer tokens between accounts as well.
In the console, initialize your second account and check its balance:
In [4]: test_account = accounts.load("test")
In [5]: test_account.balance /1e18
Out[5]: 0.05
Then input the transfer command— SENDER_ACCOUNT.transfer(RECEIVER_ACCOUNT, WEI_AMOUNT).
You can use a wei converter to convert the value you want to send, or you can create a variable and use the converter function offered by Ape.
In [14]: value = convert("0.1 ETH", int)
In [15]: value
Out[15]: 100000000000000000
We are transferring 0.1 Goerli ETH between chainstack_account and test_account in this example. The console will ask you to sign using your passphrase.
In [6]: chainstack_account.transfer(test_account, 100000000000000000)
DynamicFeeTransaction:
  chainId: 5
  to: 0x82D78356b4D18e0f24D56bE752454728d80C9897
  from: 0xB6a6b3096e2E90780b745c676b842b9D2F657540
  gas: 21000
  nonce: 0
  value: 100000000000000000
  data: 0x
  type: 0x02
  maxFeePerGas: 1009999997
  maxPriorityFeePerGas: 1009999988
  accessList: []

Sign:  [y/N]: y
Enter passphrase to unlock 'chainstack' []:
As you can see, Ape automatically builds the transaction for us, and once the transaction is confirmed, we can verify if it worked.
INFO: Submitted 0x49da1da7e0368f35302a80791e8b965de26fa06e92a8919662a8bd8c1375b047

Confirmations (2/2): 100%|███████████████████████████████████████████████████████████████████████████████████████████████████| 2/2 [00:29<00:00, 14.75s/it]

INFO: Confirmed 0x49da1da7e0368f35302a80791e8b965de26fa06e92a8919662a8bd8c1375b047 (total fees paid = 21209999937000)

Out[6]: <Receipt 0x49da1da7e0368f35302a80791e8b965de26fa06e92a8919662a8bd8c1375b047>

In [7]: test_account.balance /1e18
Out[7]: 0.15

In [8]: chainstack_account.balance / 1e18
Out[8]: 0.149978790000063
Ape also comes with a set of pre-defined accounts in case you want to develop locally instead of on a testnet.
Close the console by typing exit and restart it without the --network flag this time to get into the local environment.
This is also an excellent time to talk about the --verbosity flag, which allows us to set up the level of feedback that we want from the console; we will start the console with the DEBUG setting, which is the option that will communicate the most and shows what is happening behind the scenes. You can check out the different verbosity options available in the ApeWorX docs.
Restart the console in local mode.
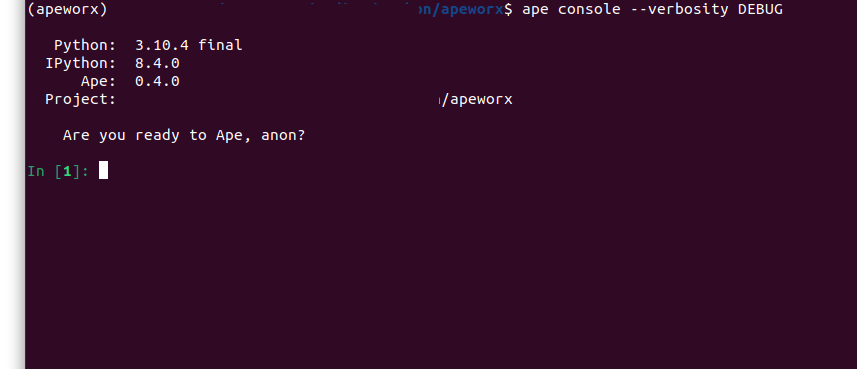
You can already see how the DEBUG setting gives us more information, and we can see that we have 10 test accounts available.
In [1]: len(accounts.test_accounts)
Out[1]: 10
We can associate these accounts to a variable and use them for our development and testing.
In [2]: account_1 = accounts.test_accounts[0]
In [3]: account_1.balance / 1e18
DEBUG: Making request. Method: eth_getBalance
Out[3]: 1000000.0
Notice how the DEBUG verbosity shows you what happens and what method is called to request the balance.
Create a project with Ape
Now that we are familiar with the console let’s see how to create a project, deploy a contract and interact with it. We’ll work with a simple, smart contract written in Solidity for this tutorial.
Keep in mind that you will have to initialize the environment variables with the endpoints again every time you close the terminal unless you store the environment variable in the local file ~/.bashrc (Linux) or ~/.zshrc (macOS).
The first step is to install the Solidity plugin.
pip install ape-solidity Then we can initialize the project, create a directory where you want your project to live, then you can input the init command.
ape initYour project will have this structure
Project root                        # The root project directory.
├── contracts/                      # Smart contracts directory.
    └── smart_contract_example.sol  # Sample of a smart contract, ".sol" or ".vy".
├── tests/                          # Project tests, run using 'ape test'.
    └── test_sample.py              # Sample of a test script.
├── scripts/                        # Project scripts; run with 'ape run <name>'.
    └── deploy.py                   # Sample script to deploy a contract.
└── ape-config.yaml                 # The ape project configuration file
Let’s use this simple smart contract, which allows you to save a string on chain (on Goerli in this example) and create a SimpleStorage.sol in the contracts folder of the project.
// SPDX-License-Identifier: MIT

pragma solidity ^0.8.0;

contract SimpleStorage {

    string storedWord;


    function setWord(string memory _word) public {
    storedWord = _word;
    }

    function getWord() public view returns (string memory) {
    return storedWord;
    }

}
Deploy a smart contract from the Ape console
Now that we have a smart contract in the correct folder, we need to compile it.
ape compileIf everything goes well, there will be a __local__.json file in the .build directory containing the ABI, bytecode, and other information about the contract.
Then we can deploy it directly from the Ape console.
Start the console with the Goerli endpoint that we set up earlier.
ape console --network ethereum:goerli:chainstackInitialize the address you want to use to deploy (you need to re-initialize it every time you exit the Ape console), in our case, the address that we created earlier, and deploy from the project manager.
Note that we create an instance called “contract” so that we can interact with the contract we deploy.
In [1]: dev_account = accounts.load("chainstack")
In [2]: contract = dev_account.deploy(project.SimpleStorage)
Once we confirm the transaction, the smart contract will be deployed, and the console will show us the address.
INFO: Confirmed 0x899009c30ee0ade521bb97cda00ff5b2a157d5fcb3dfcd14ac26755ef7d64237 (total fees paid = 255956003071472)
SUCCESS: Contract 'SimpleStorage' deployed to: 0xC88bfF0F5e264F4652327010E8eB3ab9c9Cf0372
Use the Ape console to interact with your smart contract
At this point, we have already learned a lot about this framework, and we deployed a smart contract on Goerli; it’s time to interact with it.
The contract we just deployed allows us to save a string on chain and retrieve its value. Then, we can interact with it from the console quickly.
We can, for example, retrieve the contract address like the following.
In [4]: contract.address
Out[4]: '0xC88bfF0F5e264F4652327010E8eB3ab9c9Cf0372'
Now, let’s save a string on chain by calling the setWord() function; we have to specify which account sends the transaction and pays for gas, and the console will also return the receipt.
In [5]: contract.setWord("Web3 is cool",sender=dev_account)
Out[5]: <Receipt 0x217cdd40fdfb6d9f47ccbab66bc62f00b3edf094608b3bdf622a36161e7067bd>
And at this point, calling the getWord() function should come easy to you.
In [6]: contract.getWord()
Out[6]: 'Web3 is cool'
Extra tip: the Ape console is a Python interactive environment, so you can create functions to better interact with the smart contract. For example, a function to retrieve and print the string saved In the smart contract directly.
In [15]: def word():
    ...:     savedWord = contract.getWord()
    ...:     return savedWord
    ...:

In [16]: print(word())
Web3 is cool
Obviously, because this smart contract is so simple, it seems superfluous, but it can come in handy with more complex applications.
You can find how to deploy and interact with smart contracts in the ApeWorX docs.
Deploy a smart contract from a script
Like in more traditional frameworks such as Brownie, we can deploy contracts and interact with them through a script.
Follow the previous steps to:
- Initialize a new project and place the smart contract file in the contracts folder again; I will use the same contract.
- Set the terminal in the project root folder and run
ape compile.
Now we can create a new file in the scripts folder inside our project and call it deploy.py
We first import the ape modules: accounts and project.
Now, we have two options to pick the account we want to use to deploy and sign the transaction. The first is to hardcode it into the script. For example, the following code shows a deploy script with a hardcoded account.
from ape import accounts, project
def main():
from ape import accounts, project

def main():
      # Initialize deployer account and print balance
      dev_account = accounts.load("chainstack")
      print(f'The account balance is: {dev_account.balance / 1e18} Goerli ETH')

     # Deploy the smart contract and print a message
     dev_account.deploy(project.SimpleStorage)
     print("Contract deployed!")
Note that we also added a few extra print statements to provide additional information. Furthermore, the script must be structured, with a main() function to work.
The dev_account.deploy(project.SimpleStorage) line deploys the smart contract; note that the name SimpleStorage, in this case, must be the name of the smart contract, not the .sol file.
Now go back to the terminal (always in the project root folder) and run the following:
ape run deploy --network ethereum:goerli:chainstackThis will prompt you to sign the transaction.
The account balance is: 0.3986564444825816 Goerli ETH
DynamicFeeTransaction:
  chainId: 5
  from: 0xB6a6b3096e2E90780b745c676b842b9D2F657540
  gas: 255956
  nonce: 9
  value: 0
  data: 0x608060...0f0033
  type: 0x02
  maxFeePerGas: 1000000016
  maxPriorityFeePerGas: 1000000001
  accessList: []

Sign:  [y/N]:
Once the steps are completed, it will give you a success message and show the contract address.
Confirmations (2/2): 100%|████████████████████████████████████████████████████████████████████████████████████| 2/2 [00:29<00:00, 14.77s/it]
INFO: Confirmed 0xa88e5b15cbad7ce1c8466baff0c21e9ea2e8be606b9a08fb14d30c528ee1e71d (total fees paid = 255956003839340)
SUCCESS: Contract 'SimpleStorage' deployed to: 0xa15fddEE05b12804797B16345F8d8DeaF7d285A1
Contract deployed!
And here you go, you just deployed a smart contract using the Ape framework from a script.
The following script does the same thing, but it gives the option to pick which account you want to use to deploy when you run it. This is suitable if you have multiple accounts and don’t want to hardcode a specific one in the script.
from ape import project
from ape.cli import get_user_selected_account

def main():
    # The CLI will ask which account to use
    dev_account = get_user_selected_account()
    print(f'The account balance is: {dev_account.balance / 1e18} Goerli ETH')

    # Deploy the smart contract and print a message
    dev_account.deploy(project.SimpleStorage)
    print("Contract deployed!")
Then you run it the same way with ape run deploy --network ethereum:goerli:chainstack
The only difference is that it will prompt you to pick an account to use.
0. chainstack
1. test

Select an account: 0
The account balance is: 0.39861173848186626 Goerli ETH
DynamicFeeTransaction:
  chainId: 5
  from: 0xB6a6b3096e2E90780b745c676b842b9D2F657540
  gas: 255956
  nonce: 10
  value: 0
  data: 0x608060...0f0033
  type: 0x02
  maxFeePerGas: 1000000021
  maxPriorityFeePerGas: 1000000001
  accessList: []

Sign:  [y/N]: y
Interact with an already deployed contract
Interact from the console
Once we deploy the smart contract, we can interact with it directly from the console or from a script.
From the console, we can recall a deployed smart contact from its address.
So let’s start the console with the usual command.
ape console --network ethereum:goerli:chainstackAnd create a contract instance by recalling its address.
In [1]: contract = Contract(“0xa15fddEE05b12804797B16345F8d8DeaF7d285A1”)Now we can interact with the contract precisely as we did earlier when we deployed the contract directly from the console.
Interact from a script
We can also make scripts to interact with our contracts; we can place them in the scripts folder and run them with the ape run command if we create a function and call it in the command.
The following code is a simple script to interact with the SimpleStorage contract. Remember that this is a Python-based framework, so we can leverage the Python code.
The script’s logic is the following:
- Prompt the user to pick which account to use.
- Displays the address of the latest
SimpleContractcontract deployed. - Prompt the user to input a string to save in the smart contract and calls the
saveWord()function. - After the transaction is confirmed, it calls the
getWord()function and displays the string we saved.
from ape import project
from ape.cli import get_user_selected_account

def simpleStorage_interact():
    # The CLI will ask which account to use
    dev_account = get_user_selected_account()
    print(f'The account balance is: {dev_account.balance / 1e18} Goerli ETH')

    # Initialize latest deployed contract
    simple_storage= project.SimpleStorage.deployments[-1]
    print(f'The latest SimpleStorage contract is deployed at: {simple_storage.address}')

    # Prompt the user to input a string to save
    string_to_save = input("Type the string to save: ")
    print("Saving the string, please sign the transaction when prompted.")
    simple_storage.setWord(string_to_save, sender=dev_account)

    # Retrive and display the saved string
    print(f'The saved string is: {simple_storage.getWord()}')

def main():
    simpleStorage_interact()
Once saved in the scripts folder, run the following command in the terminal from the project root.
ape run simpleStorage_interact --network ethereum:goerli:chainstackWe call the function simpleStorage_interact() directly from the terminal, which will look like this.
0. chainstack
1. test

Select an account: 0
The account balance is: 0.648355782477259 Goerli ETH
The latest SimpleStorage contract is deployed at: 0x5c5799e815a2686Cbe47003D83188E22E0493964
Type the string to save: Chainstack is cool
Saving the string, please sign the transaction when prompted.

DynamicFeeTransaction:
  chainId: 5
  to: 0x5c5799e815a2686Cbe47003D83188E22E0493964
  from: 0xB6a6b3096e2E90780b745c676b842b9D2F657540
  gas: 44706
  nonce: 11
  value: 0
  data: 0xcd048d...000000
  type: 0x02
  maxFeePerGas: 1000000014
  maxPriorityFeePerGas: 1000000000
  accessList: []

Sign:  [y/N]: y
Enter passphrase to unlock 'chainstack' []:
Leave 'chainstack' unlocked? [y/N]: y
INFO: Submitted 0x58eed7f8bdd2a2f098ca6bdffe9a5ed66f5c366931e78eaf2f5bebc8d4fa3a6c
Confirmations (2/2): 100%|████████████████████████████████████████████████████████████████████████████████████████████| 2/2 [00:29<00:00, 14.72s/it]
INFO: Confirmed 0x58eed7f8bdd2a2f098ca6bdffe9a5ed66f5c366931e78eaf2f5bebc8d4fa3a6c (total fees paid = 44706000625884)
The saved string is: Chainstack is cool
Conclusion
The Ape framework is gaining traction and will become more popular as more people learn how easy it makes to develop smart contracts once it’s set up.
This guide should get you up and running to create projects using Ape and gives you a few different options to deploy and interact with your smart contracts.
I would say the most straightforward way is through the console directly, but creating and running scripts can be a fun way to do it as well.
- Discover how you can save thousands in infra costs every month with our unbeatable pricing on the most complete Web3 development platform.
- Input your workload and see how affordable Chainstack is compared to other RPC providers.
- Connect to Ethereum, Solana, BNB Smart Chain, Polygon, Arbitrum, Base, Hyperliquid, Tempo, MegaETH, Monad, Plasma, Avalanche, Optimism, Scroll, Aptos, Cronos, Gnosis Chain, Kaia, Moonbeam, Celo, Aurora, TON, Ronin, and Bitcoin mainnet or testnets through an interface designed to help you get the job done.
- Fast access to blockchain archive data and gRPC streaming on Solana.
- To learn more about Chainstack, visit our Developer Portal or join our Telegram group.
- Connect your AI agent to Chainstack in seconds using Chainstack MCP — give Claude, Cursor, Codex, Gemini, and Windsurf live access to blockchain data, node management, and docs.
- Are you in need of testnet tokens? Request some from our faucets. Sepolia faucet, Base Sepolia faucet, Solana devnet faucet, Hoodi faucet, BNB faucet, zkSync faucet, Scroll faucet, Hyperliquid faucet, Monad faucet, Amoy faucet, Plasma faucet, TON faucet.
Have you already explored what you can achieve with Chainstack? Get started for free today.