Ethereum
 Hyperliquid
 Solana
 Arbitrum
 BNB Smart Chain
 Base
Base Polygon
 TRON
TRON Sui
Sui MegaETH


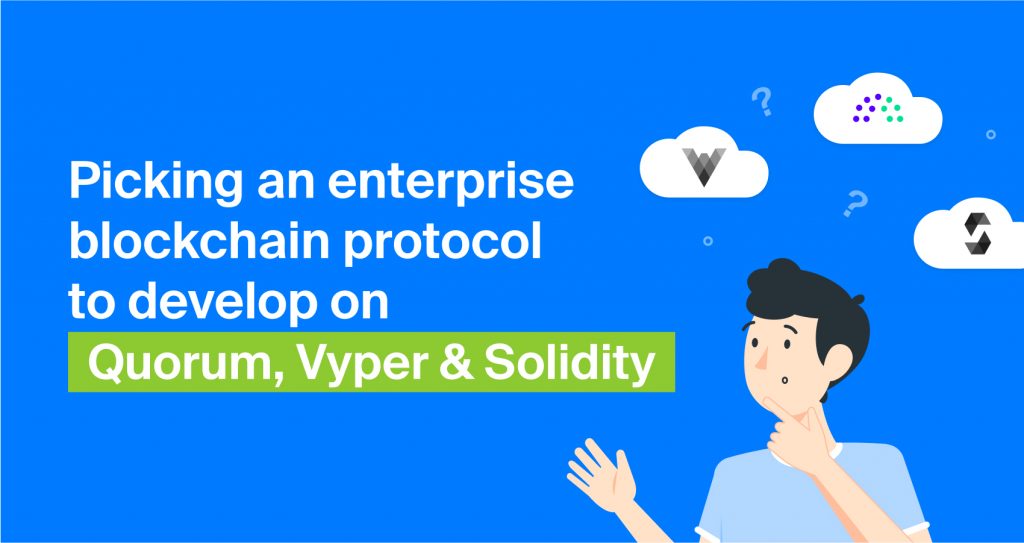
Picking an enterprise blockchain protocol to develop on: Quorum, Vyper & Solidity
As a Python developer;
As a JavaScript developer.
In brief
This post is a part of the multipart series aimed at developers looking to try their hand out at and get a taste of the enterprise blockchain world.
This post focuses on running a “Hello, Block!” smart contract on Quorum for developers primarily comfortable with Python and JavaScript.
Vyper is a pythonic smart contract language.
Solidity is arguably similar to JavaScript.
So, if you are most comfortable with Python, try the Vyper example; if you are into JavaScript, go with Solidity.
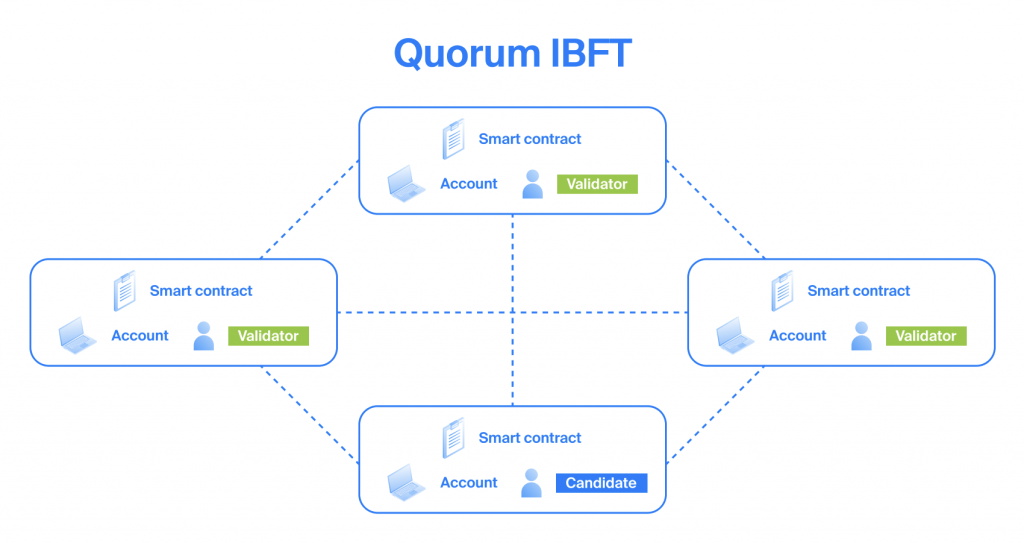
Architecture
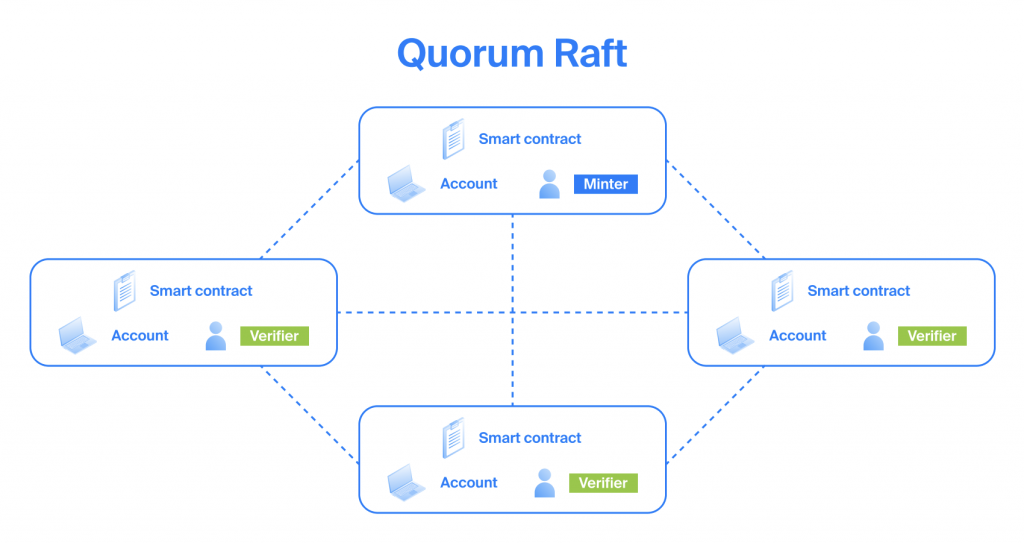
On Quorum, a smart contract is called a smart contract. Just like in Ethereum, the smart contracts are propagated to all nodes in the network.
Transaction privacy can be established by separate Tessera nodes.
See also a brief Quorum introduction.
Ecosystem
Quorum is mainly driven by ConsenSys.
Quorum, being a fork of Ethereum, enjoys connection to the vast Ethereum ecosystem.
Prerequisites
- A Chainstack account.
- A Quorum IBFT network. See Deploy a consortium network.
- A version of the Geth client, called GoQuorum, installed. See GoQuorum.
Quorum “Hello, Block!” in Vyper programming language
Contract
Quorum “Hello, Block!” in Solidity programming language
Contract
Deploy the contract
At this point you should have Quorum IBFT network deployed and the GoQuorum client installed as specified in the Prerequisites section.
Connect to your Quorum node
Connect to your Quorum IBFT node with the GoQuorum client. For detailed instructions, see Quorum interaction tools.
Example:
~/quorum/build/bin# ./geth attach https://user-name:[email protected]
Welcome to the Geth JavaScript console!

instance: Geth/v1.9.7-stable-6005360c(quorum-v2.7.0)/linux-amd64/go1.13.13
coinbase: 0xce6d1ed6ca40a56b81fcb2789d13892628b957b8
at block: 12468 (Thu, 24 Sep 2020 04:08:34 UTC)
 datadir: /datadir/blockchain/qdata/dd
 modules: admin:1.0 debug:1.0 eth:1.0 istanbul:1.0 net:1.0 personal:1.0 rpc:1.0 txpool:1.0 web3:1.0

>
Compile the smart contract
To deploy the contract and interact with the contract, you need to get the contract’s bytecode and ABI. The easiest way to do this is to just use the online compilers.
ABI stands for Application Binary Interface and it’s something that you use to interact with the contract.
Bytecode is the compiled machine code that you deploy on the network as a smart contract.
Vyper
- Use Etherscan’s online Vyper compiler.
- Paste in the Vyper contract code.
- Select the compiler version 0.1.x.
- Click Compile Vyper.
- You will need the Abi and Bytecode outputs.
You can trim down the ABI output and remove fields like Gas as you don’t need that for a Quorum network. You can just use the ABI parameters from later in this tutorial.
Solidity
- Use Remix IDE to compile online.
- Go to the File explorer tab on the left and click plus sign to add new *.sol file.
- In the new *.sol file, paste in the Solidity contract code.
- Click the Solidity compiler tab on the left.
- Click Compile.
- On the same tab, there will the Compilation Details button show up. Under the button, click ABI and Bytecode to copy the ABI and bytecode values.
You can trim down the ABI output and remove fields like Gas as you don’t need that for a Quorum network. You can just use the ABI parameters from later in this tutorial.
Deploy the smart contract code
Starting from this point in the tutorial, it doesn’t really matter if you created the contract in Vyper or Solidity, as now you have the compiled machine code that you will deploy.
You should be now connected to your Quorum node and be in the GoQuorum JavaScript console.
In the console, start by unlocking your Quorum account that you will use to deploy the contract bytecode:
personal.unlockAccount("ACCOUNT")where ACCOUNT is the actual Quorum address that was created when you deployed your Quorum node. To get the address, navigate to your Quorum node in the Chainstack UI and copy the Address value under Default wallet.
When asked for password, just hit Enter as the default password is blank.
Example:
> personal.unlockAccount("0x59e41b14a83d2ce5da3ccebb2be1c36f45958e54")
Unlock account 0x59e41b14a83d2ce5da3ccebb2be1c36f45958e54
Password:
true
Set the ABI for the contract:
var helloBlock = eth.contract(ABI)where ABI is the contract ABI. You can use the trimmed down version from the example below.
Example:
var helloBlock = eth.contract([{"outputs": [], "inputs": [], "constant": false, "payable": false, "type": "constructor"}, {"name": "printMessage", "outputs": [{"type": "bytes", "name": ""}], "inputs": [], "constant": true, "payable": false, "type": "function"}, {"name": "setMessage", "outputs": [], "inputs": [{"type": "bytes", "name": "_message"}], "constant": false, "payable": false, "type": "function", "gas": 71004}, {"name": "message", "outputs": [{"type": "bytes", "name": ""}], "inputs": [], "constant": true, "payable": false, "type": "function"}])Set the bytecode to deploy:
var bytecode = 'BYTECODE'where BYTECODE is the machine code you compiled previously.
If you used the Etherscan Vyper compiler, just copy the code from the Bytecode field.
If you used the Remix IDE Solidity compiler, you must copy the value in the object field and precede it with 0x.
Example for Vyper or Solidity:
var bytecode = '0x608...'At this point you have the ABI and bytecode set up.
Now prepare to deploy from your account that you previously unlocked:
var deploy = {from:"ACCOUNT", data:bytecode, gas: 2000000}where ACCOUNT is the actual Quorum address that was created when you deployed your Quorum node and that you previously unlocked. If you forgot the address, get it by navigating to your Quorum node in the Chainstack UI and copying the Address value under Default wallet.
Example:
> var deploy = {from:"0x59e41b14a83d2ce5da3ccebb2be1c36f45958e54", data:bytecode, gas: 2000000}
undefined
Prepare to deploy the instance:
var helloBlockPartialInstance = helloBlock.new("printMessage", deploy)And deploy:
helloBlockPartialInstanceThis will give you the address of your newly deployed contract. You can also view the address by visiting your Quorum network’s explorer. See Explore a network.
Interact with the smart contract
In the same console session, set your contract interaction instance:
var helloBlockInstance = helloBlock.at(helloBlockPartialInstance.address)And finally interact with the contract:
helloBlockInstance.printMessage()Example:
> helloBlockInstance.printMessage()
"0x48656c6c6f2c20426c6f636b2120496e20567970657221"
Decode the output by using web3.toAscii.
Example:
> web3.toAscii("0x48656c6c6f2c20426c6f636b2120496e20567970657221")
"Hello, Block! In Vyper!"
Congratulations! What you have just done is: a) created and deployed a smart contract on a private Quorum blockchain network; b) interacted with the contract using the GoQuorum console.
For more sophisticated and real-world scenarios, explore Chainstack tutorials.
Join our community of innovators
- To learn more about Chainstack, visit our Knowledge Center or join our Discord server and Telegram group.
- Sign up for a free Developer account, or explore the options offered by Growth or Business plans here.
- Take a look at our pricing tiers using a handy calculator to estimate usage and number of nodes.
Have you already explored what you can achieve with Chainstack? Get started for free today.