Ethereum
 Hyperliquid
 Solana
 Arbitrum
 BNB Smart Chain
 Base
Base Polygon
 TRON
TRON Sui
Sui MegaETH


Start and deploy your own fully synced Ethereum node in under 10 minutes
Deploy Ethereum node
Have you ever tried to deploy an Ethereum node? Do you feel like “does Ethereum node ever sync”? Well, it has to sync from the genesis block and this may take quite some time, but don’t worry, we have a solution for you.
Deploying a smart contract these days is easier than you think. By combining a popular framework called Embark with Chainstack’s capability to quickly deploy Ethereum nodes on the mainnet, smart contract deployment is as easy as sending an email.
Install dependencies
Before continuing, you should install these dependencies:
Once we’ve installed these dependencies, we can install Embark.
npm install -g embark
Also you should install Metamask to simplify the interaction process later on.
Smart contracts
Fractional ownership of a high value asset can be made possible via smart contracts.
The Lisa Mona, a piece of artwork that costs approximately $100,000,000 is up for auction to small retail investors. Since retail investors do not have the funds to purchase the Lisa Mona in its entirety, the Lisa Mona can be represented by 1000 tokens on the Ethereum virtual machine. Hence, owning 1 token is equivalent to owning 1/1000 of the Lisa Mona, worth exactly $100,000 per token. Asset tokenization also makes it easy for investors to trade tokens as they deem fit.
I’ve designed a simple smart contract to tokenize the Lisa Mona, called Art.sol.
Art.sol
pragma solidity = 0.5.0;
contract Art{
  uint public supply;
  uint public pricePerEth;
  mapping( address => uint ) public balance;
constructor() public {
    supply = 1000;// There are a total of 1000 'mini' Lisa Monas
    pricePerEth = 100000000000000000; // 1 token = 0.1 ether
  }

  function check() public view returns(uint) {
    return balance[msg.sender];
  }
  function () external payable {
    balance[msg.sender] += msg.value/pricePerEth;
    supply -= msg.value/pricePerEth;
  }
}
We’ve set the price of one Lisa Mona token to 0.1 ether. This means that to own 1/1000 of a Lisa Mona, an investor simply has to send 0.1 ether to the smart contract.
Save the code above as Art.sol. We will be using Embark to deploy the smart contract to the Ethereum testnet (Ropsten) so you can deploy and interact with it without spending real ether.
Spinning up your Ethereum node
When a developer wants to deploy a smart contract, the transaction is broadcast to a node. The developer has to trust that the remote node is perfectly honest, in technical parlance, non-Byzantine. A better option would be to run your own full Ethereum node, which comes with several benefits such as:
1. No throttling for high usage
2. Ensuring that all transactions made to the blockchain are correct
3. Lower latency if the node is located in the same geographical location
Chainstack makes it easy to create a Ropsten testnet node. Normally this can take up to 12 hours, but Chainstack’s Bolt does all of this in only 10 Minutes. Since we don’t want to spend real ether, let’s deploy our smart contracts to a Ropsten node.
I’m working for Chainstack and at Chainstack, we can create a new Ethereum Node in just 10 minutes 🙂
Let’s start by signing up for a free 7-day trial .
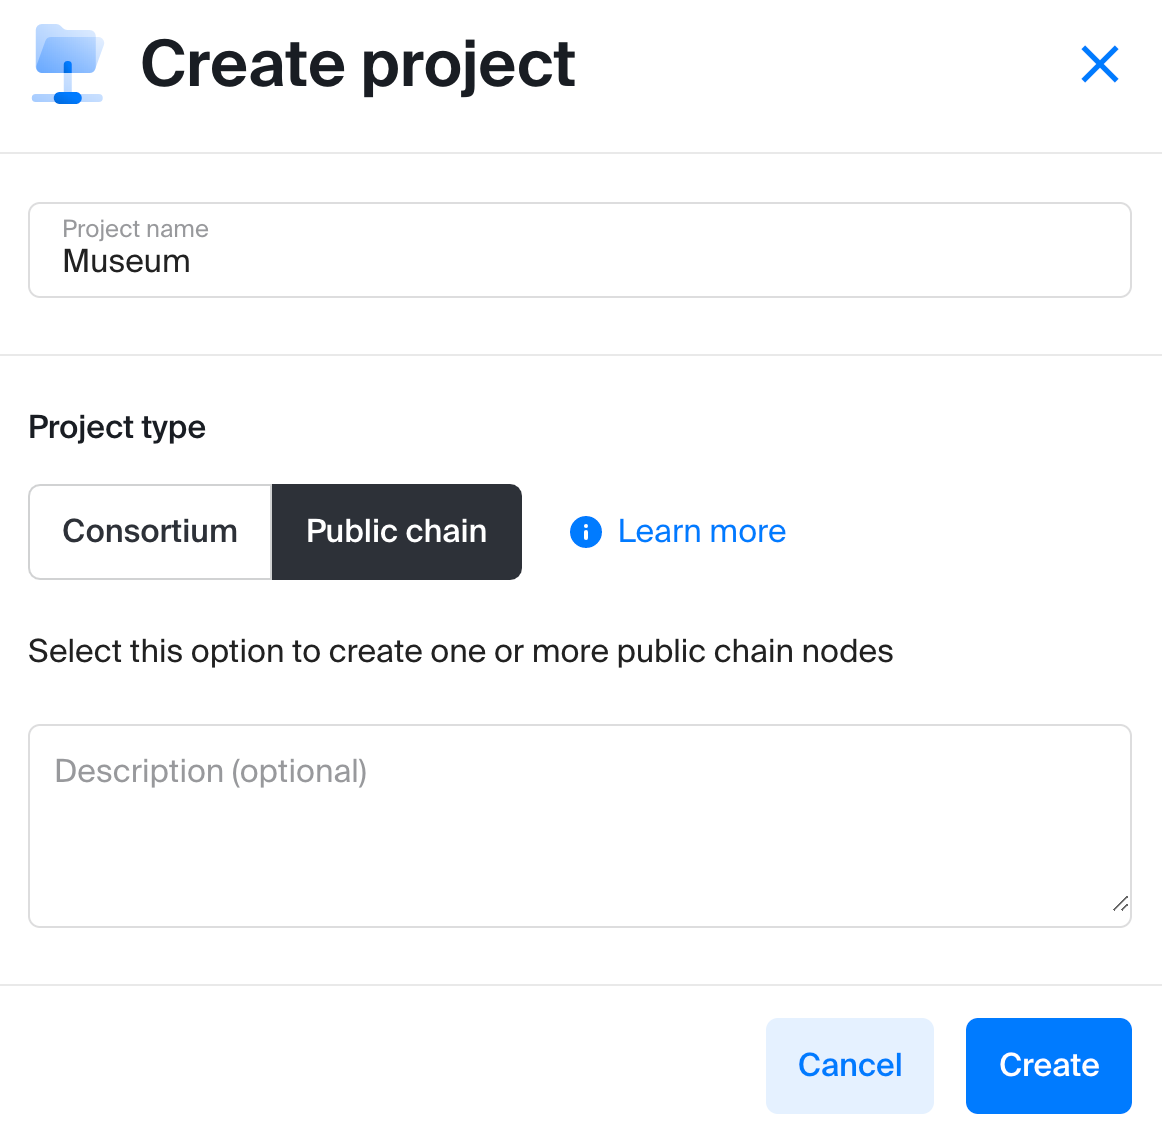
We’ll call our project Museum, choosing the ‘Public chain’ as our project type (naturally, because we are dealing with Ethereum, which is a public chain). Click ‘Create’, and you have your project ready.
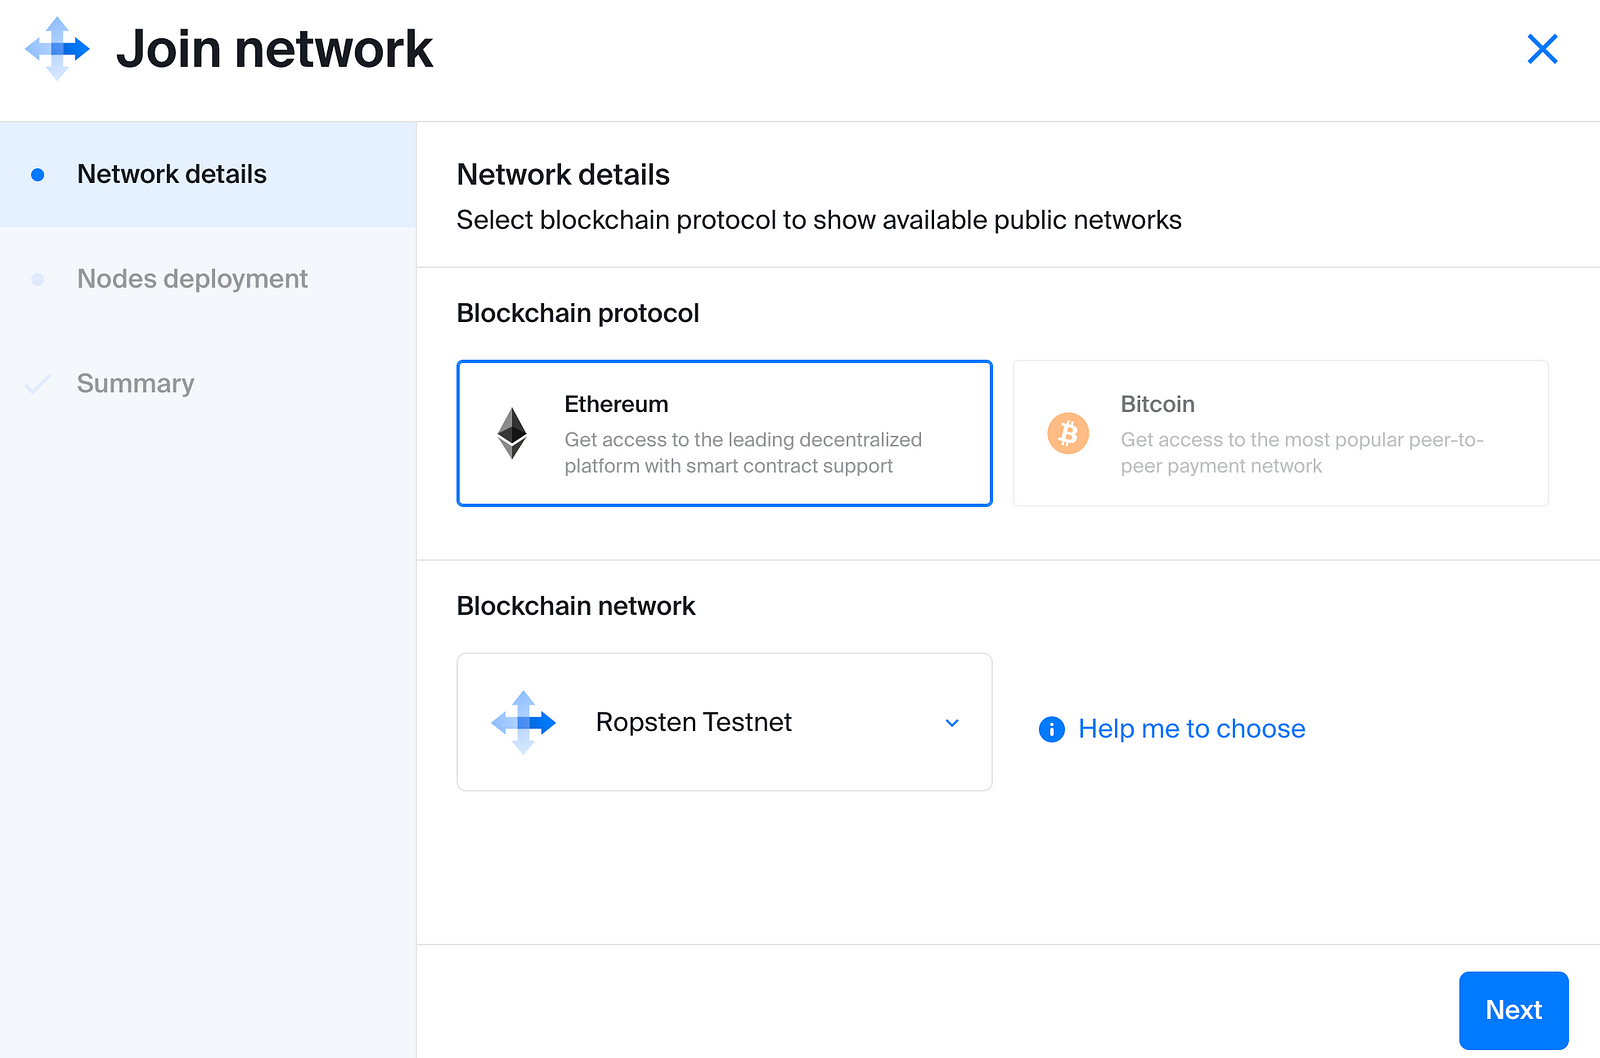
Now click the Embark project listing to get the ‘Join network’ modal. This is where you will specify various parameters to join the Ethereum network. For this tutorial, choose the Ropsten testnet:
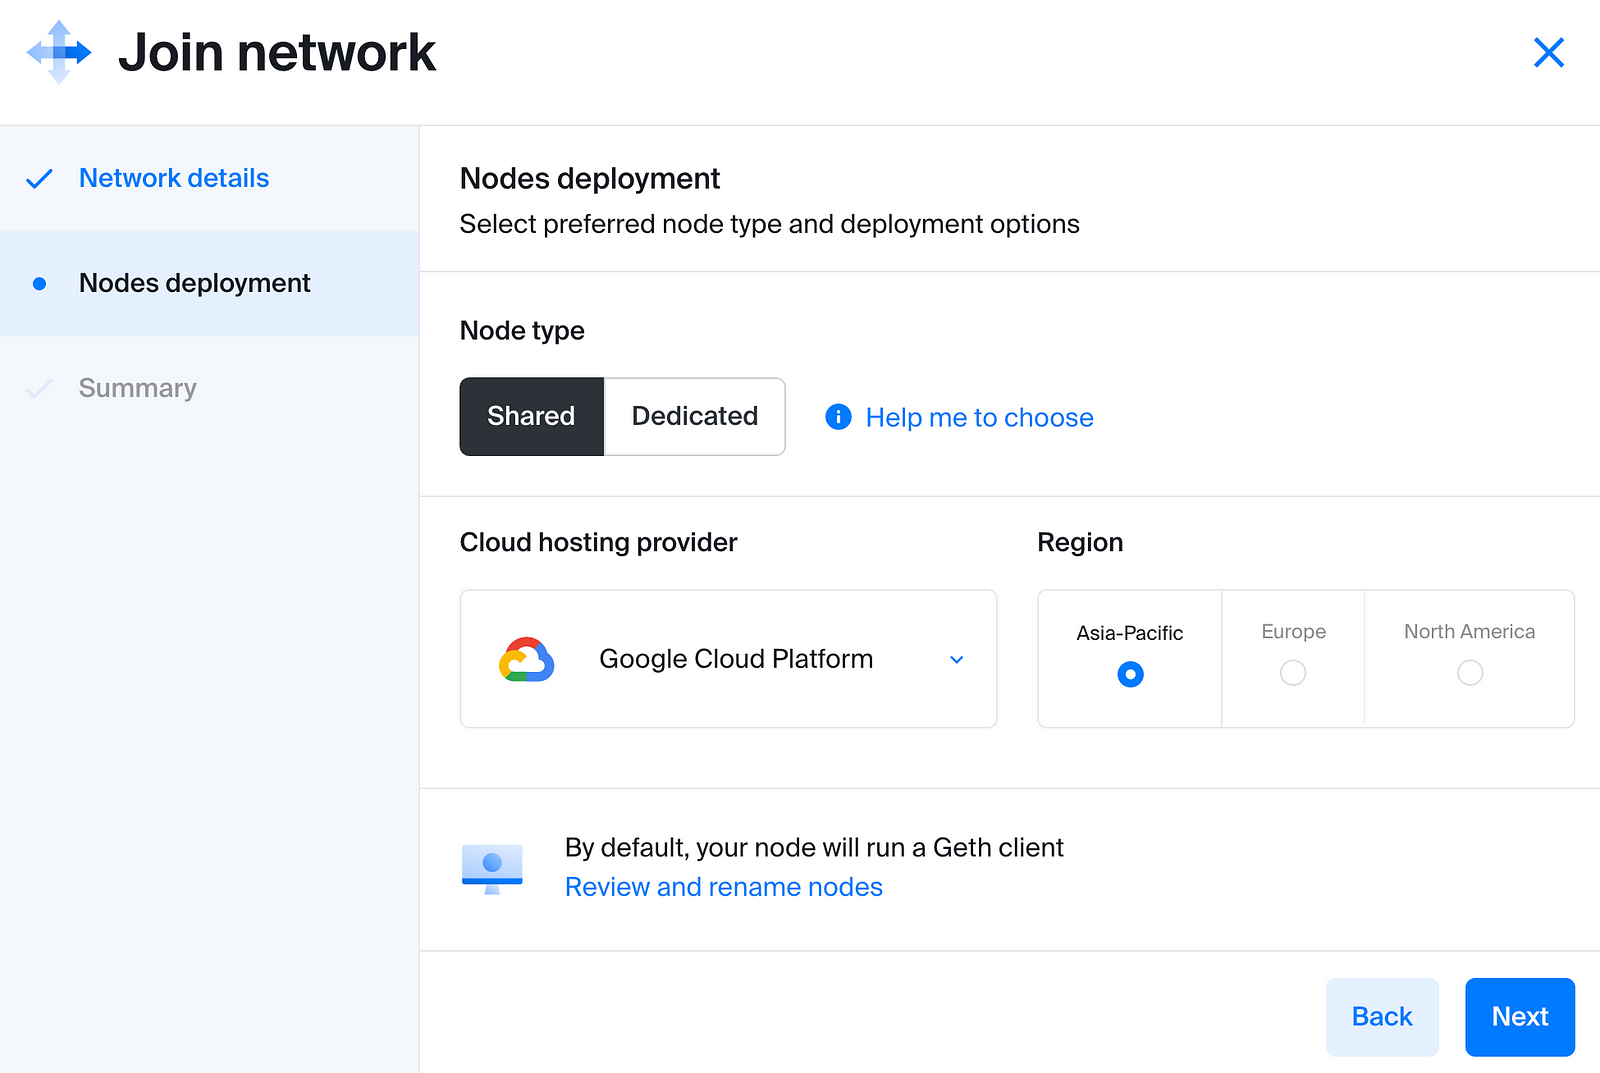
Hit ‘Next‘ to configure our personal Ethereum node. Let’s choose a shared node since that will be enough for this tutorial.
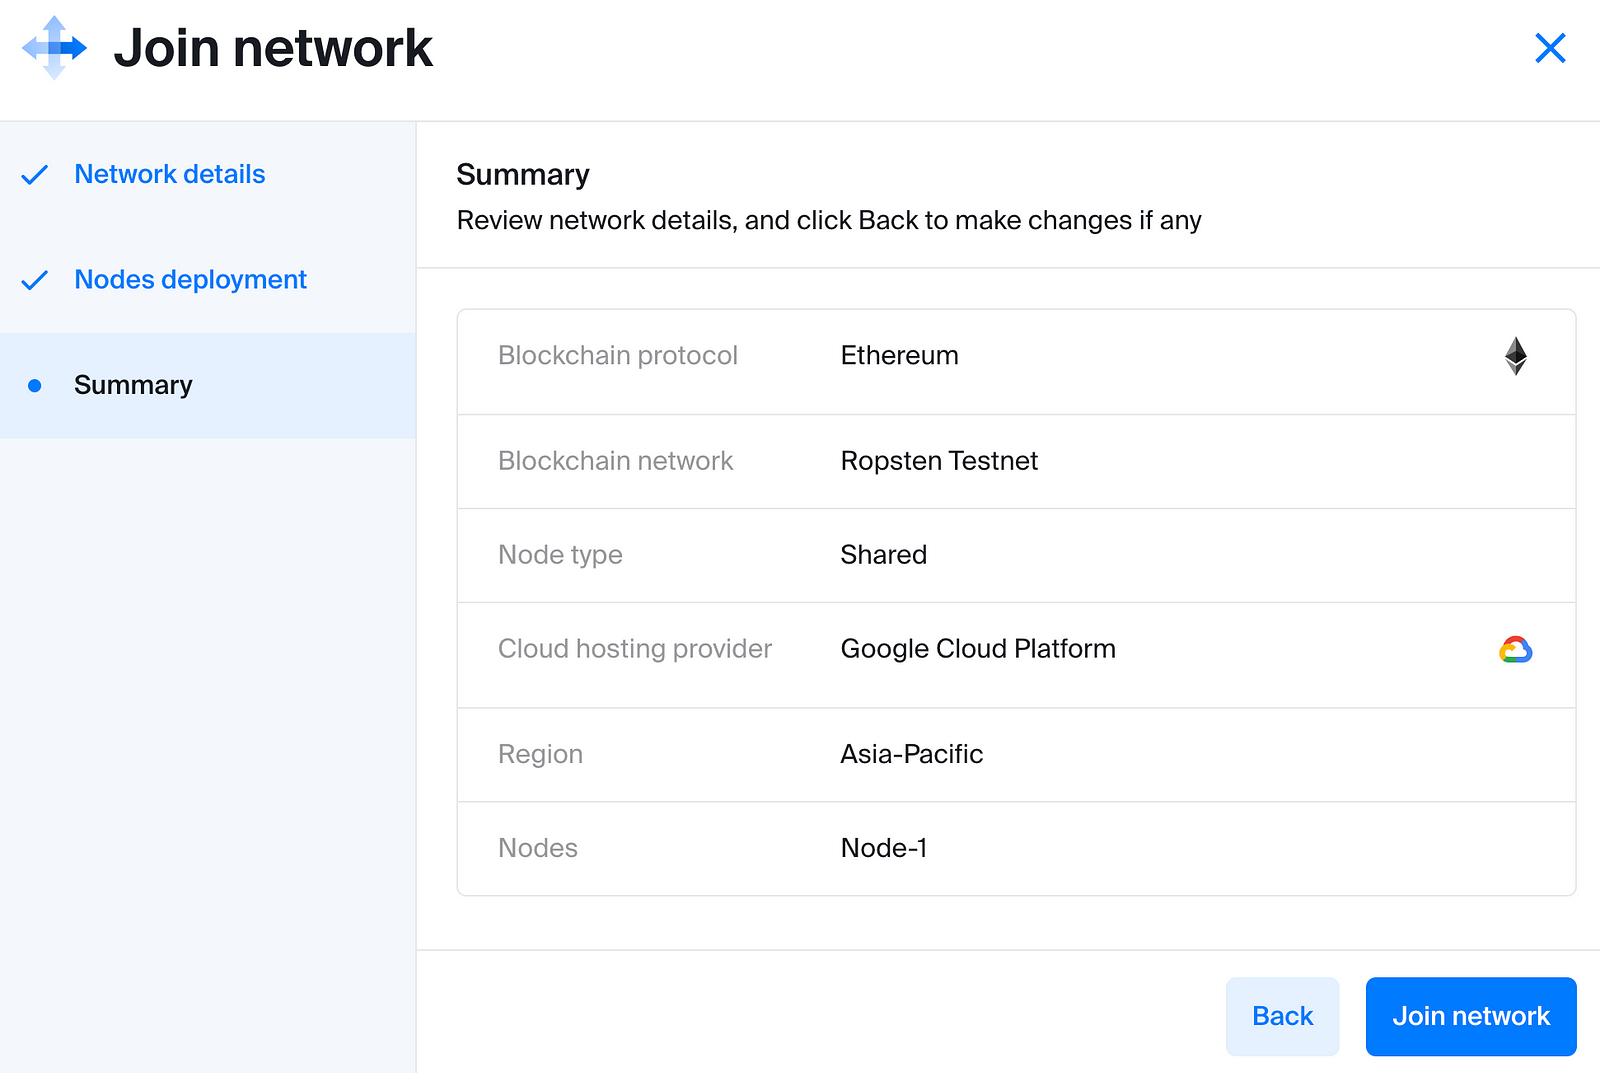
At the summary page, hit ‘Join network’, and wait to see Chainstack’s DevOps for blockchain weave its magic!
How to deploy a smart contract?
On our local machine, let’s create a new Embark project:
embark new Artcd ArtNow let’s copy the smart contract that we created earlier into the contractsfolder.
cp \path\to\art.sol .\contractsWe’re ready to deploy our contract. But how do we get Embark to connect to the Chainstack node that we just created? To do so, let’s create a wallet that will deploy the contract to the network.
geth account new
Follow the instructions to create your new account. For this tutorial, we will be using a keystore file. You can get the path to the keystore file by typing:
geth account list
This generates the addresses you have created along with the path to the respective keystore files. Let’s assume that the keystore file is at /PATH/TO/KEYSTORE/UTC-123.123 for the rest of the tutorial.
Let’s also copy the keystore file to the project directory so we can easily import it into Metamask later on.
/PATH/TO/KEYSTORE/UTC-123.123 .Lastly import the keystore file into Metamask:
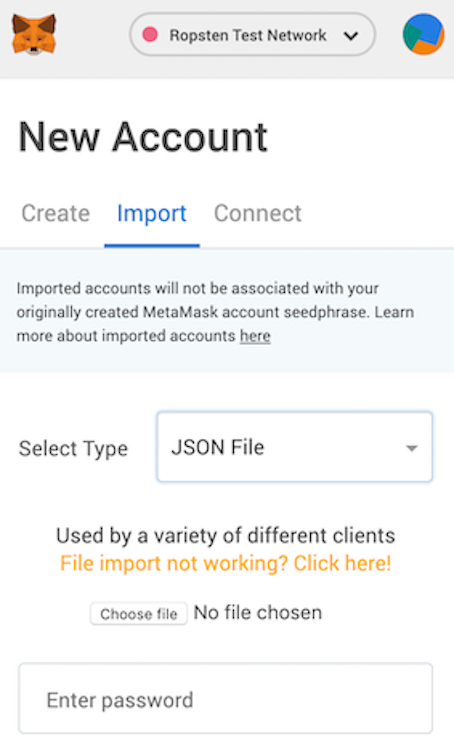
Copy the address of the wallet, and claim some Ropsten ethers here.
Connecting to a Chainstack node
Now go to the node details page in Chainstack, and get its RPC endpoint. If you forgot how to do that, simply log in to Chainstack and then navigate to your projects page. Click on your project Museum. Following that, click on your network name, and in the next page choose the node that you want to connect to. It should bring you to this page:
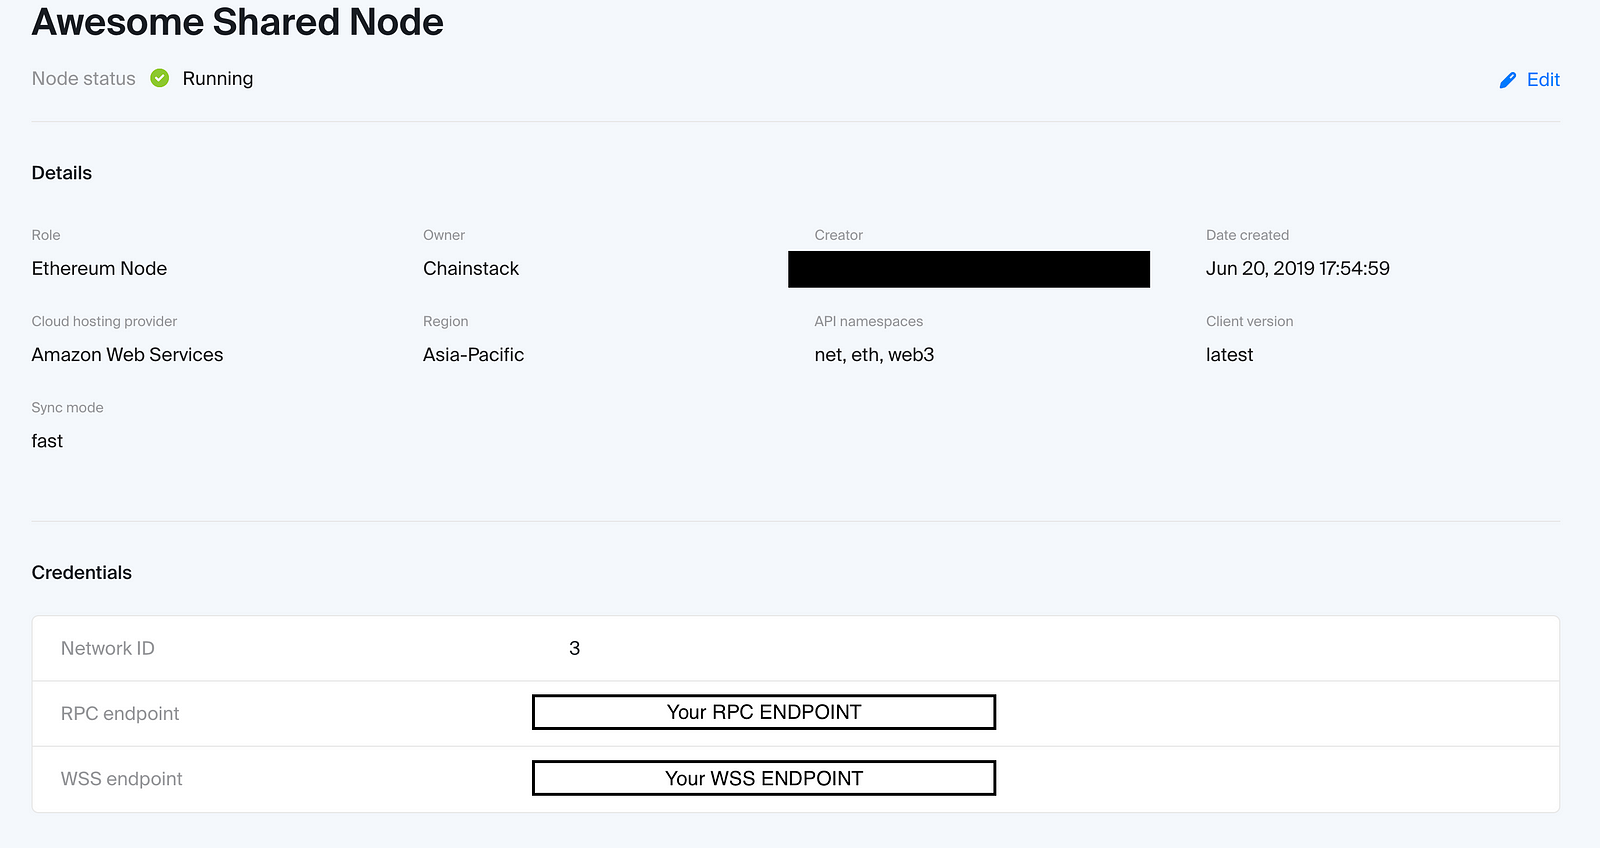
Take note of the RPC and WS endpoints at the end.
The file located /config/contracts.js contains the environment configuration. This file tells Embark the node to connect to. Let’s create one for this tutorial called chainstack. Copy the code below, and append it to the end of contracts.js before the last curly brackets. Be sure to change the variables for privateKeyfile,password and host accordingly.
chainstack: {
    deployment:{
      accounts: [
        {
          privateKeyFile:"/PATH/TO/KEYSTORE/UTC-123.123",
          password:"PASSWORD"
        }
      ],
      host:"RPC_ENDPOINT",
      port:false,
      protocol:"https",
      type:"rpc"

    },
    dappConnection: [
      "$WEB3",  // uses pre existing web3 object if available (e.g in Mist)
      "ws://localhost:8546",
      "http://localhost:8545"
    ],
    gas: "auto",

  }
...
We’re all set. To deploy the contract run the code below in the root of the directory.
embark run chainstack
The chainstack argument after run tells Embark to use the chainstackconfig in contract.js.
Your terminal should display something like this:

Congratulations, you’ve successfully deployed your own contract 🙂
Interacting with the smart contract
Embark conveniently creates a front-end application (called Cockpit) for us to play with our contract.
Enter this into the browser of your choice:
http://localhost:55555/explorer/contracts/ArtYou’ll be prompted for the login token. Go to your terminal and type tokenin the Embark console. This immediately generates and copies the token to your clipboard. Go back to your browser, and you can now log in.
You’ll now be at the contract page of the smart contract you just deployed. Feel free to click on any of the functions and experiment.

Sending some ether to the smart contract
Let’s use the same Ethereum account which deployed Art.sol to send some ethers and get ‘mini’ Lisa Monas in return.
First let’s check how many ‘mini’ Lisa Monas we own. Execute the check() function in Embark’s cockpit. Not suprisingly, it returns the value of 0.
check() //returns 0supply() //returns 1000Now copy the address of the smart contract and send some ethers to this address. Let’s start by sending 0.1 ether.
Going back to Embark’s cockpit, let’s try calling the functions check() and supply() after approximately 30 seconds (we have to let the transaction be mined first).
check() //returns 1supply() //returns 999Voila! You’ve just purchased 1 ‘mini’ Lisa Mona. You now officially own exactly 1/1000 of Lisa Mona, a piece of art so stupendously expensive that it was beyond the reach of most mortals, until now. Also congratulations, for you’ve just deployed and interacted with your own smart contract!
Conclusion
I hope that this tutorial has helped you appreciate how easy it is to deploy a smart contract using a popular framework such as Embark along with Chainstack’s quick node deployment.
At Chainstack, we’re always looking for ways to improve, so drop us a message anytime.
Explore Chainstack
Join our community of innovators
- To learn more about Chainstack, visit our Knowledge Center or join our Discord server and Telegram group.
- Sign up for a free Developer account, or explore the options offered by Growth or Business plans here.
- Take a look at our pricing tiers using a handy calculator to estimate usage and number of nodes.
Have you already explored what you can achieve with Chainstack? Get started for free today.