Ethereum
 Hyperliquid
 Solana
 Arbitrum
 BNB Smart Chain
 Base
Base Polygon
 TRON
TRON Sui
Sui MegaETH


Creating a public blockchain node with Chainstack
Chainstack stopped supporting Hyperledger Fabric nodes in July 2024. Contact our support team at [email protected] if you have any questions, or visit our Help Center.
Introduction
Chainstack is the leading suite of services connecting developers with Web3 infrastructure, powering applications in DeFi, NFT, gaming, analytics, and everything in between. We provide you with highly scalable infrastructure and solutions that allow you to scale your DApp quickly without having to worry about handling all the traffic to and from the blockchain network. In this short tutorial, you will learn how to quickly create a blockchain node with Chainstack in less than 5 minutes.
Signing up
First, you need to create an account with Chainstack if you don’t already have one. Go to the Chainstack console page to create a new account.
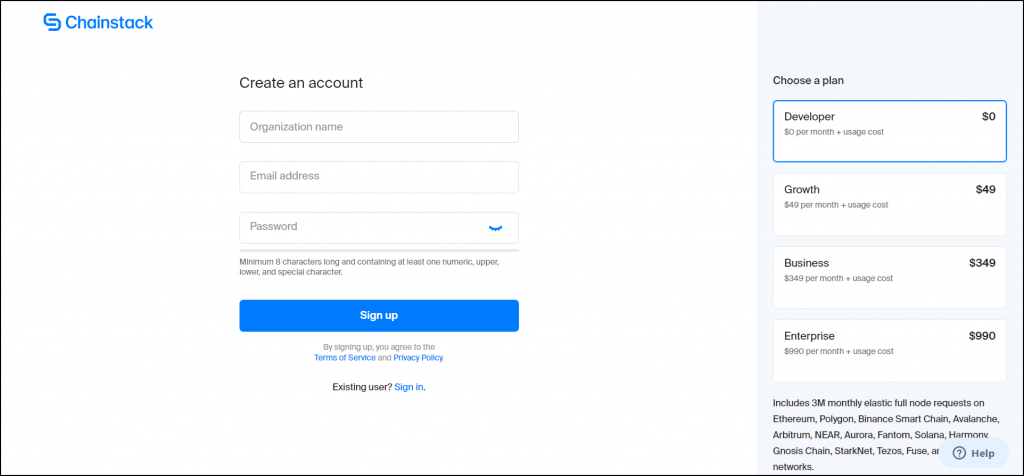
Fill out all the required details and sign up.
You will see a pricing panel on the right side. Choose whatever plan best fits your needs. You will be required to enter the details of a credit/debit card, but don’t worry, you won’t be charged if you sign up for a developer plan.
Our developer plan allows you to send 3 million free requests per month to the blockchain through your exclusive Chainstack endpoints. This means you can give our services a good try before having to spend your money. You can find more details about our pricing on our website.
We also have a usage cost calculator on our pricing page that allows you to look at your expenses as per your subscribed plan and usage.
After this, you will receive a confirmation mail at your registered email address. Click on the link to verify your account, and you are now ready to create your first project.
Creating a new project
Once you log in to your Chainstack account, you will see an empty dashboard. Click on the Get started button to create your first project.
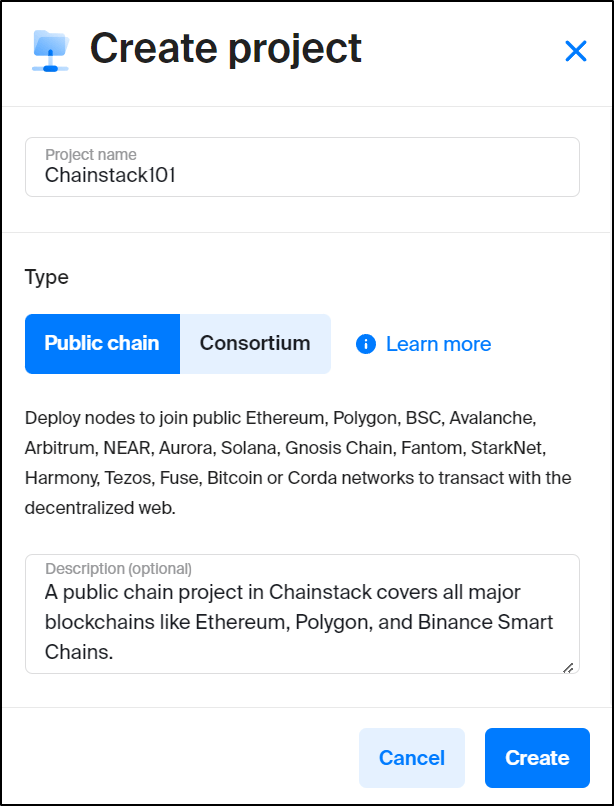
Chainstack allows you to create two types of projects:
- A public blockchain project which allows you to connect to all the major blockchains like Ethereum, Polygon, and Binance Smart Chain. These are all the public blockchains that are available to everyone with an internet connection.
- A consortium project which allows you to deploy blockchain nodes to semi-private networks like Hyperledger Fabric or Corda, which typically focus on private transactions, and are not permissionless.
For this tutorial, we will create a public chain project. Give your project a name, and a description if you so wish, and then click on Create.
Click on your new project in the dashboard. You are now ready to join a blockchain network.
Joining a network
Once inside a project, click on Get started. Let us first choose the network we want to connect to. Chainstack supports more than a dozen major public blockchains, along with their corresponding testnets. You can read more about the supported protocols from our docs. For this tutorial, we will be deploying a node to the Polygon mainnet.
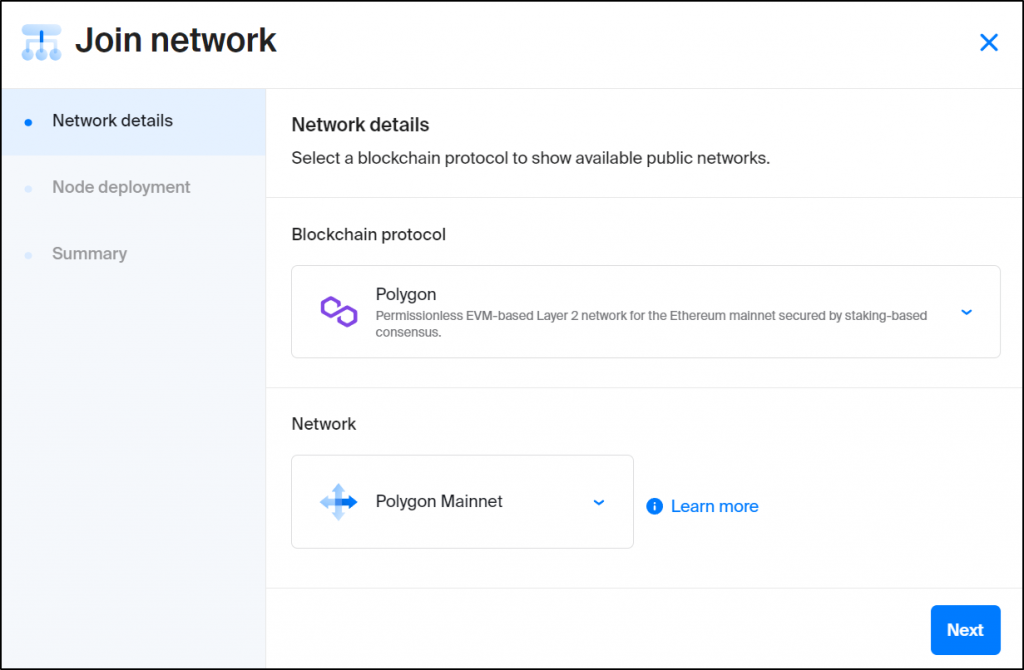
Click on Next. This will take you to the node deployment window where you can configure the exact features you want out of your node. Let us look at all the options we have here:
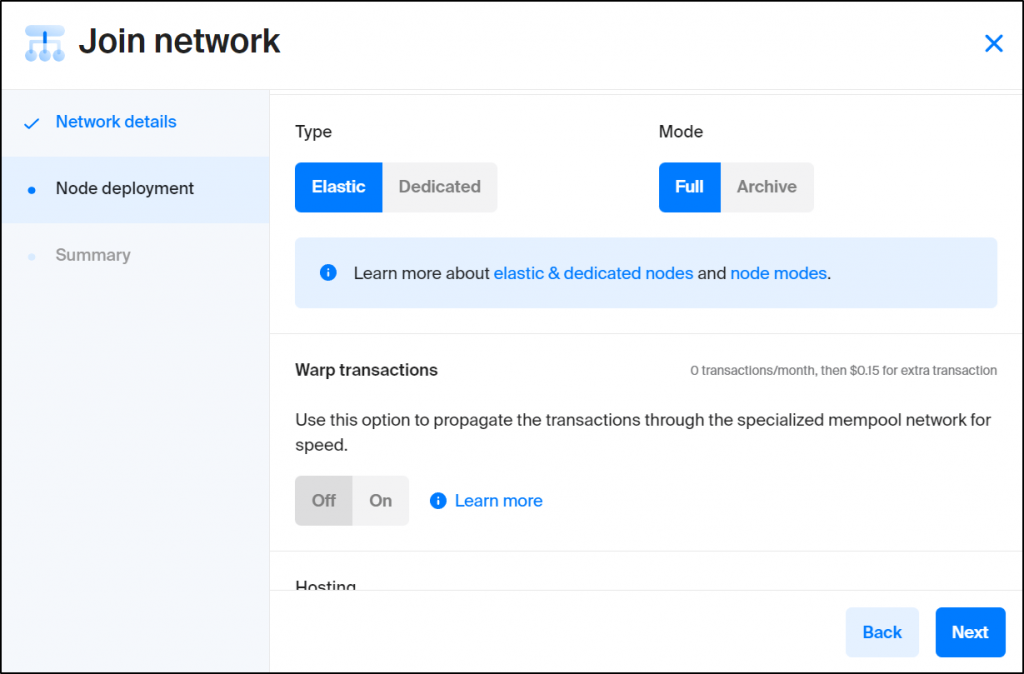
Elastic nodes vs dedicated nodes
An elastic node allows you to access a very fast, highly scalable blockchain node through your exclusive Chainstack endpoints. A dedicated node on the other hand is a new node deployed to the blockchain that is exclusive to you. Nobody else has the credentials to access your dedicated node.
Full nodes vs archive nodes
A blockchain network is basically a sequential production of new blocks. All of those blocks have their own data, and to query the data of older blocks, you need an archive of their historical states. A full node stores the data of the recent states, meaning you can easily query the data of these latest blocks in your application. If you need to query data older than this though, you need an archive node that will allow you to query data right up to the genesis block.
Warp transactions
We have partnered with bloXroute to offer Warp transactions to our users. A warp transaction is like any other transaction, except that it is distributed to the entire network through bloXroute’s high-speed relay network. This will allow your transactions to be picked up by the validators much more quickly when it really counts.
Hosting
Chainstack gives you many options to configure your node deployment. You can either choose one of the many cloud providers we offer across multiple regions, or you can opt into privately hosting your node. Private hosting is however available only with our Business/Enterprise plans, and you need to get in touch with us so that we can offer you the engineering help you will need to host your own node privately.
Scroll to the bottom and give your node a name. Click Next.
Create a blockchain node with Chainstack
The summary window will show you all the configurations of the node you are about to deploy on a single page. Here is how it looks for me.
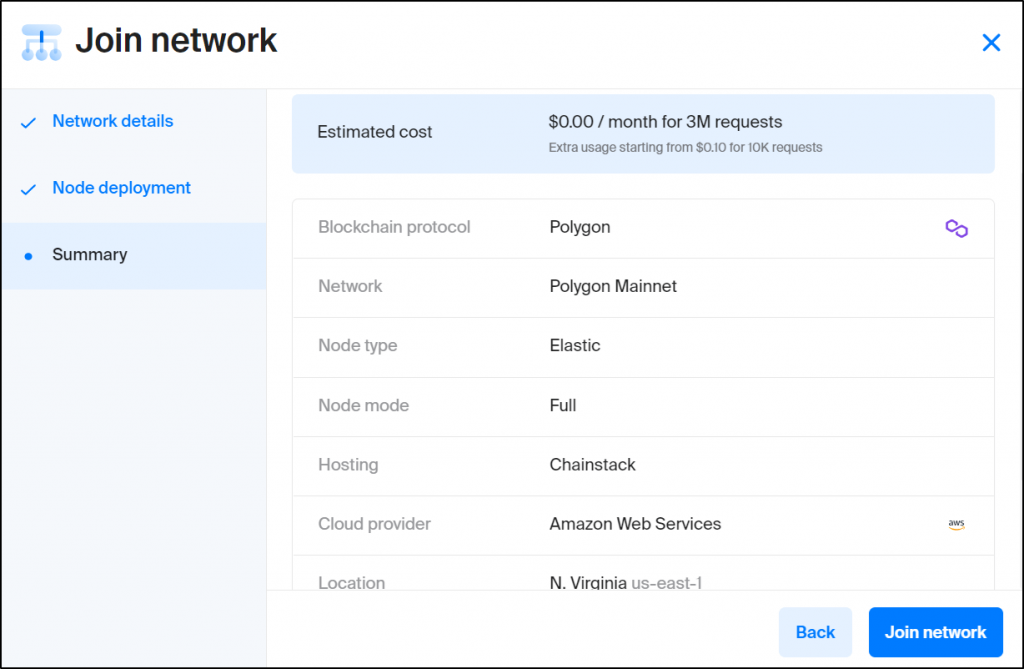
Verify everything and click on Join network. Your node may take a few moments to deploy. Once that is done, click on your now running node to view your exclusive endpoints, as well as your node’s running history.

Our node dashboard shows you the node’s entire performance history, along with a detailed chart. You can view your access credentials by scrolling to the bottom of the page. Check out our blog to learn how to use these credentials to create some cool projects.
Conclusion
The idea of this article was to show our users how they can quickly get up and running with a highly scalable blockchain node with Chainstack. We are continuously working on bringing support for more and more protocols and extending the scope of our services for our users. Feel free to go through our docs, or to reach out to us.
- Discover how you can save thousands in infra costs every month with our unbeatable pricing on the most complete Web3 development platform.
- Input your workload and see how affordable Chainstack is compared to other RPC providers.
- Connect to Ethereum, Solana, BNB Smart Chain, Polygon, Arbitrum, Base, Hyperliquid, Tempo, MegaETH, Monad, Plasma, Avalanche, Optimism, Scroll, Aptos, Cronos, Gnosis Chain, Kaia, Moonbeam, Celo, Aurora, TON, Ronin, and Bitcoin mainnet or testnets through an interface designed to help you get the job done.
- Fast access to blockchain archive data and gRPC streaming on Solana.
- To learn more about Chainstack, visit our Developer Portal or join our Telegram group.
- Connect your AI agent to Chainstack in seconds using Chainstack MCP — give Claude, Cursor, Codex, Gemini, and Windsurf live access to blockchain data, node management, and docs.
- Are you in need of testnet tokens? Request some from our faucets. Sepolia faucet, Base Sepolia faucet, Solana devnet faucet, Hoodi faucet, BNB faucet, zkSync faucet, Scroll faucet, Hyperliquid faucet, Monad faucet, Amoy faucet, Plasma faucet, TON faucet.
Have you already explored what you can achieve with Chainstack? Get started for free today.