Ethereum
 Hyperliquid
 Solana
 Arbitrum
 BNB Smart Chain
 Base
Base Polygon
 TRON
TRON Sui
Sui Robinhood


How to run a self-hosted blockchain node on velia.net
You don’t really know what your RPC provider’s infrastructure looks like. You know what their status page tells you, what their docs claim, and what you can infer from response times. Everything else — the noisy neighbors, the rate limit tuning, the shared bandwidth, the failover logic that may or may not work the day you actually need it — is invisible to you.
That’s fine until it isn’t. When something breaks on shared infrastructure, you’re not at the front of the queue. You’re not in the queue at all. You wait, your users wait, and your post-mortem ends with “third-party outage” — a sentence that has never once made anyone happier.
The fix is to stop renting access and start owning the node. With Chainstack Self-Hosted as a one-click install on velia.net bare metal, this is a checkout away. No DevOps marathon, no chasing Geth/Reth/Lighthouse compatibility matrices, no provisioning scripts you’ll regret in six months. This guide walks you through the whole thing — server pick to live node.
What is Chainstack?
Chainstack is a managed blockchain infrastructure platform for teams that need production-grade RPC access without becoming an infrastructure team. The product line spans Global Nodes, Dedicated Nodes, and Self-Hosted — three layers of how much of the stack Chainstack runs for you versus how much you run yourself.
Self-Hosted is the deepest control option: your hardware, your endpoints, your data, your network policies. Chainstack handles the node software lifecycle — deployment, health checks, updates, self-healing — and stays out of everything else.
velia.net is a Chainstack partner offering Chainstack Self-Hosted as a one-click software option on its web3 server line.
Before you start
You’ll need:
- A velia.net account (sign up)
- A payment method (card or bank transfer, EUR billing)
- An SSH key pair for server access (you’ll paste it during checkout)
- Optionally, a domain name if you want to reach the Chainstack panel via a hostname instead of an IP
SSH key pair — how you log into the server without a password. If you don’t have one already, run this in your terminal:
ssh-keygen -t ed25519 -C "[email protected]"Press Enter through the prompts. Then:
cat ~/.ssh/id_ed25519.pubThat’s your public key. Copy the full output — you’ll paste it during checkout.
Step-by-step guide
Step 1: Open the launch config
Velia is running an 80% first-month discount with ChainstackSH80 on the Chainstack web3 launch configuration. Start here:
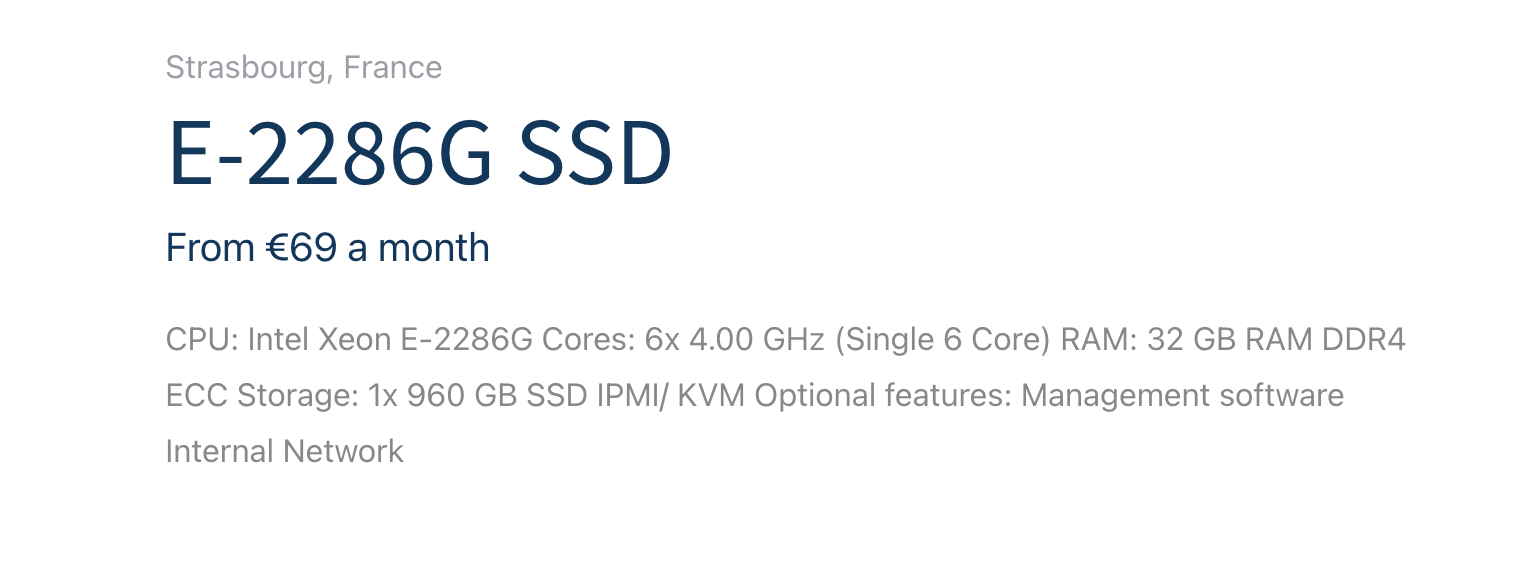
That link opens the configurator for the E-2286G SSD in Strasbourg, France:
- 6-core Intel Xeon E-2286G at 4.00 GHz
- 32 GB DDR4 ECC RAM
- 1× 960 GB SSD
- IPMI/KVM included
- From €69/month standard. From €13.80 first month with
ChainstackSH80.
This is a solid box for evaluating Chainstack Self-Hosted on Sepolia or Hoodi testnets at base spec. For Ethereum mainnet, bump storage in the configurator (Step 2) — mainnet needs 2 TB+ of NVMe, the default 960 GB SSD won’t fit it. For anticipated scale or higher-tier hardware, contact us and we’ll scope a configuration with you.
Step 2: Configure hardware
Scroll down past the header into the Product configuration panel. The hardware decisions are the first three blocks:
- RAM — 32 GB by default. Bump to 64 GB (+€22/mo) if you’re running heavier execution clients or multiple nodes on one box.
- Storage — 1× 960 GB SSD by default. For more storage take 2× 1.92 TB SSD Data Center Edition (+€60/mo), available as No RAID or Software RAID 1.
- NVMe SSD (Data Center Edition) — No NVMe by default. Adding 1× 960 GB NVMe (+€20/mo) or 2× 960 GB NVMe (+€40/mo, RAID 1 optional) is worth it for I/O-heavy workloads — node sync and DB writes get noticeably faster on NVMe than on SATA SSD.
The right column shows a live Configuration summary that updates as you toggle options.
Step 3: Pick Chainstack Self-Hosted under Management Software
This is the step that makes everything else work. Scroll down to Management Software and select Chainstack Self-Hosted.
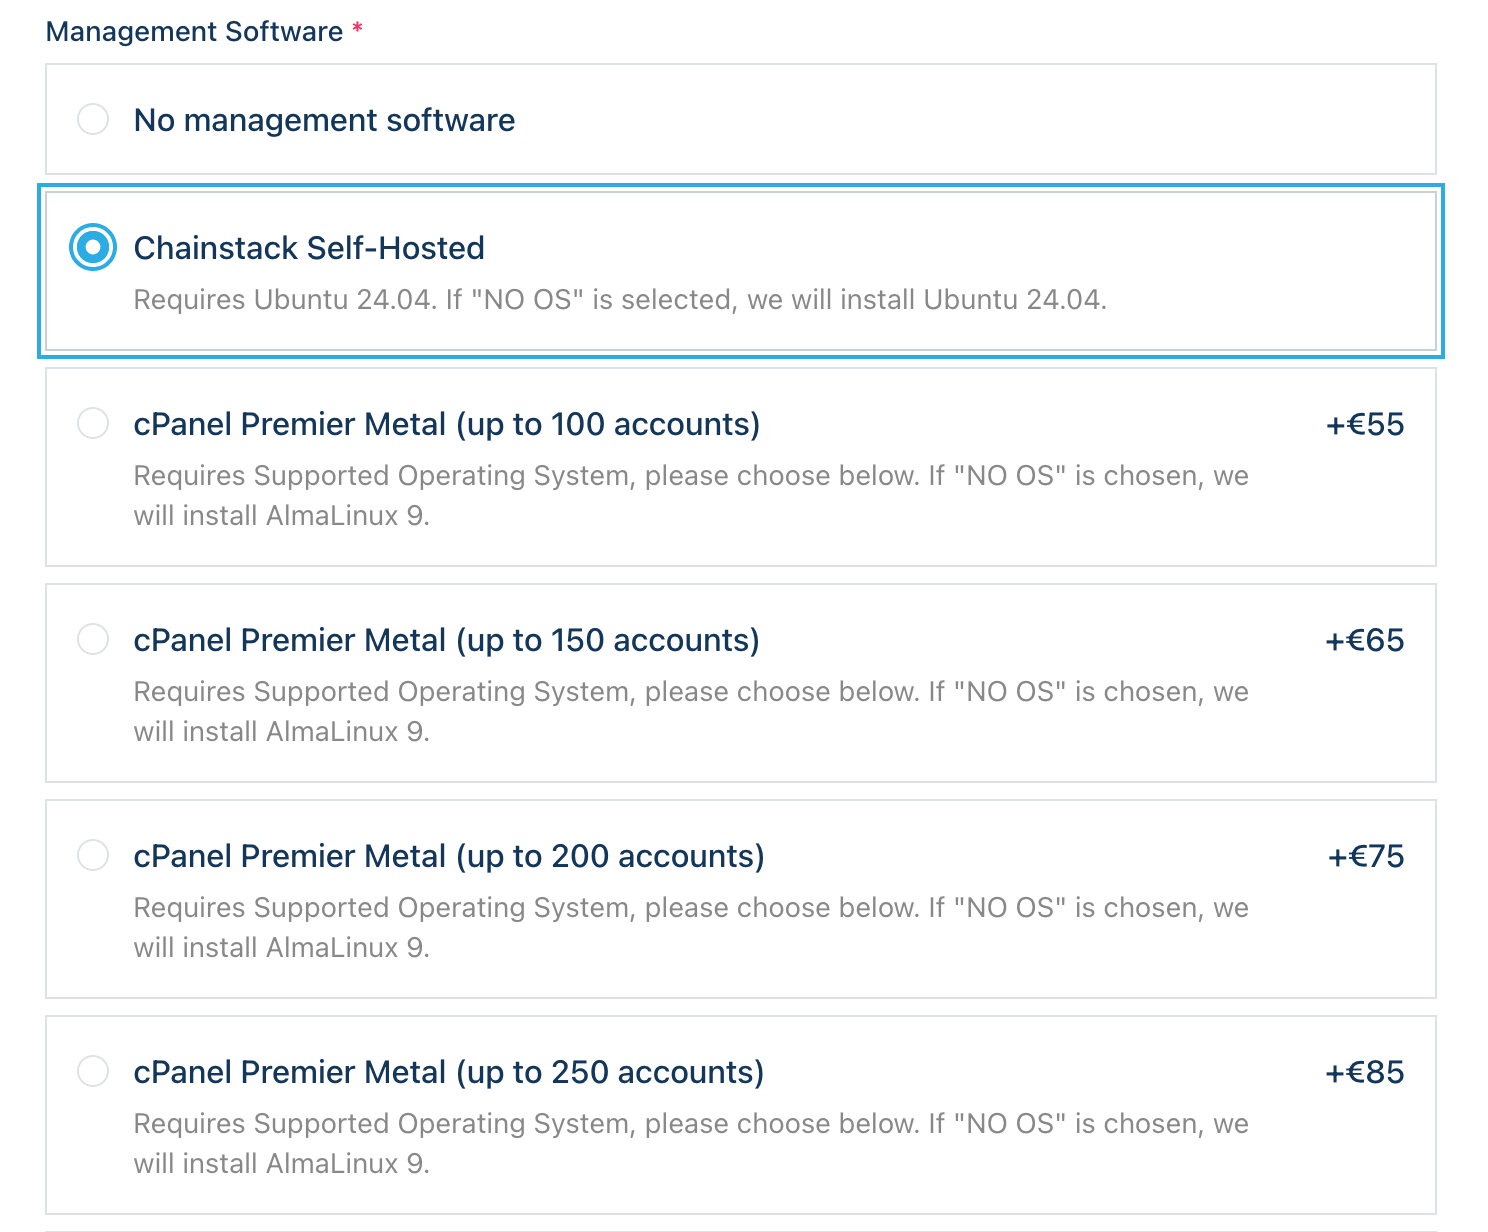
By default this block is set to “No management software” — if you skip it, you’ll get bare Velia hardware with no Chainstack layer on top, and you’ll be back to manual node installation. Pick Chainstack Self-Hosted explicitly.
Underneath the option Velia notes: “Requires Ubuntu 24.04. If ‘NO OS’ is selected, we will install Ubuntu 24.04.” In other words, you don’t need to touch the Operating System block below — leaving it on “No installation (I’ll do the installation myself via KVM/IPMI)” lets Velia auto-install Ubuntu 24.04 under Chainstack. If you’d rather pick the OS yourself, choose Ubuntu 24.04 explicitly from the OS list.
Step 4: Confirm network and optional add-ons
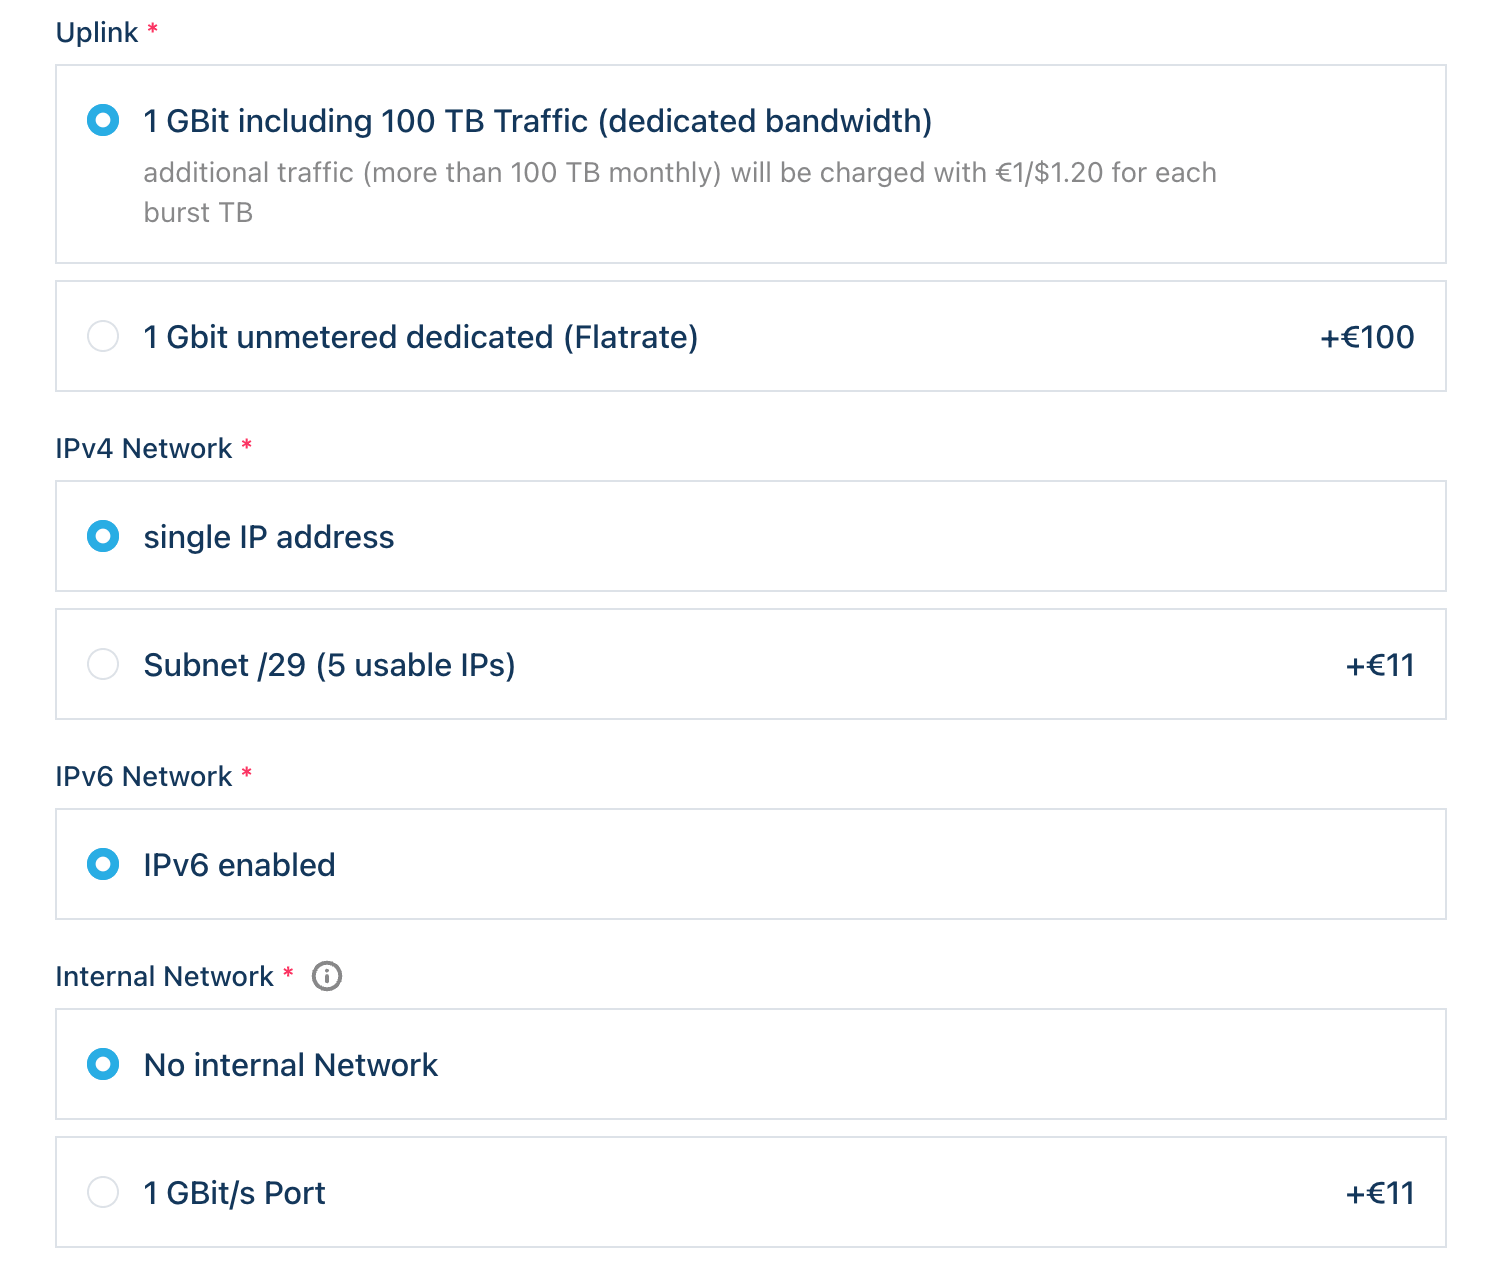
The remaining blocks govern network and optional services. For most first deployments the defaults are fine:
- Power Supply — UPS-protected terminal. Fixed, no choice.
- Bandwidth — 1 GBit port with 100 TB monthly included; extra traffic billed at €1 per TB. Switch to 1 Gbit unmetered (Flatrate) (+€100/mo) if you’re running a public RPC endpoint with heavy egress.
- IPv4 Network — single IP address by default. Take Subnet /29 (5 usable IPs, +€11/mo) if you’re planning multiple services behind the same box.
- IPv6 Network — IPv6 enabled. Fixed, no choice.
- Internal Network — 1 GBit/s private port (+€11/mo). Useful if you’re going to add more Velia servers later and want them on a private segment.
- Backup — Acronis Cyber Backup Cloud at 100 GB / 200 GB / 500 GB / 1 TB tiers (+€6 / +€11 / +€28 / +€50/mo). Worth it for production data; skip for pure evaluation.
Step 5: Add to cart, apply the promo, and check out
In the Configuration summary panel on the right, pick your term (1 month is the default; longer terms may be in the dropdown) and click Add to cart.
On the cart and checkout screens you’ll go through:
- Account login or signup
- Contact and billing details (EUR billing, commercial customers only — no VAT shown in displayed prices)
- An SSH key pair for server access (recommended) — Velia also supports password-based access if you’d rather skip the key
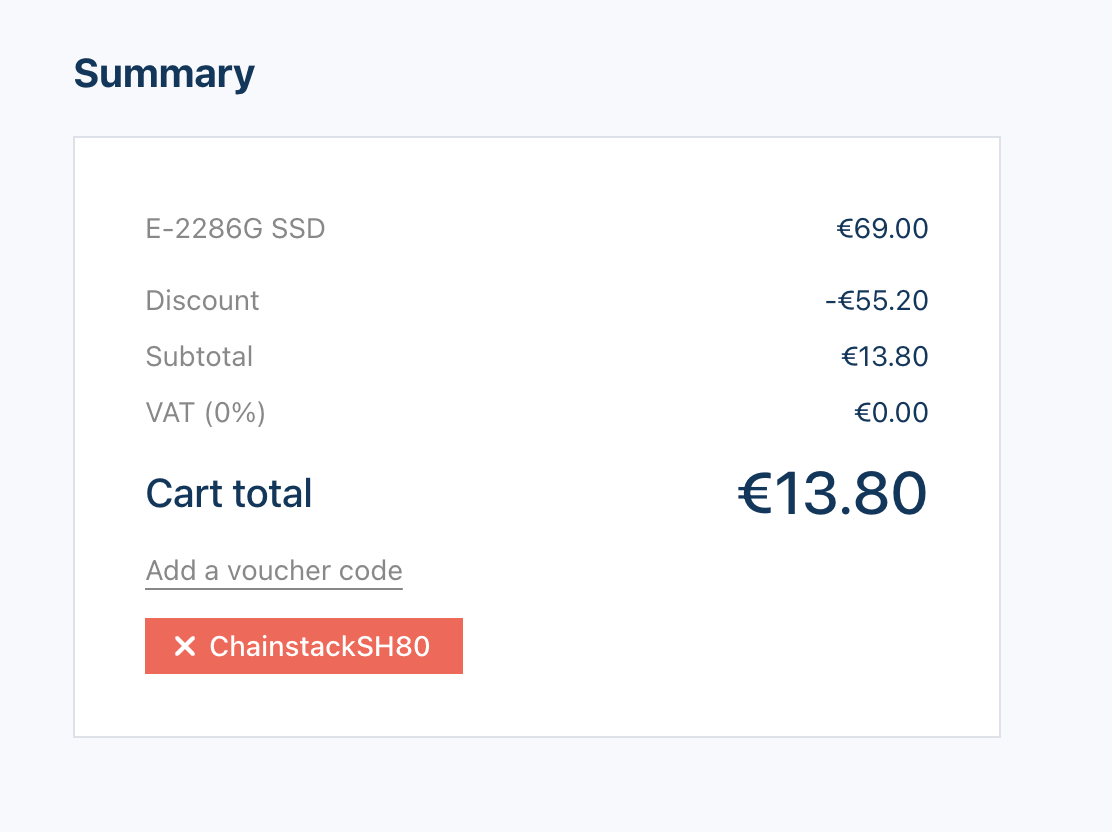
- Promo code — enter
ChainstackSH80to apply 80% off the first month. The discounted first month starts from €13.80 (down from €69), depending on the add-ons you selected in Steps 2–4. Standard pricing resumes from month two. - Payment
Submit the order. Provisioning is fast because you’re getting actual bare metal that’s already racked and pre-imaged — typically minutes, not hours. Once it’s ready, Velia will email you the server IP and access details.
After deployment
Your server is live. Two things to do next: log into the Chainstack panel and deploy your first node.
1. Find the Chainstack panel URL
SSH into the server and check the installer output for the Control Panel URL. The exact URL depends on how the services are exposed on your install — see the first-login guide for the exposure options (LoadBalancer, NodePort, Ingress, or port-forward).
Open the URL in your browser. You’ll land on the Chainstack login screen.
2. Retrieve the bootstrap password
SSH into the server:
bash
ssh root@<server_ip>Then retrieve the auto-generated admin password:
bash
yq '.cp-auth.env.CP_AUTH_BOOTSTRAP_PASSWORD' /root/.config/cp-suite/values/cp-control-panel-*.yamlUsername is admin. Paste the password into the login form.
3. Change the admin credentials immediately
Click Settings in the left sidebar. Under Personal Information, change both the username (away from default admin) and the password. Once you save, the bootstrap password from the values file is no longer valid — store the new credentials somewhere you’ll find them later.
4. Deploy your first node
Open the Nodes menu and click Add node to start the deployment wizard. You’ll pick:
- Protocol — Ethereum (additional protocols on the roadmap).
- Network — Ethereum Mainnet, Sepolia testnet, or Hoodi testnet.
- Node type — full node (validator support is on the roadmap for late 2026).
- Deployment preset — pre-configured with the Reth execution client and Prysm consensus client, tuned for stability and performance.
Complete the wizard and Chainstack provisions the node on your server. Spin-up takes around 10 minutes; sync time depends on the chain — Hoodi syncs in minutes to hours, Sepolia in hours, Ethereum Mainnet full in a few hours with a snapshot or days without.without.
5. Get your RPC endpoint
Once the node is live, open its details page in the panel. You’ll find the connection details:
- Execution client HTTP — JSON-RPC over HTTP (port 8545)
- Execution client WSS — JSON-RPC over WebSocket (port 8546)
- Consensus client HTTP — Beacon API (port 5052)
These endpoints are internal Kubernetes service addresses by default. To use them from outside the server, expose the services via LoadBalancer, NodePort, or Ingress — see managing nodes in the docs. Point your dApp at the exposed endpoint — a private connection with no rate limits, no shared infrastructure layer between you and the chain.
Summary
The pitch is short. The work is short.
You get bare metal in a tier-1 European data center, a node deployment workflow that runs through a web panel instead of through hand-rolled Ansible, and a first month from €13.80 that lets you evaluate the whole stack for less than a casual lunch.
In return, you stop sharing infrastructure with strangers, stop hitting rate limits during launches, and stop reading other people’s status pages.
FAQ
Server provisioning is typically minutes since the hardware is pre-racked. Node deployment through the Chainstack panel takes about 10 minutes. Initial chain sync is the long part — that depends entirely on the protocol and node type, from a few hours for an Ethereum full node up to several days for archive.
With the default 32 GB RAM and 960 GB SSD: Sepolia and Hoodi testnet full nodes, evaluation deployments, and dev/staging setups on Chainstack Self-Hosted’s currently supported scope (Ethereum Mainnet, Sepolia, Hoodi). For Ethereum Mainnet, scale storage up in the configurator — 2× 1.92 TB SSD covers the 2 TB minimum. The base 960 GB SSD isn’t enough for mainnet state. As more protocols come to Chainstack Self-Hosted, contact us for hardware sizing.
No. The Velia configurator installs Chainstack Self-Hosted on Ubuntu 24.04 automatically when you pick that option under Management Software. Chainstack then handles node deployment through its web panel. Basic Linux familiarity is enough — you SSH in once to retrieve the bootstrap password, and after that you live in the browser.
Strasbourg, France. EU jurisdiction, GDPR-relevant, with strong peering across European validator clusters.
It gives you 80% off the first month on the E-2286G SSD launch configuration accessed via this checkout link — from €13.80 for month one, down from €69 standard, depending on the add-ons you pick in the configurator. Standard pricing resumes from month two.
Additional resources