AI-ready infrastructure
 Refer and earn


 Ethereum
 Hyperliquid
 Solana
 Arbitrum
 BNB Smart Chain
 Base
Base Polygon
 TRON
TRON Sui
Sui Robinhood


How to run a Robinhood Chain node on AWS

Running your own Robinhood Chain node gives your applications an RPC endpoint on infrastructure you control. It also means managing the server, storage, blockchain client, and monitoring.
Chainstack Self-Hosted provides a control plane for deploying and managing blockchain nodes in your own environment. In this guide, we’ll install it on an AWS EC2 instance, deploy a Robinhood Chain full node, and check that the node is ready to serve requests.
We’ll use a single-server Kubernetes setup with k3s. This provides a straightforward starting point for evaluation and an initial deployment. A production architecture will need additional planning for availability, backups, and endpoint access.
What you’ll deploy
The setup has three parts:
- Amazon EC2 provides the Linux server and compute resources.
- k3s runs the Kubernetes workloads.
- Chainstack Self-Hosted provides the interface for deploying and managing your Robinhood Chain node.
Robinhood Chain uses Arbitrum Nitro and settles to Ethereum. Its node needs access to both an Ethereum execution RPC endpoint and an Ethereum Beacon API endpoint to retrieve parent-chain data, including blobs. These are separate from the Robinhood Chain RPC endpoint your applications will use.
This walkthrough targets mainnet. The network identifiers are:
| Network | Chain ID | eth_chainId response |
|---|---|---|
| Robinhood Chain mainnet | 4663 | 0x1237 |
| Robinhood Chain testnet | 46630 | 0xb626 |
1. Plan your EC2 resources
Size the server for both the Control Panel and the blockchain node.
The Control Panel requires at least 5 CPU cores, 6 GiB of RAM, and 15 GB of storage. Chainstack recommends 8 cores, 16 GiB of RAM, and 20 GB of storage for the Control Panel itself. Blockchain workloads consume additional resources.
The current Robinhood Chain presets specify:
| Network | Node vCPU | Node RAM | Listed steady-state storage |
|---|---|---|---|
| Mainnet | 8 | 64 GiB | 300 GB |
| Testnet | 4 | 32 GiB | 300 GB |
Both use Nitro. Snapshot bootstrap temporarily needs approximately twice the listed steady-state node storage because the downloaded archive and extracted data coexist.
An EC2 r6i.4xlarge, with 16 vCPUs and 128 GiB of memory, is a reasonable starting candidate for this single-node walkthrough. It accommodates the mainnet preset and Control Panel minimum with additional headroom. This is a sizing suggestion, not a workload benchmark.
Check current storage needs before launching
Treat the preset’s storage figure as a planning reference. Robinhood’s own guide recommends several terabytes and locally attached NVMe storage, with capacity for twice the current chain size plus a buffer.
Before provisioning AWS storage, confirm the current snapshot size and the capacity required by the selected Chainstack preset. Allow room for extraction, chain growth, Kubernetes data, and the operating system.
For a simple persistent-disk walkthrough, you can use an adequately sized EBS gp3 root volume. This is an architectural tradeoff: EBS simplifies persistence, while Robinhood recommends local NVMe for node performance. Evaluate disk performance before relying on this layout for production.
With gp3, capacity, IOPS, and throughput are separate settings. Increasing disk size alone does not increase its baseline performance.
2. Launch an Ubuntu EC2 instance
In the AWS console:
1. Open EC2 and choose Launch instance.
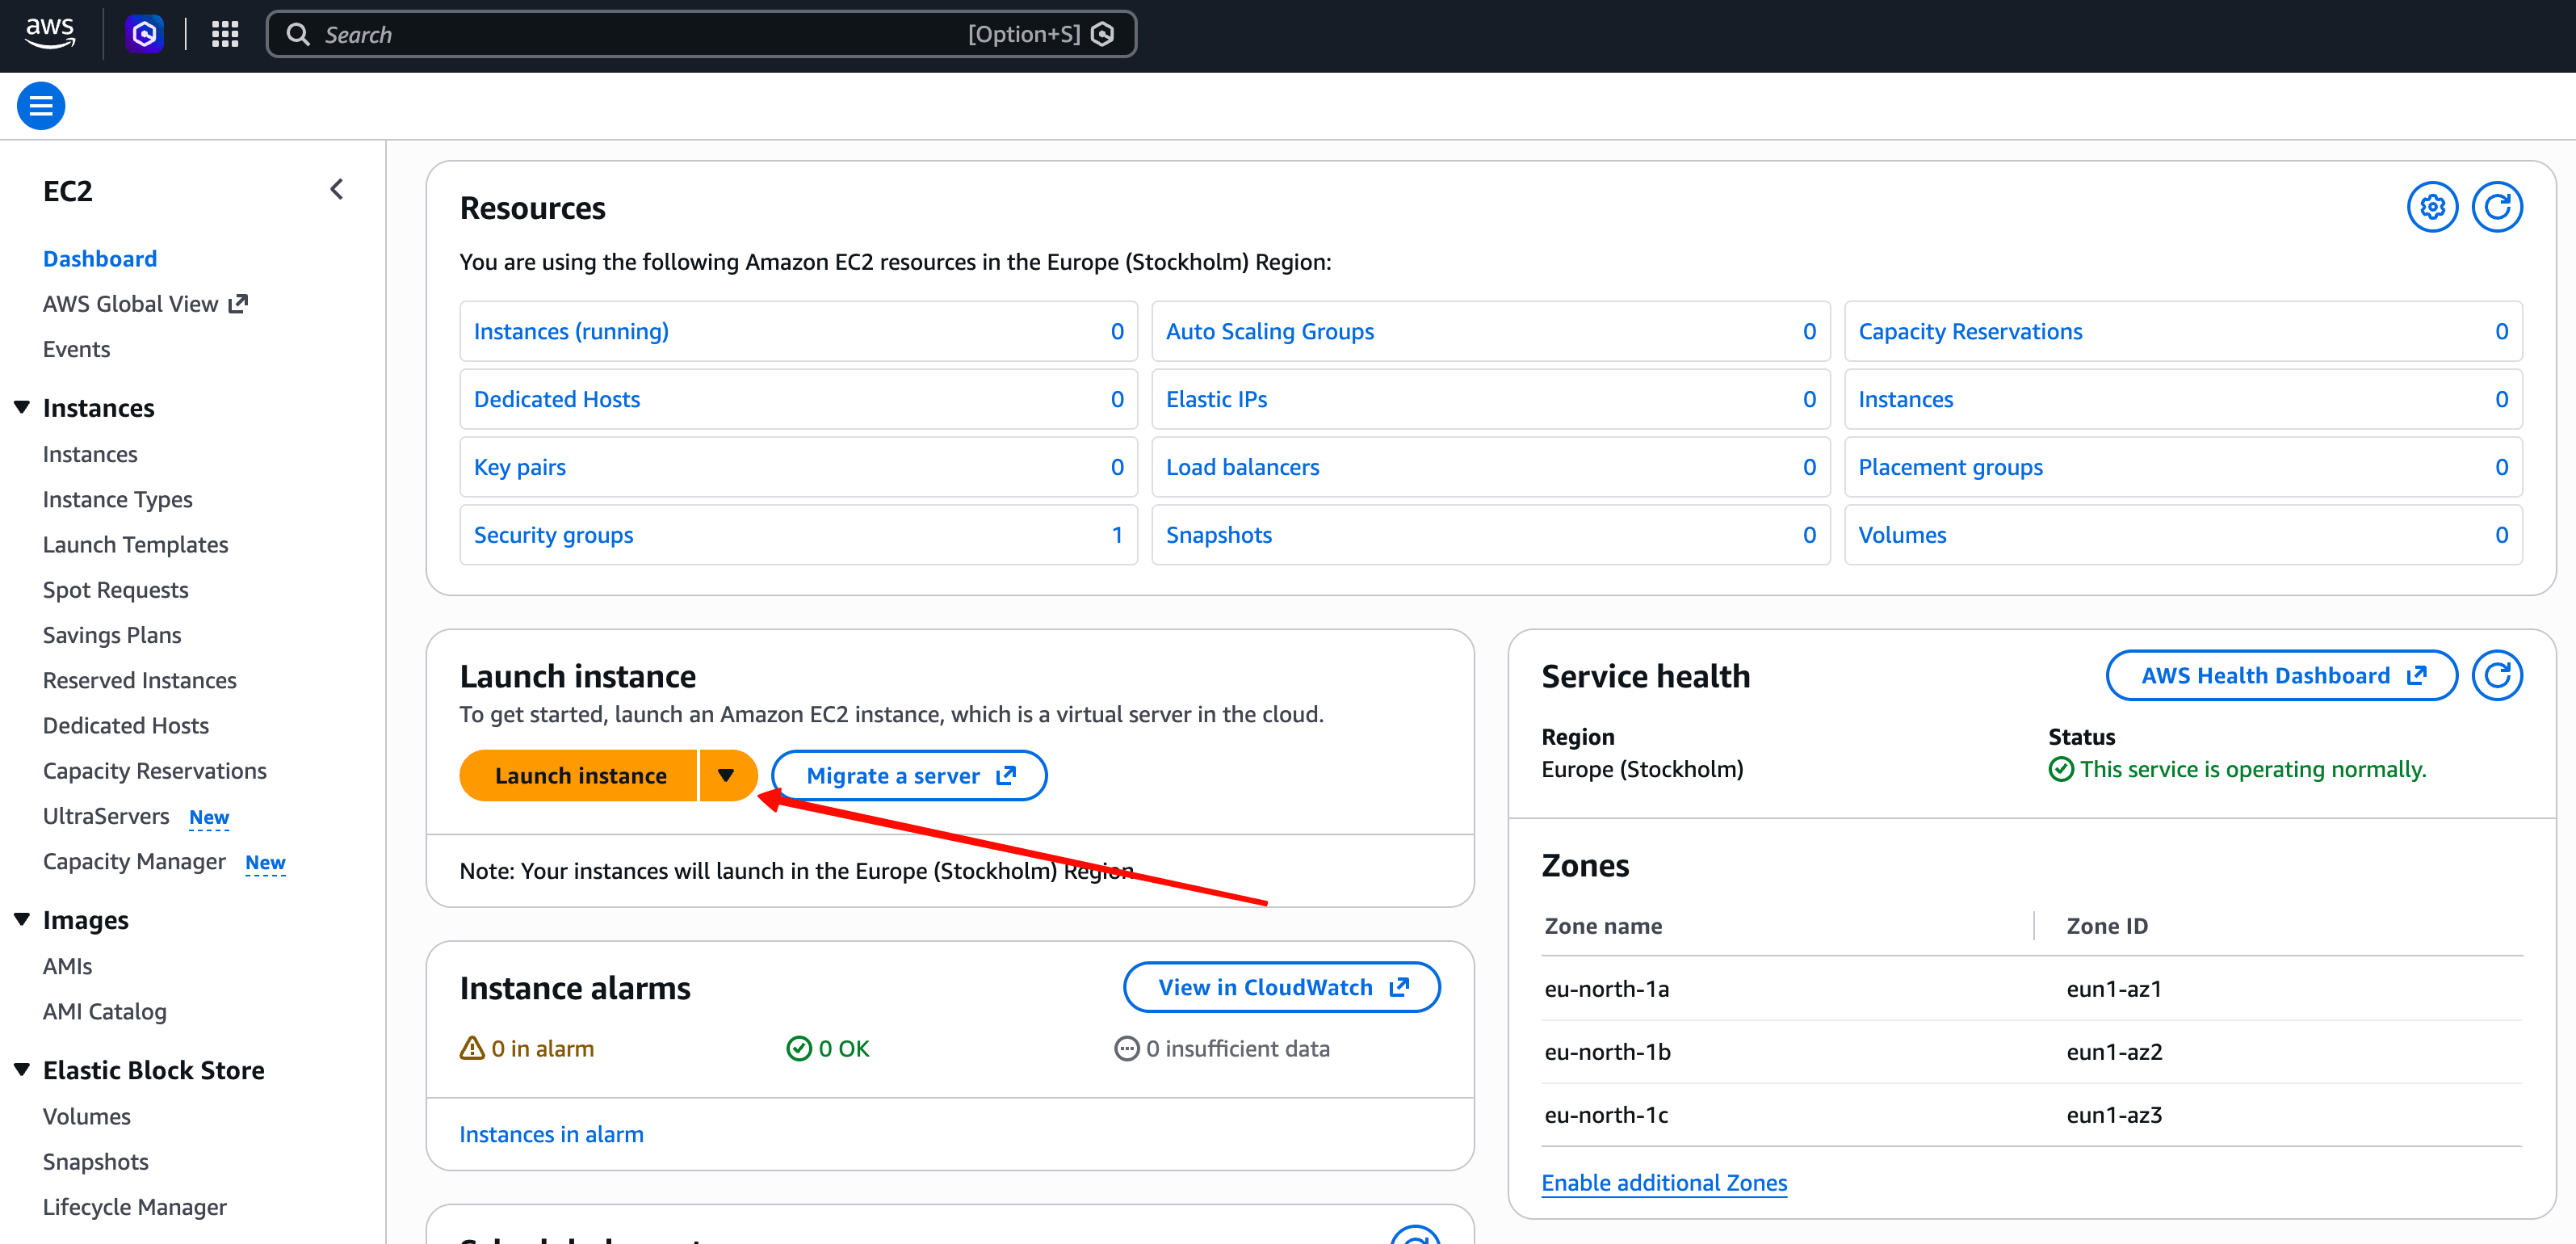
2. Select an Ubuntu Server 24.04 LTS x86-64 image.
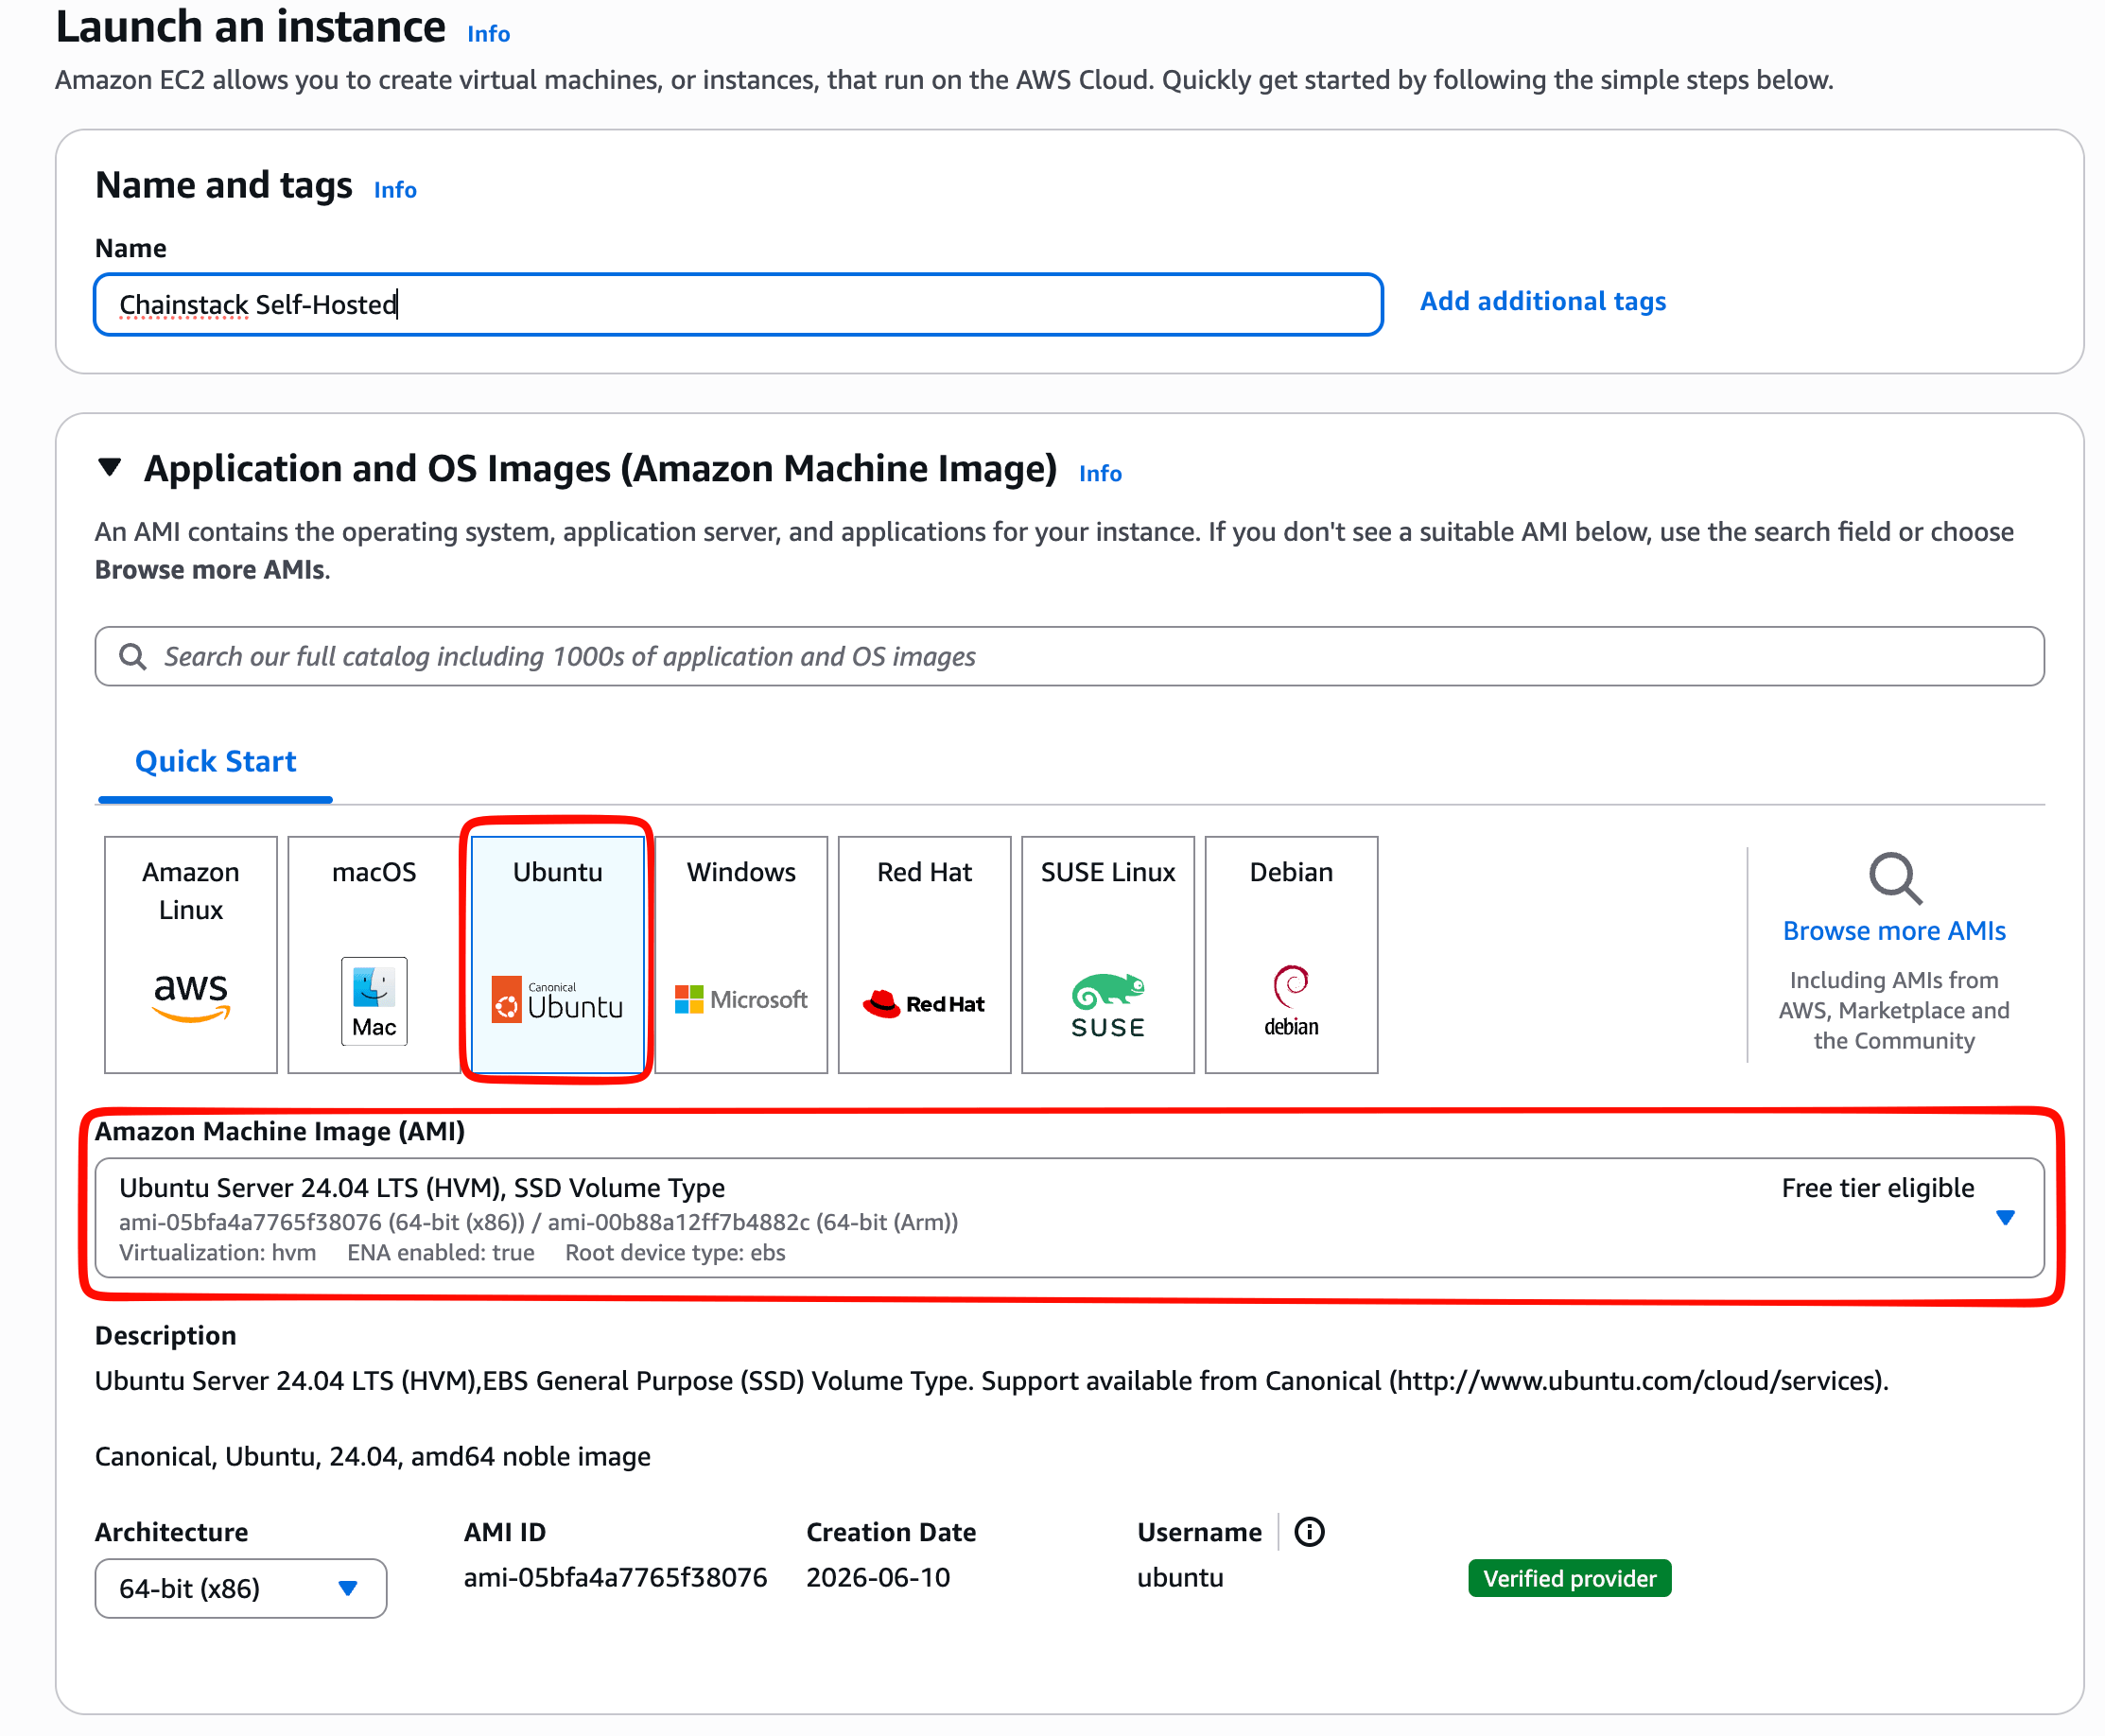
3. Choose your instance type.
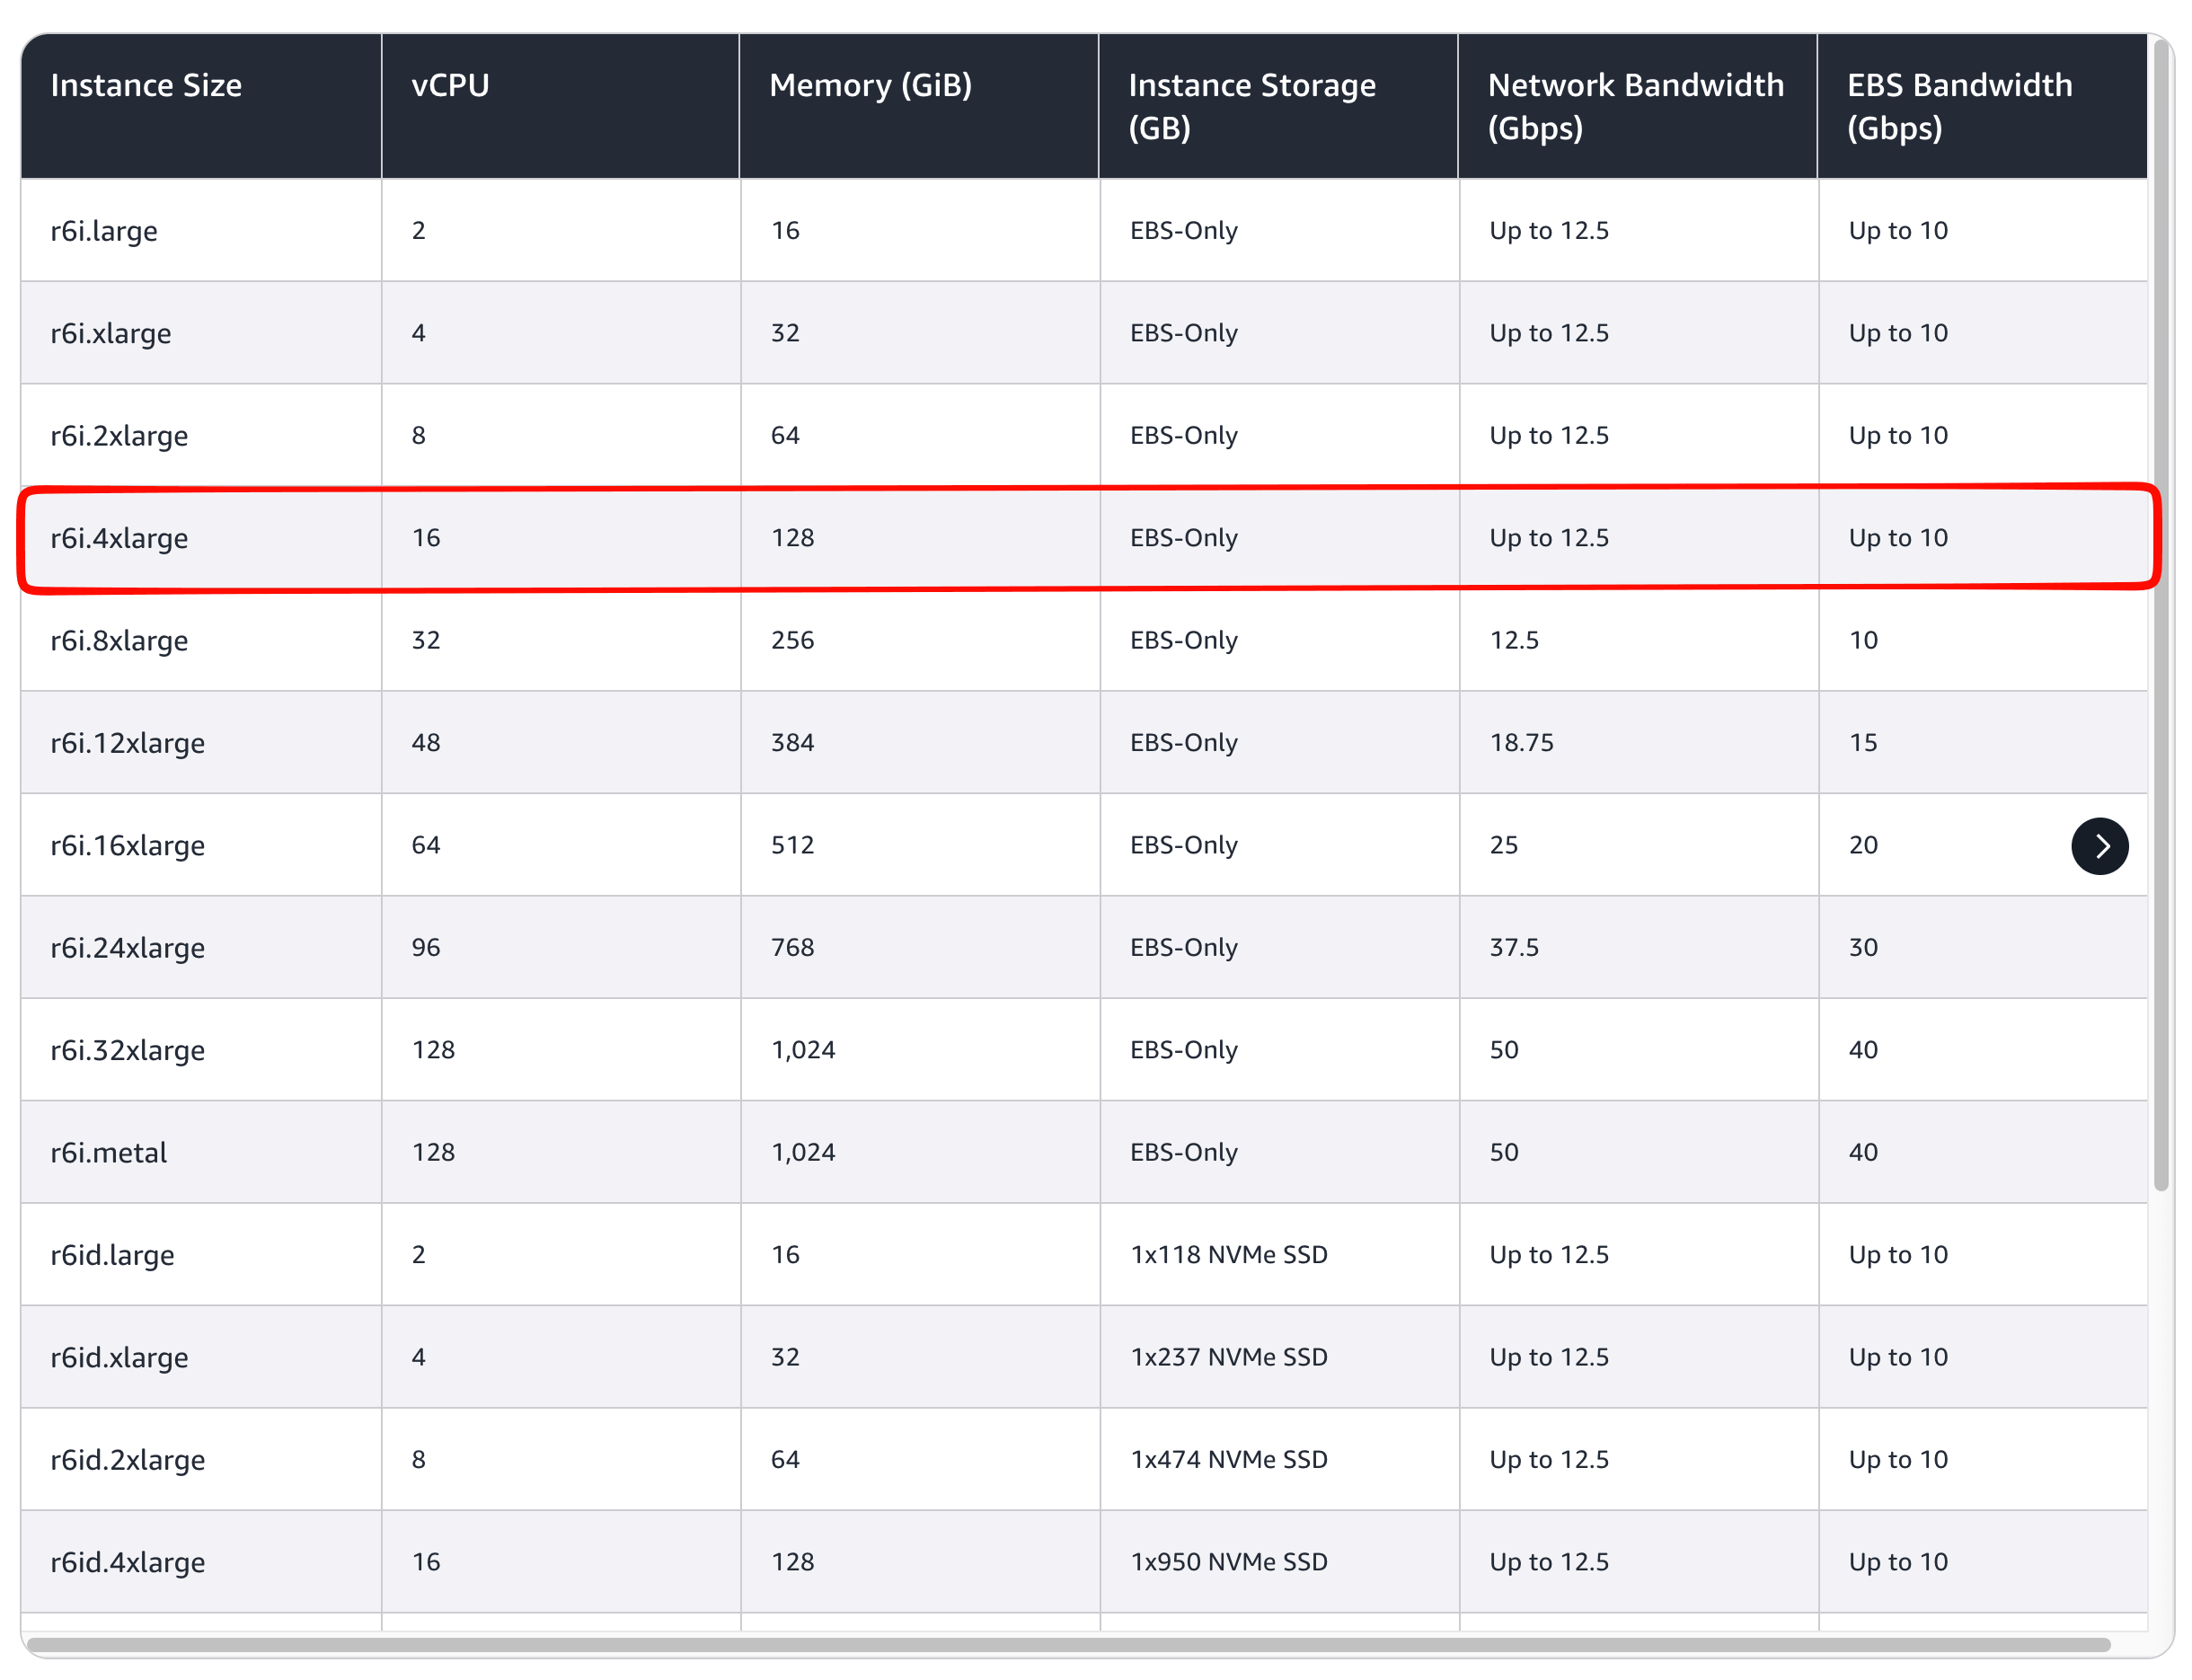
4. Create or select an SSH key pair.
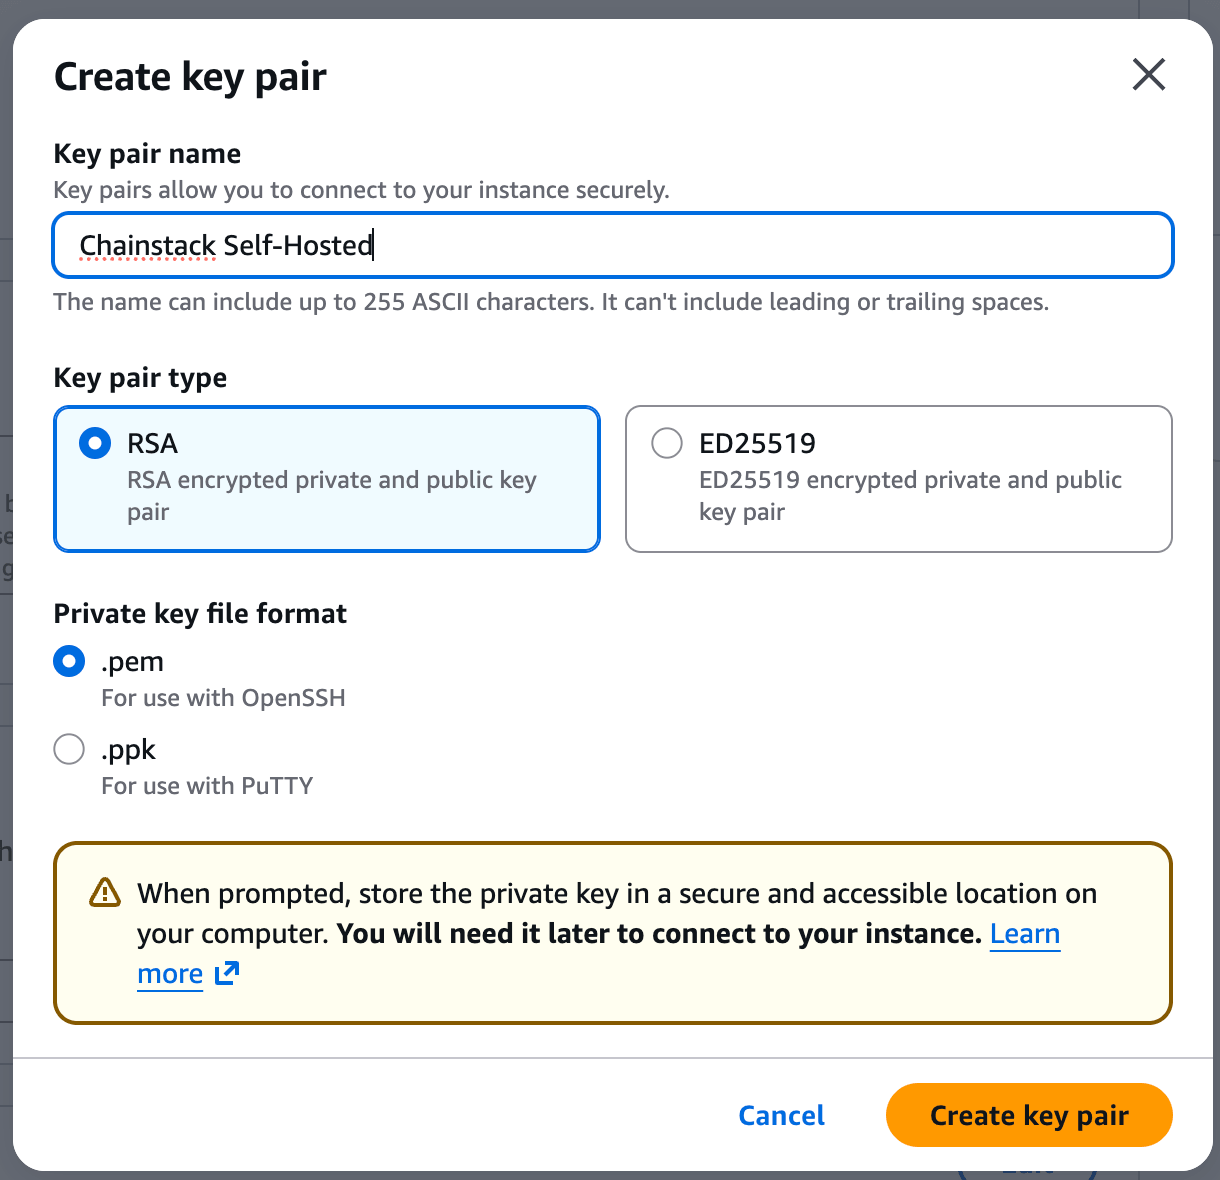
5. Configure the root EBS volume using the storage sizing above.
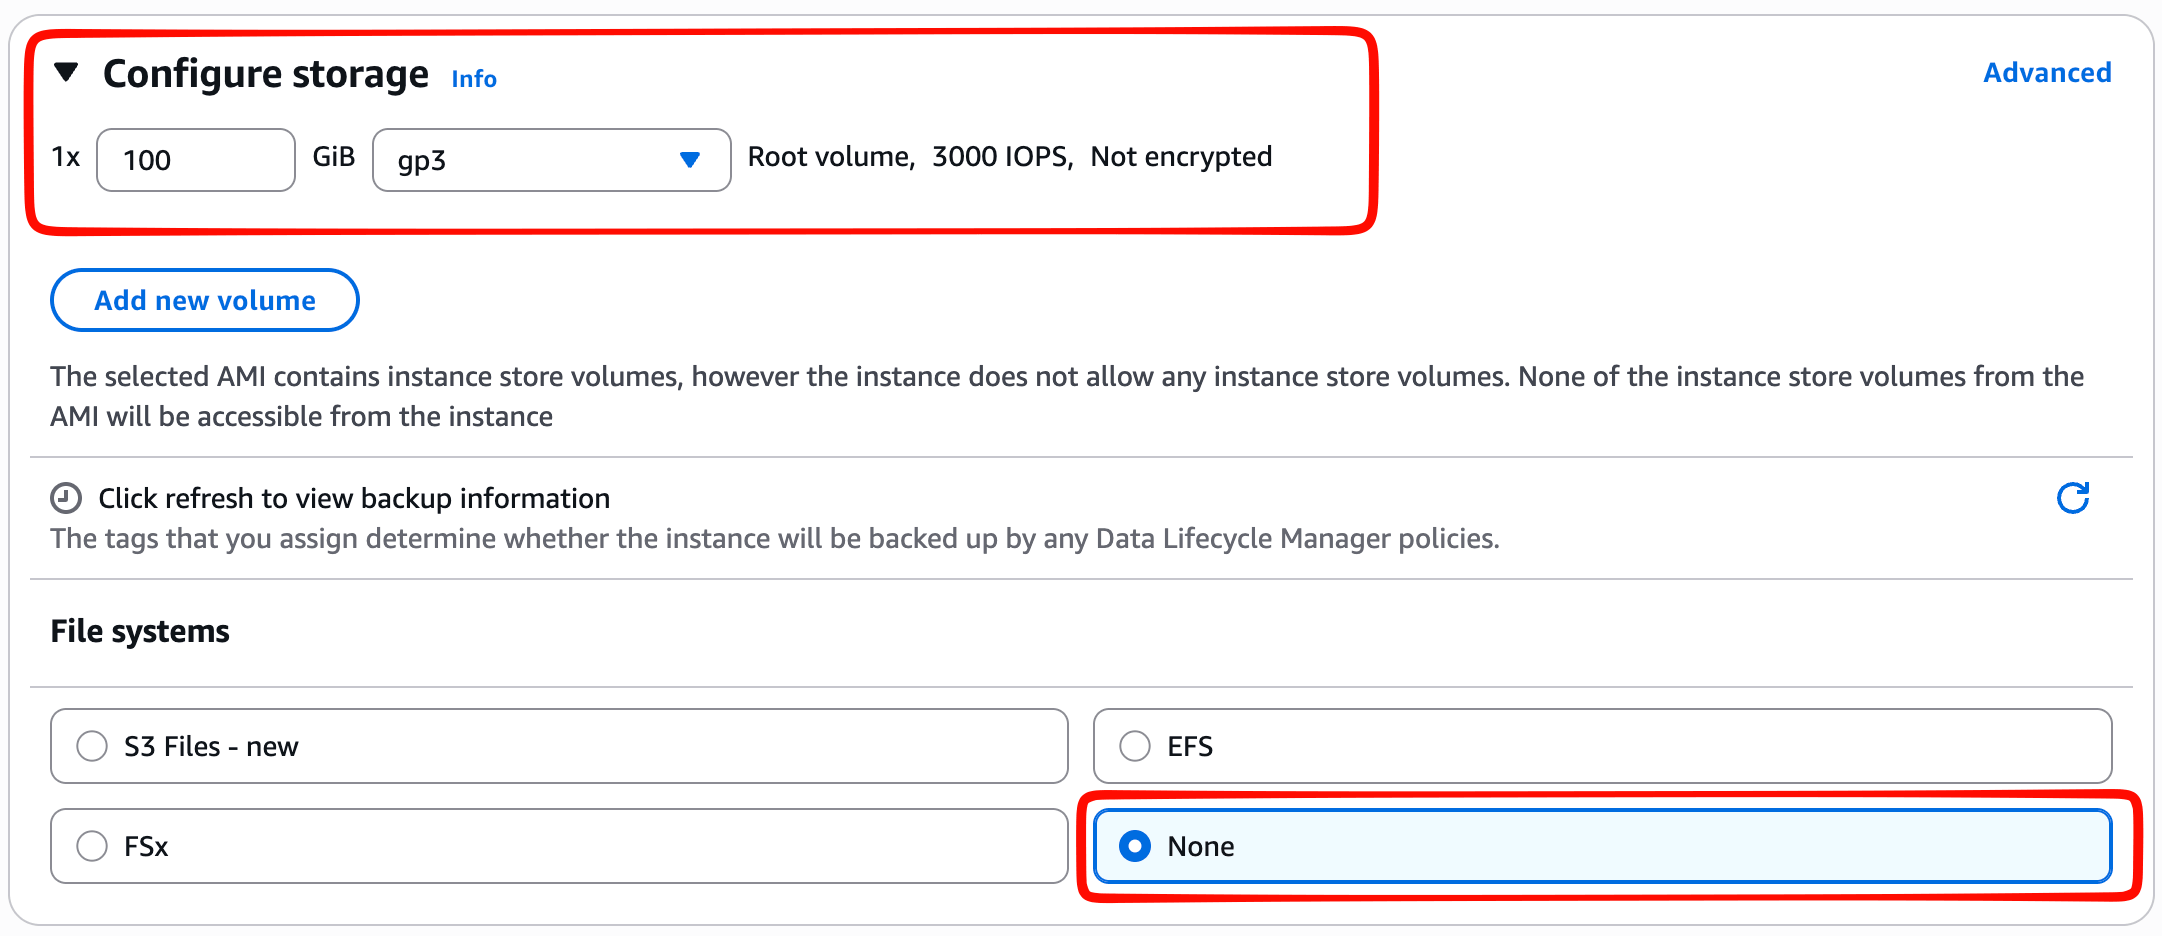
6. Place the instance in a subnet with outbound internet access, and allow inbound TCP port 22 from your own public IP address.
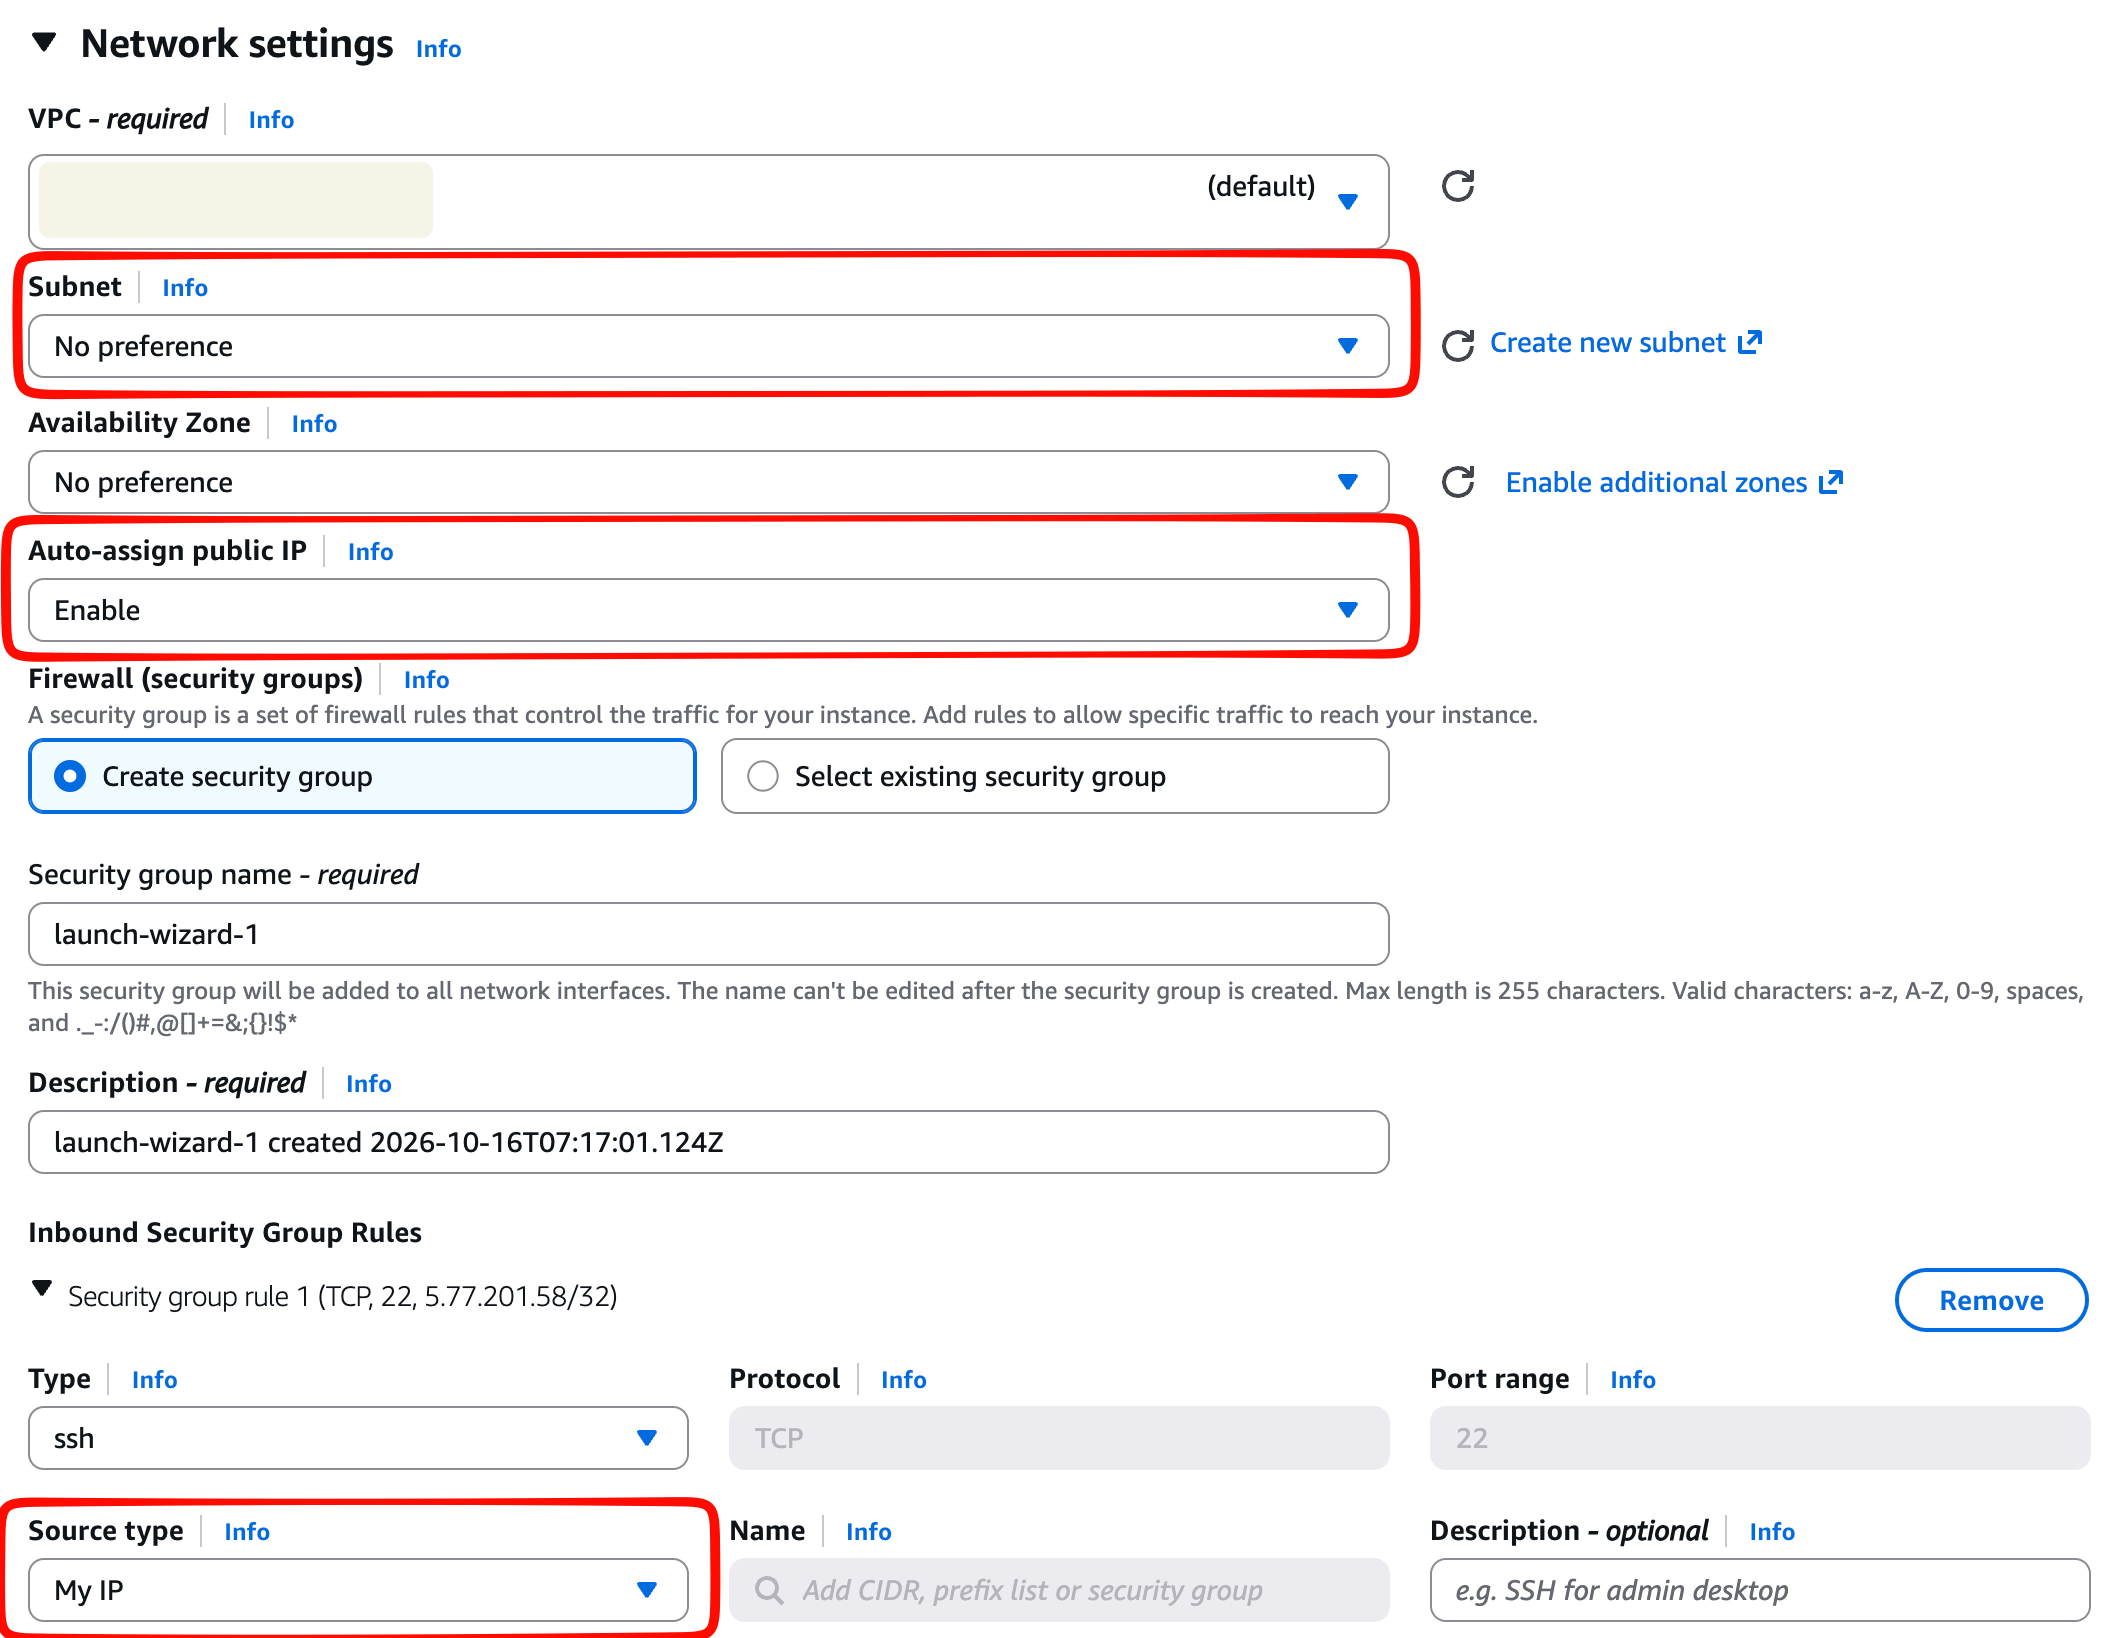
For this walkthrough, we’ll access the Control Panel and node through SSH tunnels, so you only need SSH inbound access. Restrict its source to your IP address.
Connect from your computer:
chmod 400 chainstack-aws.pem
ssh -i chainstack-aws.pem ubuntu@YOUR_EC2_PUBLIC_IP
Ubuntu images use ubuntu as the default SSH username.
3. Prepare Kubernetes and the installation tools
On the EC2 instance, start a root shell:
sudo -iInstall the dependencies and Helm:
apt update
apt install -y curl gpg wget apt-transport-https openssl

curl -fsSL \
  https://packages.buildkite.com/helm-linux/helm-debian/gpgkey \
  | gpg --dearmor > /usr/share/keyrings/helm.gpg

echo "deb [signed-by=/usr/share/keyrings/helm.gpg] https://packages.buildkite.com/helm-linux/helm-debian/any/ any main" \
  > /etc/apt/sources.list.d/helm-stable-debian.list

apt update
apt install -y helm
Install the required Mike Farah version of yq:
wget https://github.com/mikefarah/yq/releases/latest/download/yq_linux_amd64 \
  -O /usr/local/bin/yq
chmod +x /usr/local/bin/yq
Install k3s and configure access:
curl -sfL https://get.k3s.io | sh -
export KUBECONFIG=/etc/rancher/k3s/k3s.yaml
kubectl get nodes
kubectl get storageclass
Wait until the Kubernetes node shows Ready. For this single-disk layout, use k3s’s default local-path storage class. Persistent data will consume space on the instance’s filesystem, so confirm that the root volume has the required capacity.
4. Install Chainstack Self-Hosted
Install cpctl, the Chainstack Self-Hosted command-line tool:
curl -sSL https://install.chainstack.com/cpctl.sh | sh
cpctl version
The CLI installs and upgrades the Control Panel. Installing the CLI alone does not deploy the application.
Run:
cpctl install -s local-path \
  --backend-url http://localhost:8081
We use localhost because the browser will reach the deployments API through an SSH tunnel.
Accept password generation, keep the default workload namespace, and select the monitoring installation option for a clean cluster. When installation finishes, check:
cpctl statusWait for the overall status to become healthy.
The installer stores generated credentials in a timestamped YAML file under /root/.config/cp-suite/values/. Keep that file secure.
5. Open the Control Panel
On the EC2 instance, forward the UI and deployments API to loopback addresses:
kubectl port-forward -n control-panel \
  svc/cp-cp-ui 8080:80 --address 127.0.0.1 &

kubectl port-forward -n control-panel \
  svc/cp-cp-deployments-api 8081:8080 --address 127.0.0.1 &
Keep this session open. In another terminal on your computer, create the SSH tunnel:
ssh -i chainstack-aws.pem -N \
  -L 8080:127.0.0.1:8080 \
  -L 8081:127.0.0.1:8081 \
  ubuntu@YOUR_EC2_PUBLIC_IP
Open http://localhost:8080 in your browser. This adapts the documented testing port forwards by carrying traffic through SSH. Both forwards must remain active because the browser loads the UI and calls the deployments API separately.
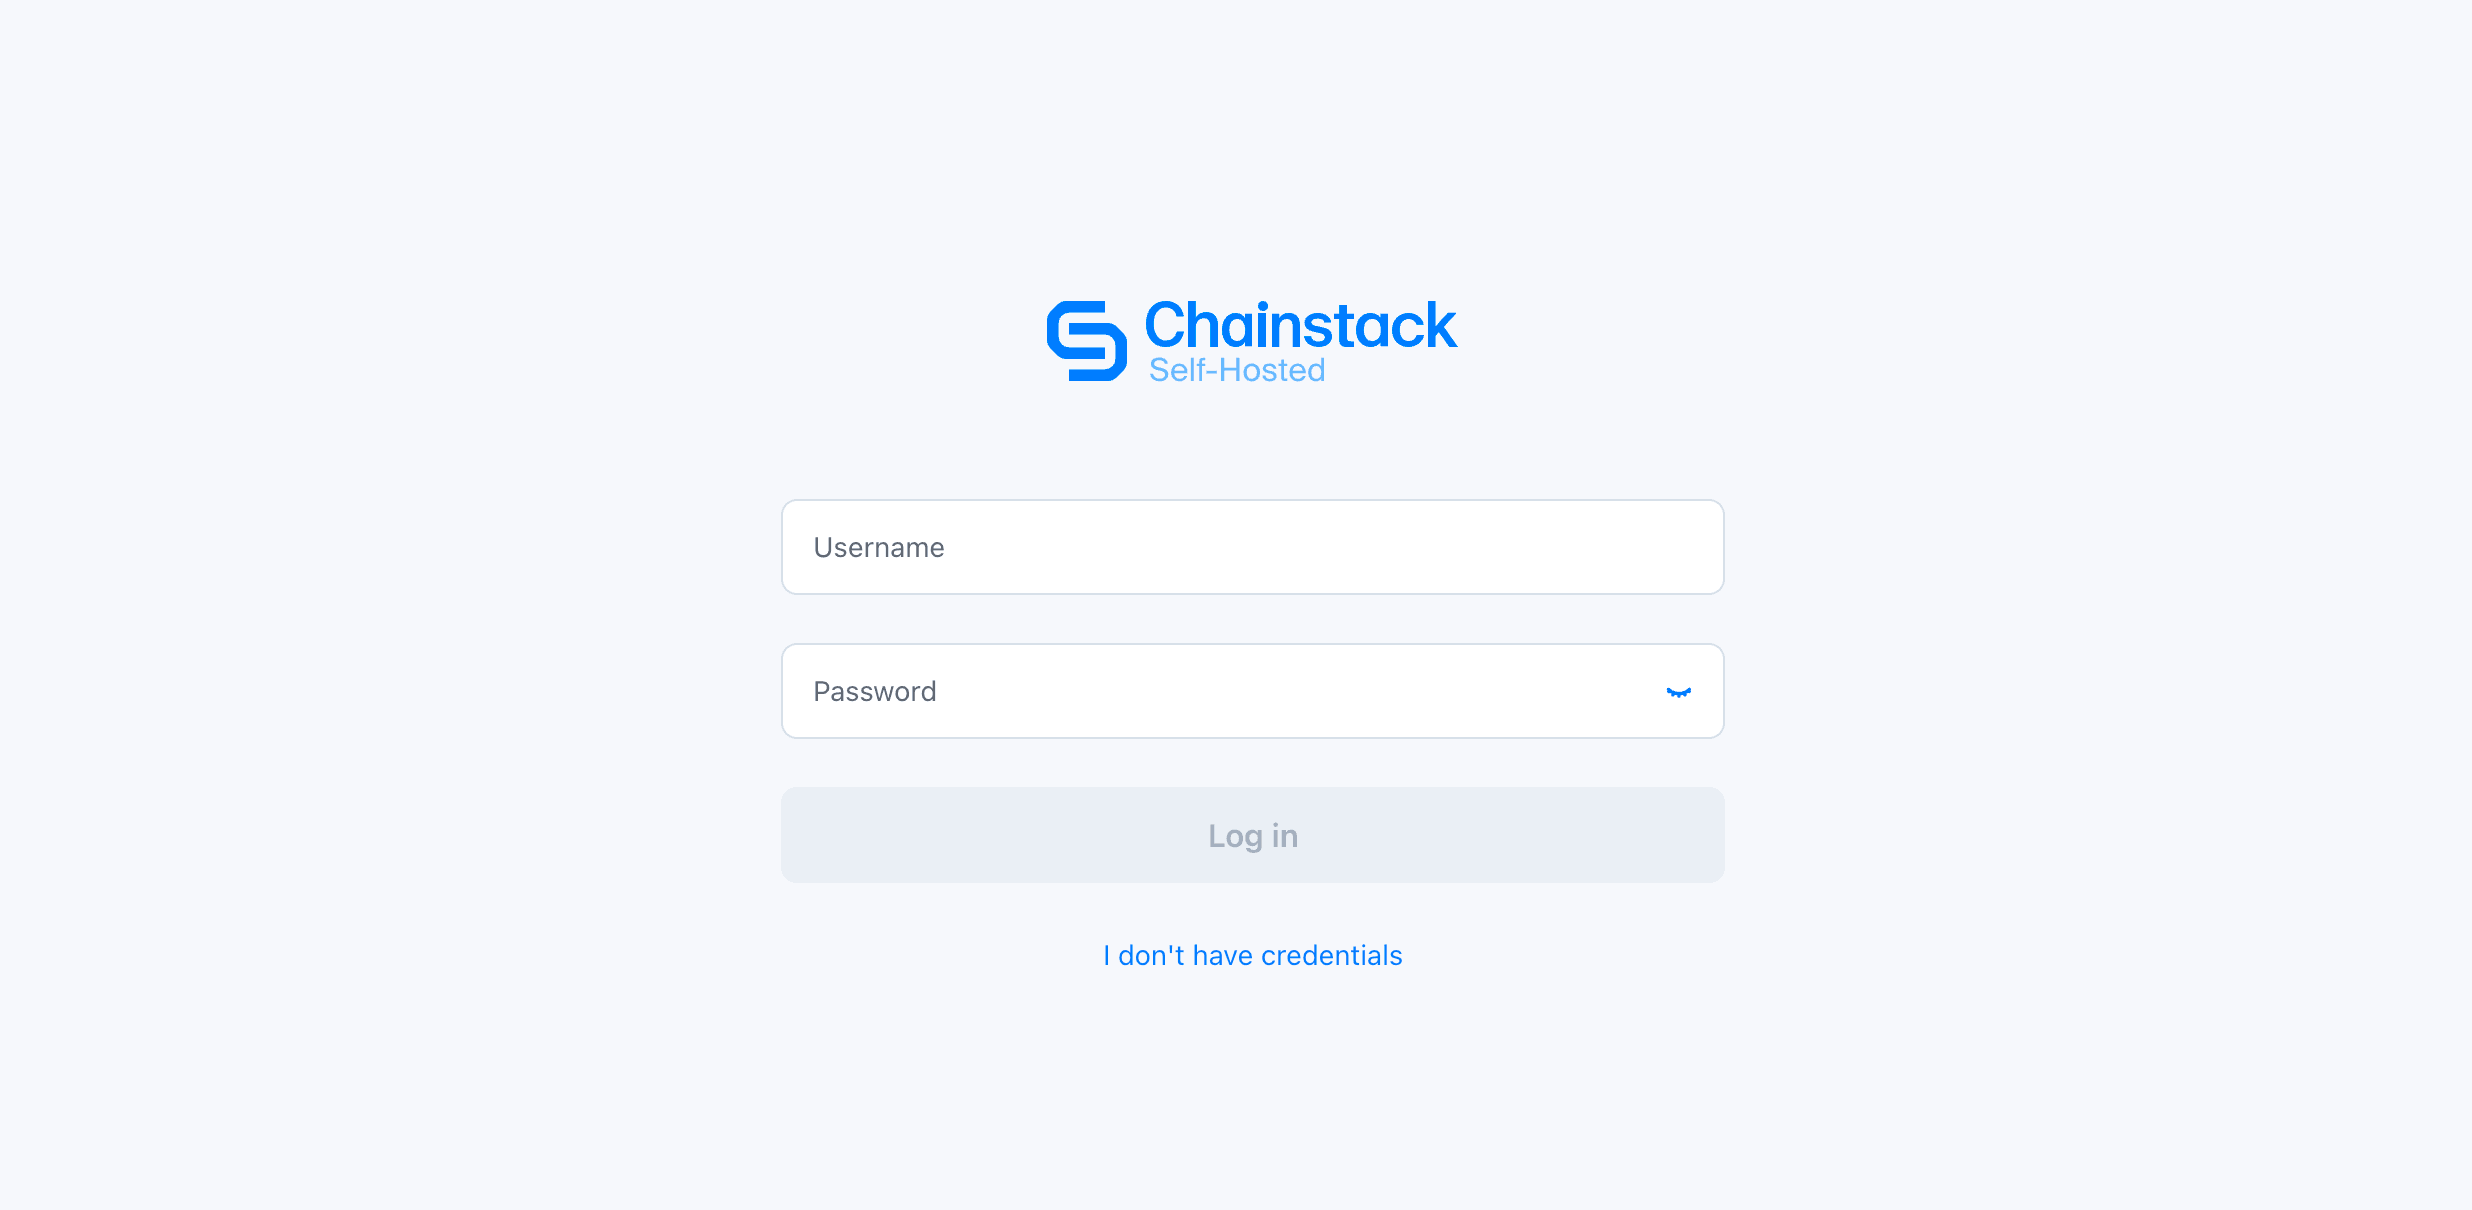
Log in with username admin and the generated bootstrap password. Retrieve the password using the command printed by the installer, then update your credentials under Settings.
6. Deploy your Robinhood Chain node
Before creating the node, prepare Ethereum execution RPC and Beacon API endpoints for the selected network. For mainnet, use Ethereum mainnet upstreams. Make sure the endpoints are reachable from the EC2 instance and have enough request capacity for synchronization.
In the Control Panel:
1. Open Nodes.
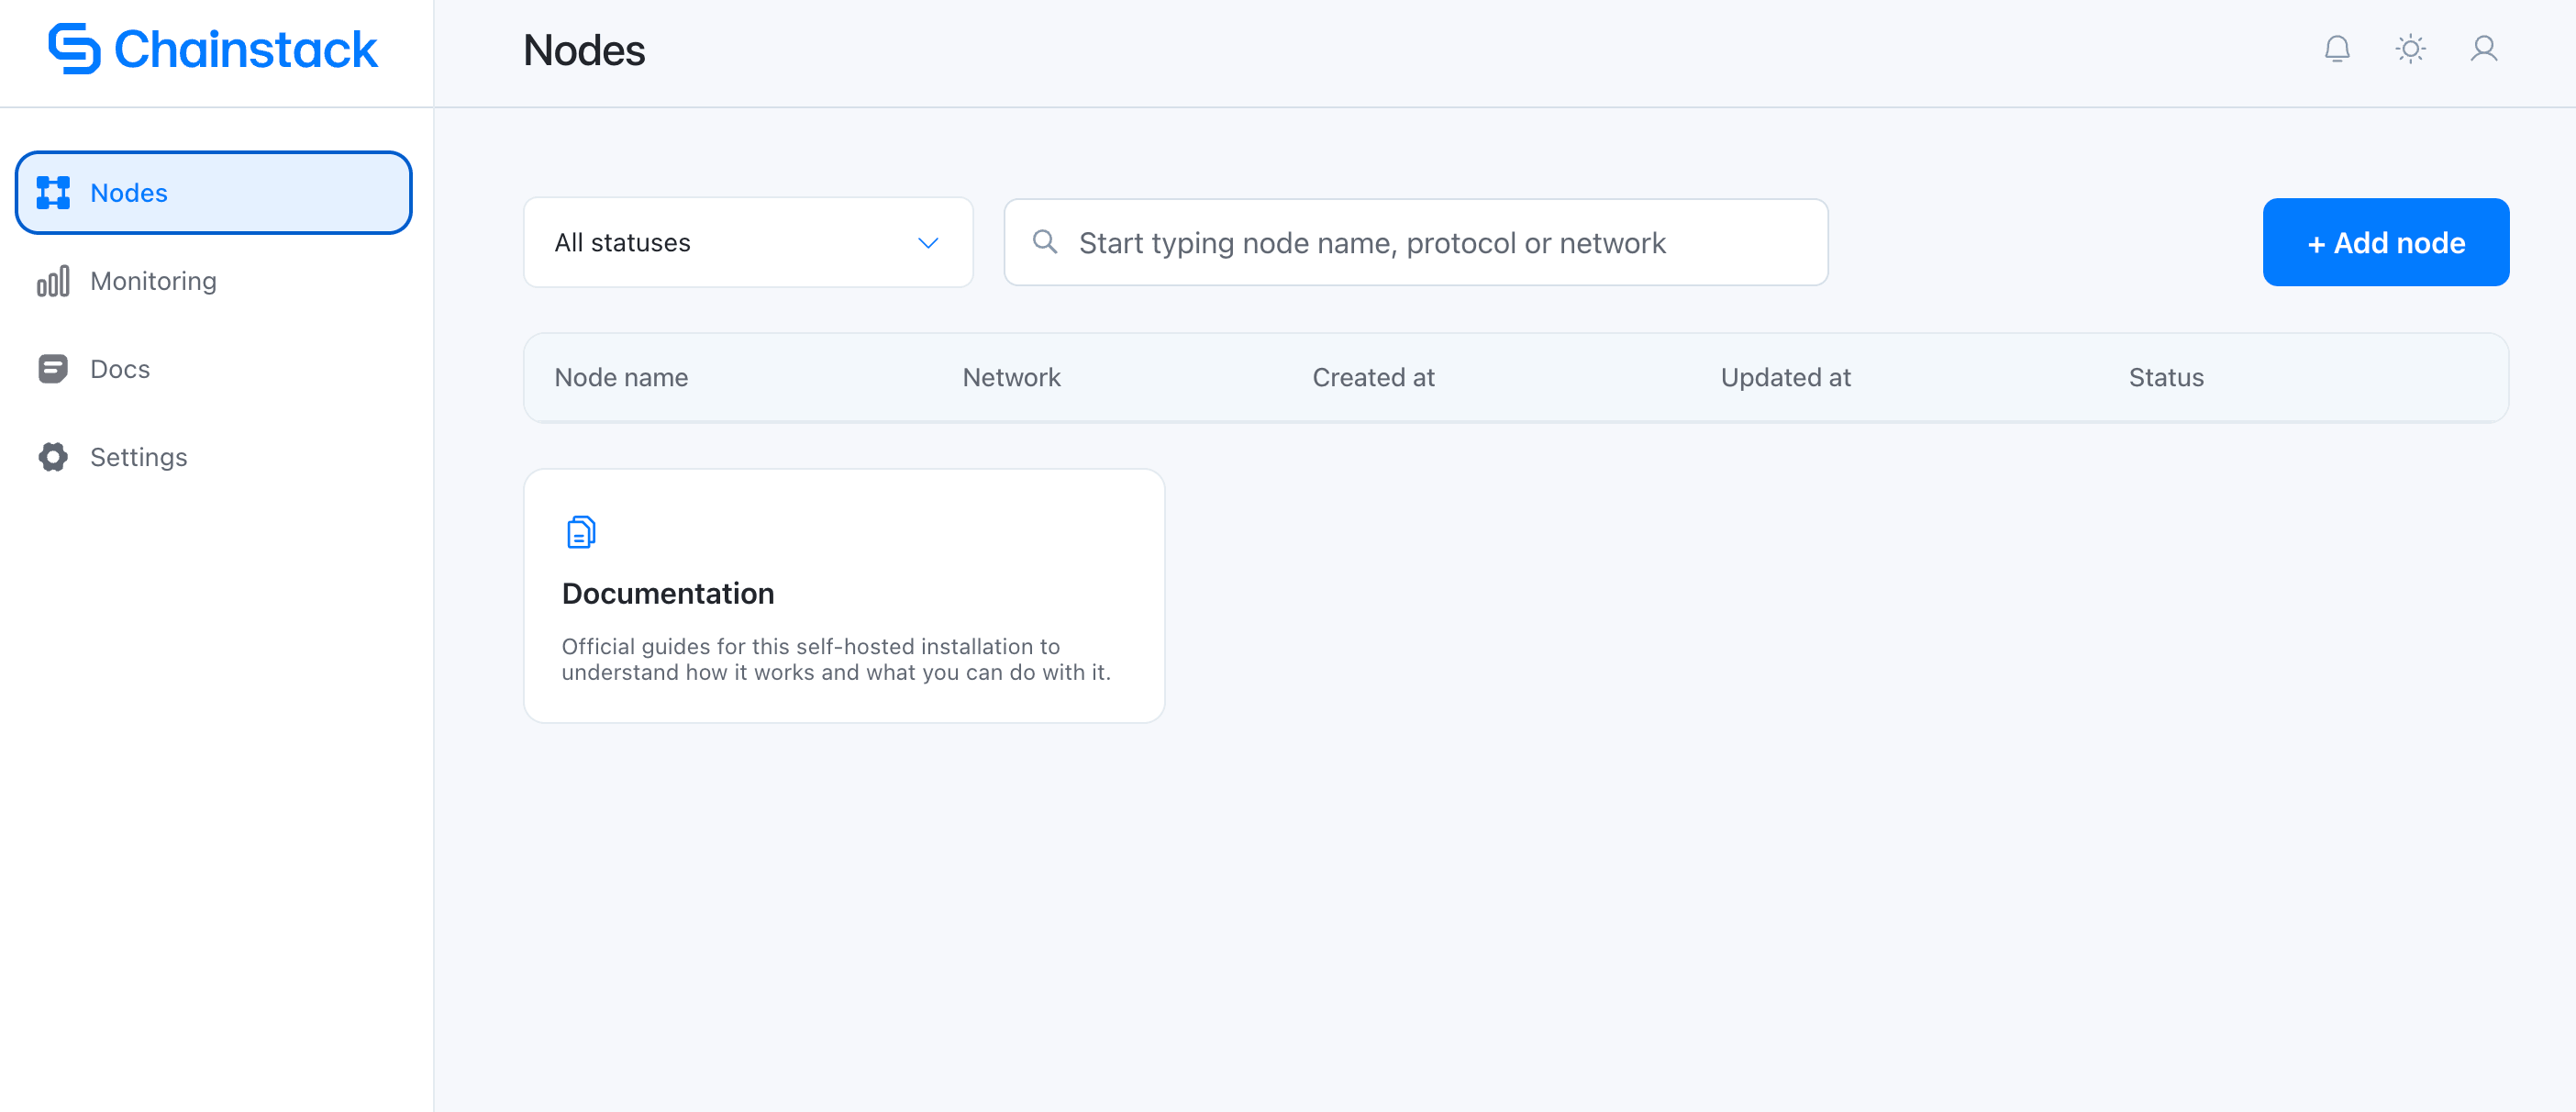
2. Click + Add node and select Robinhood Chain
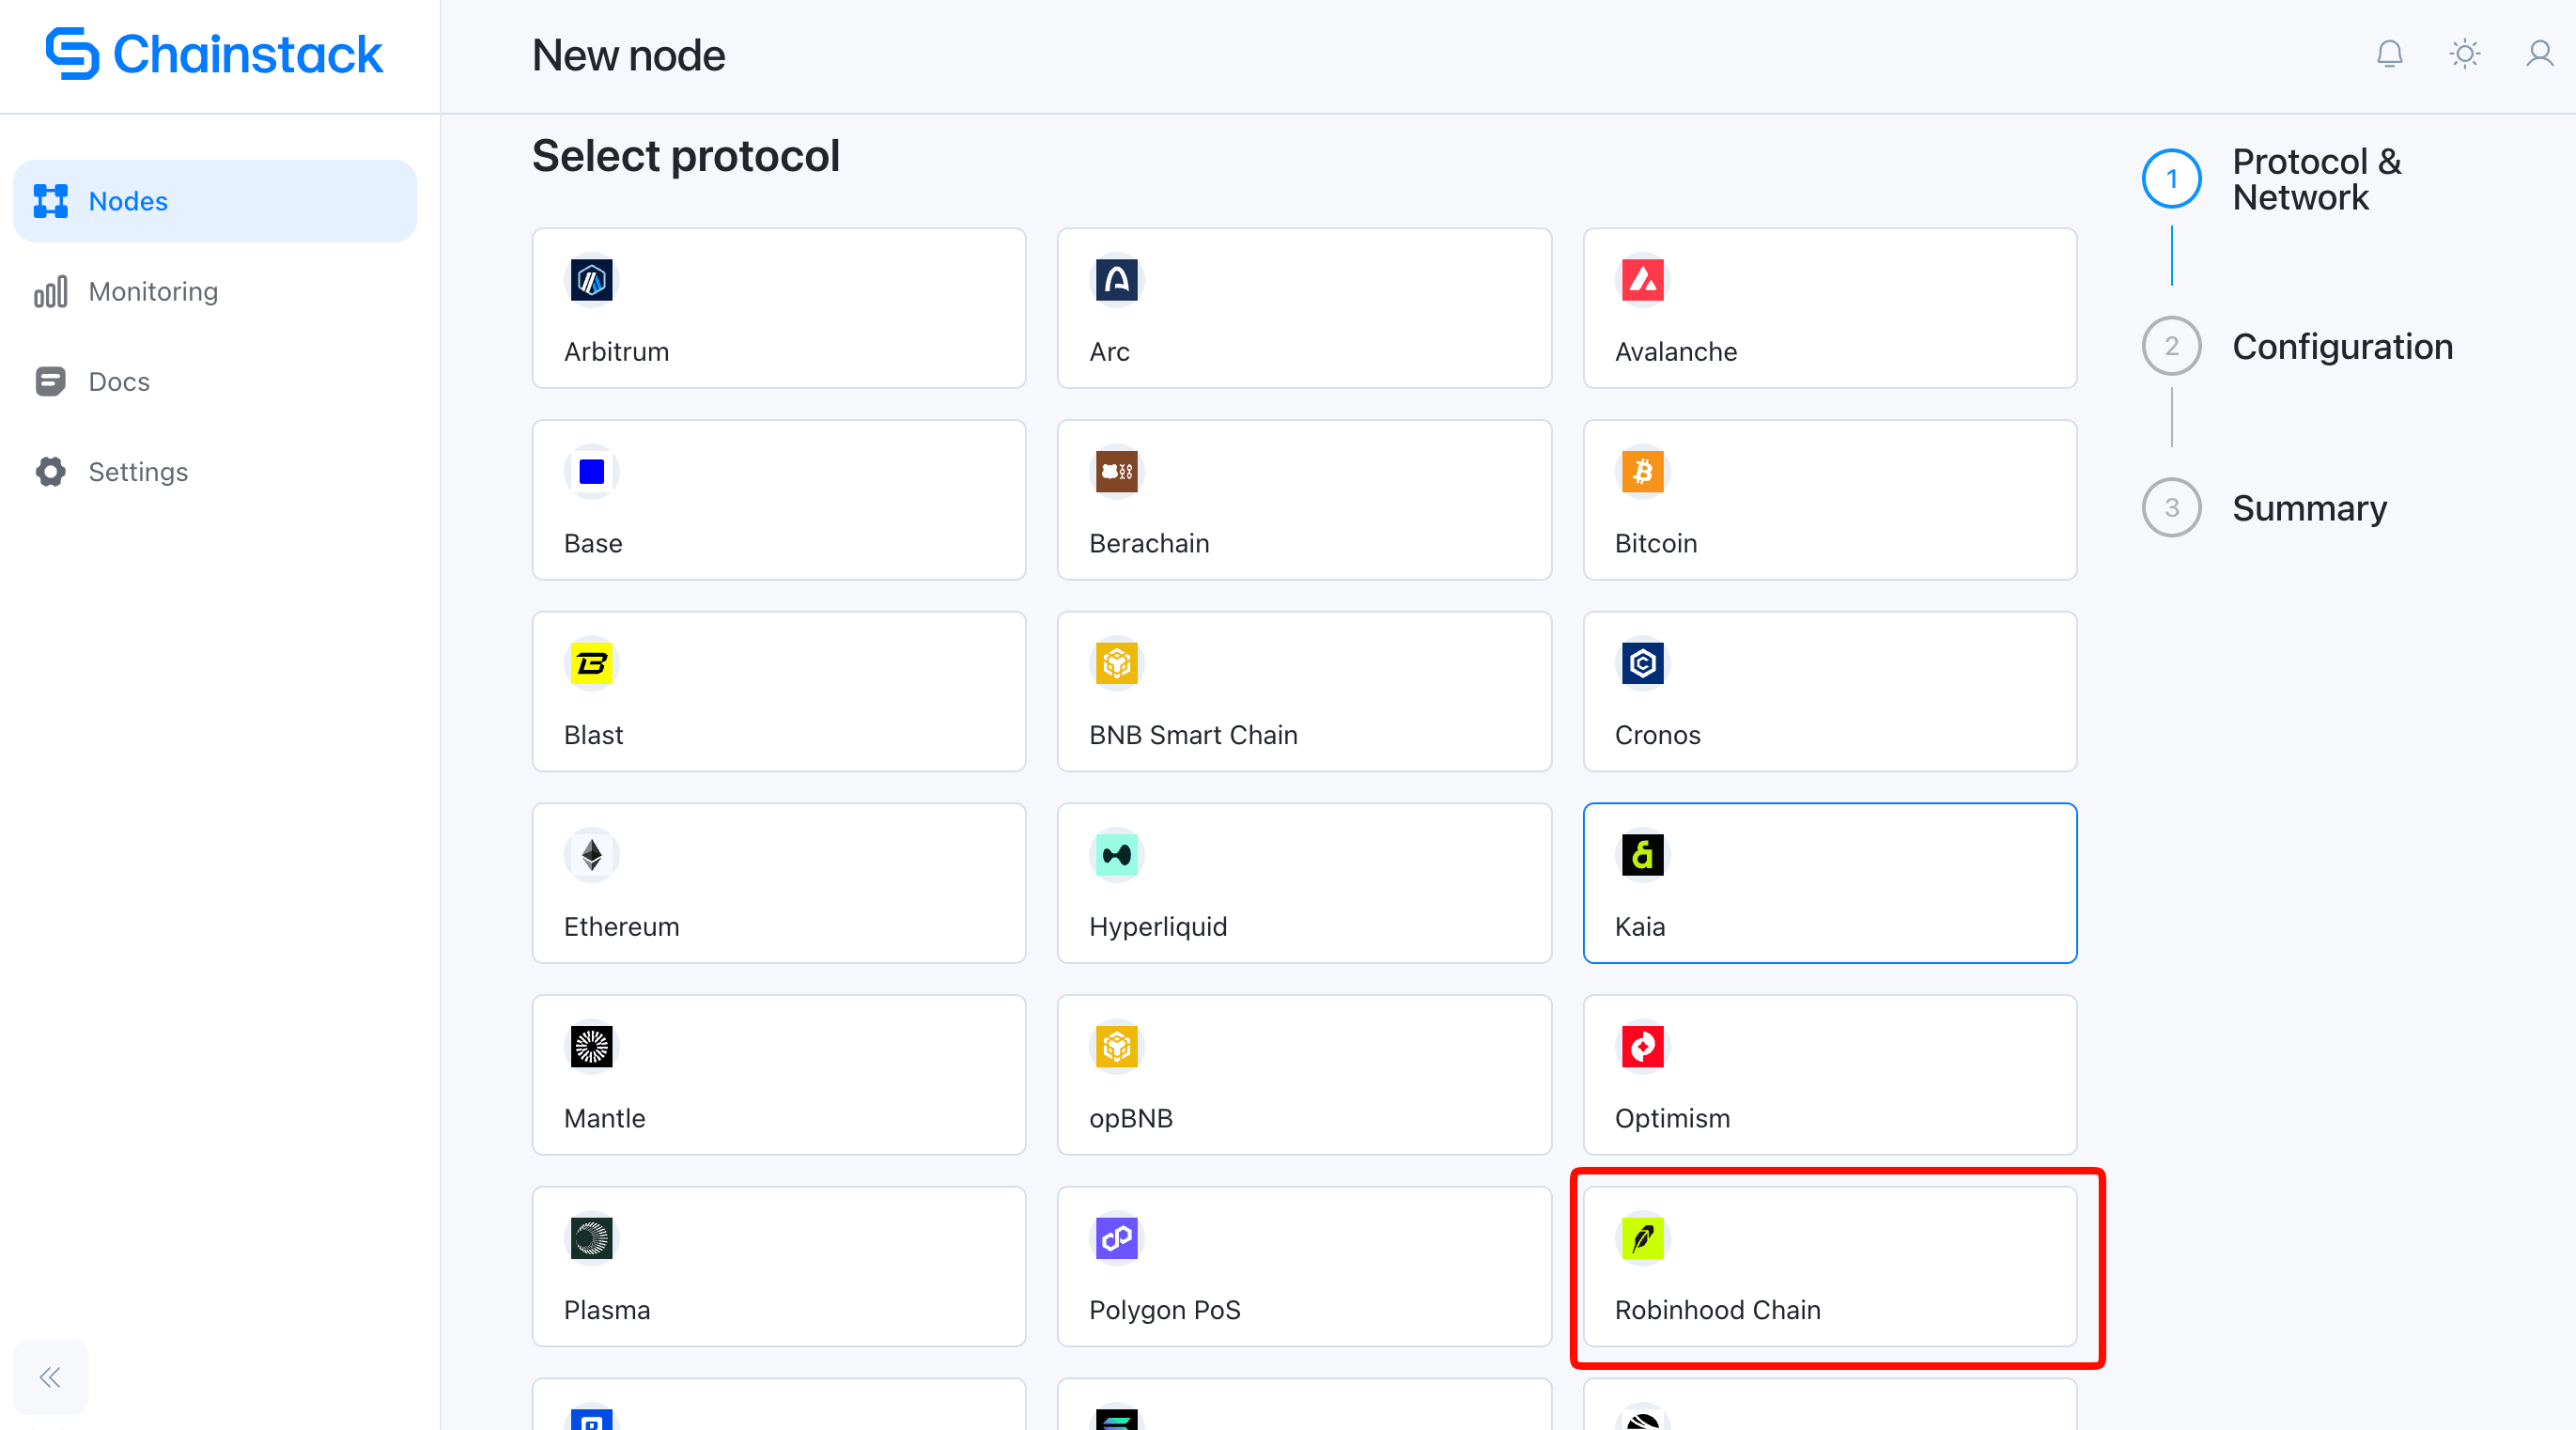
4. Select Mainnet.
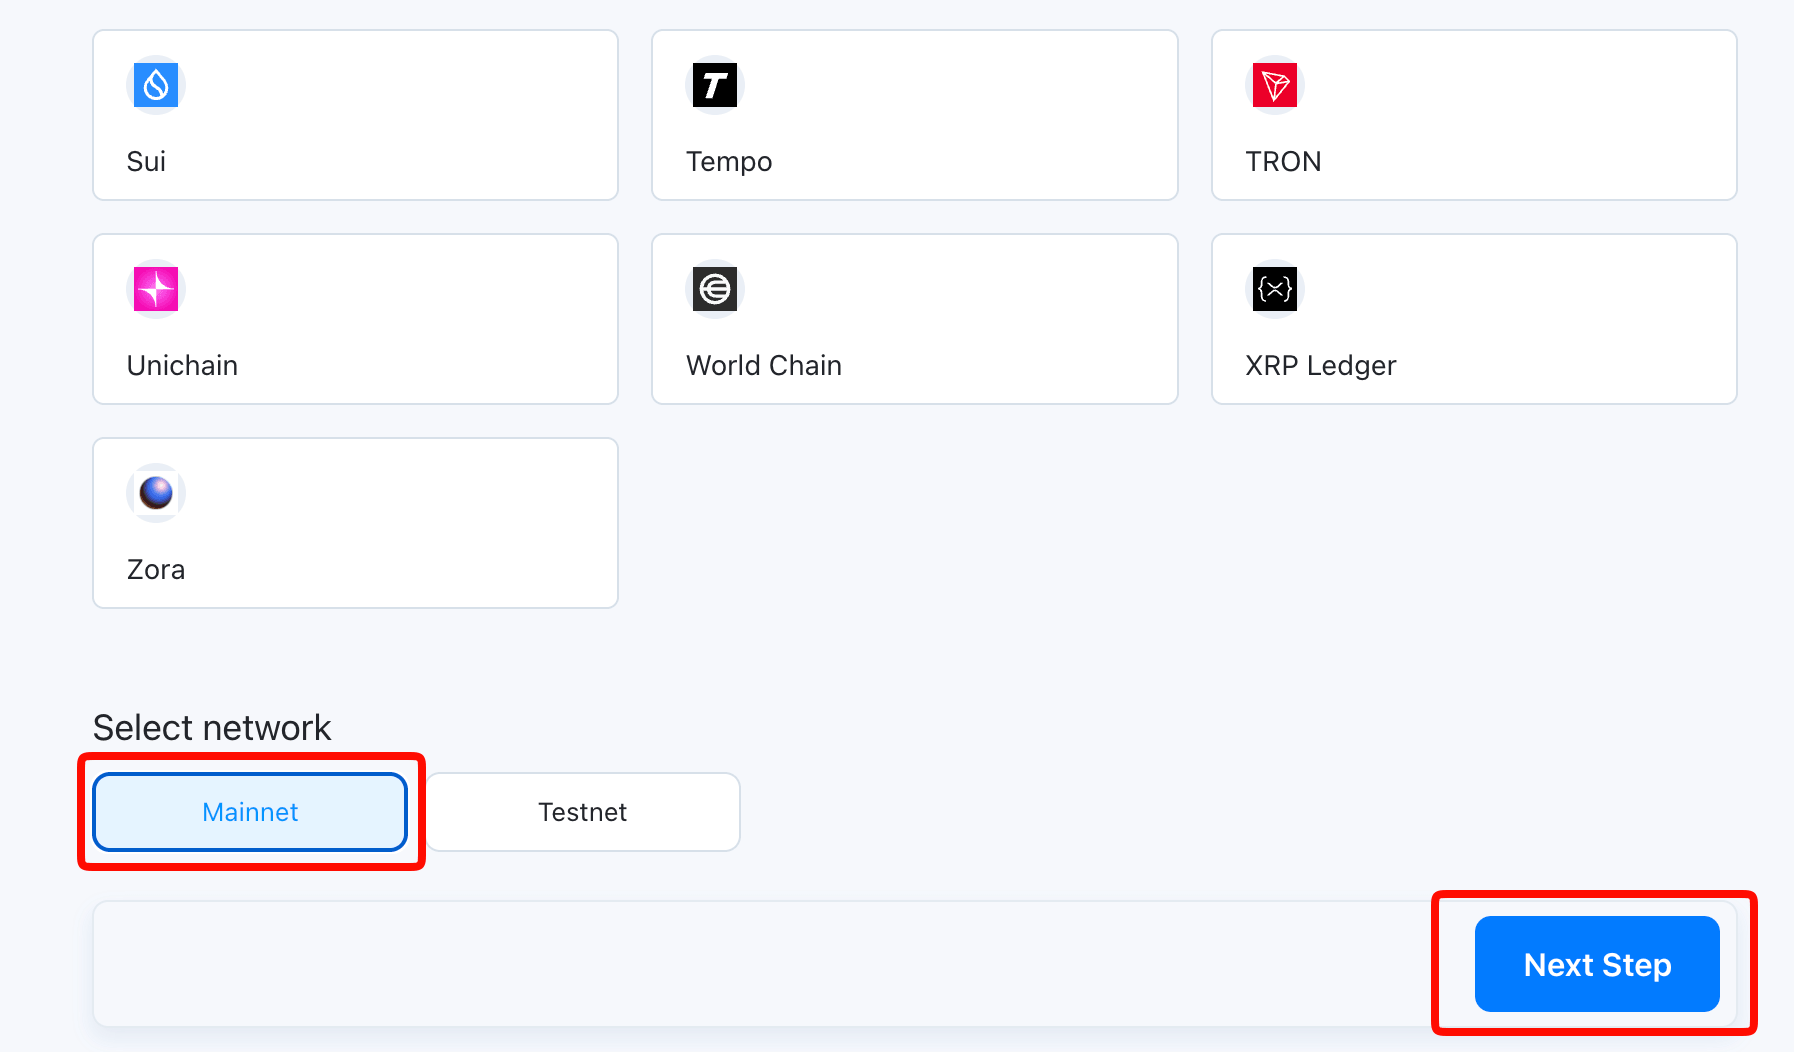
5. Choose the available preset.
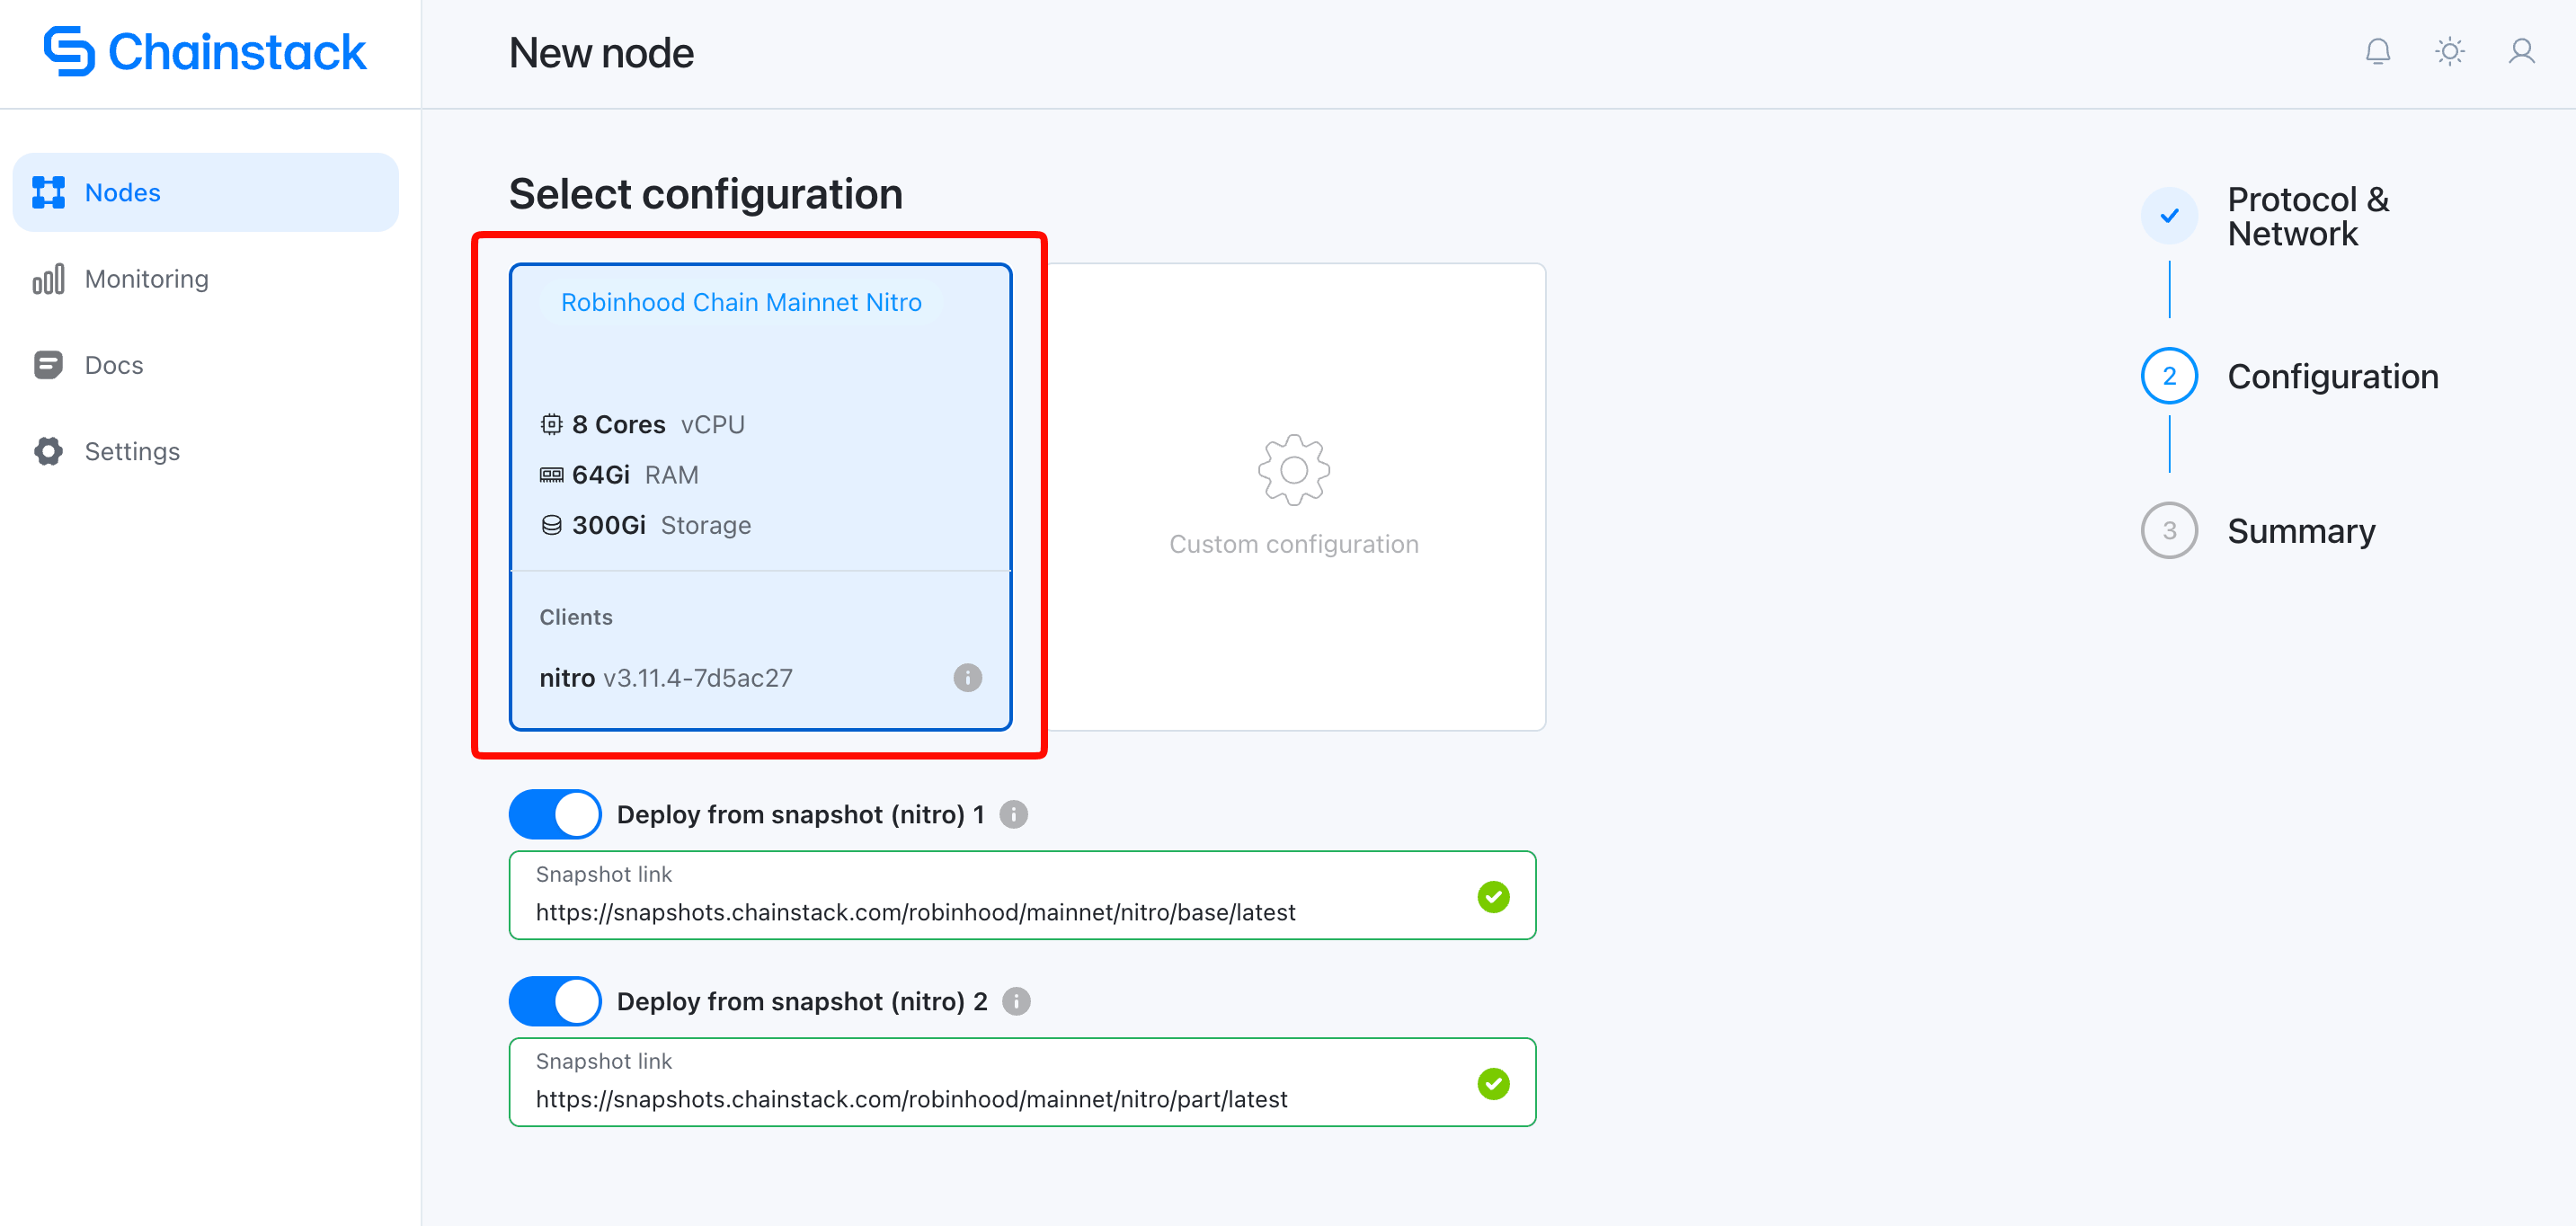
7. Review the configuration and create the node.
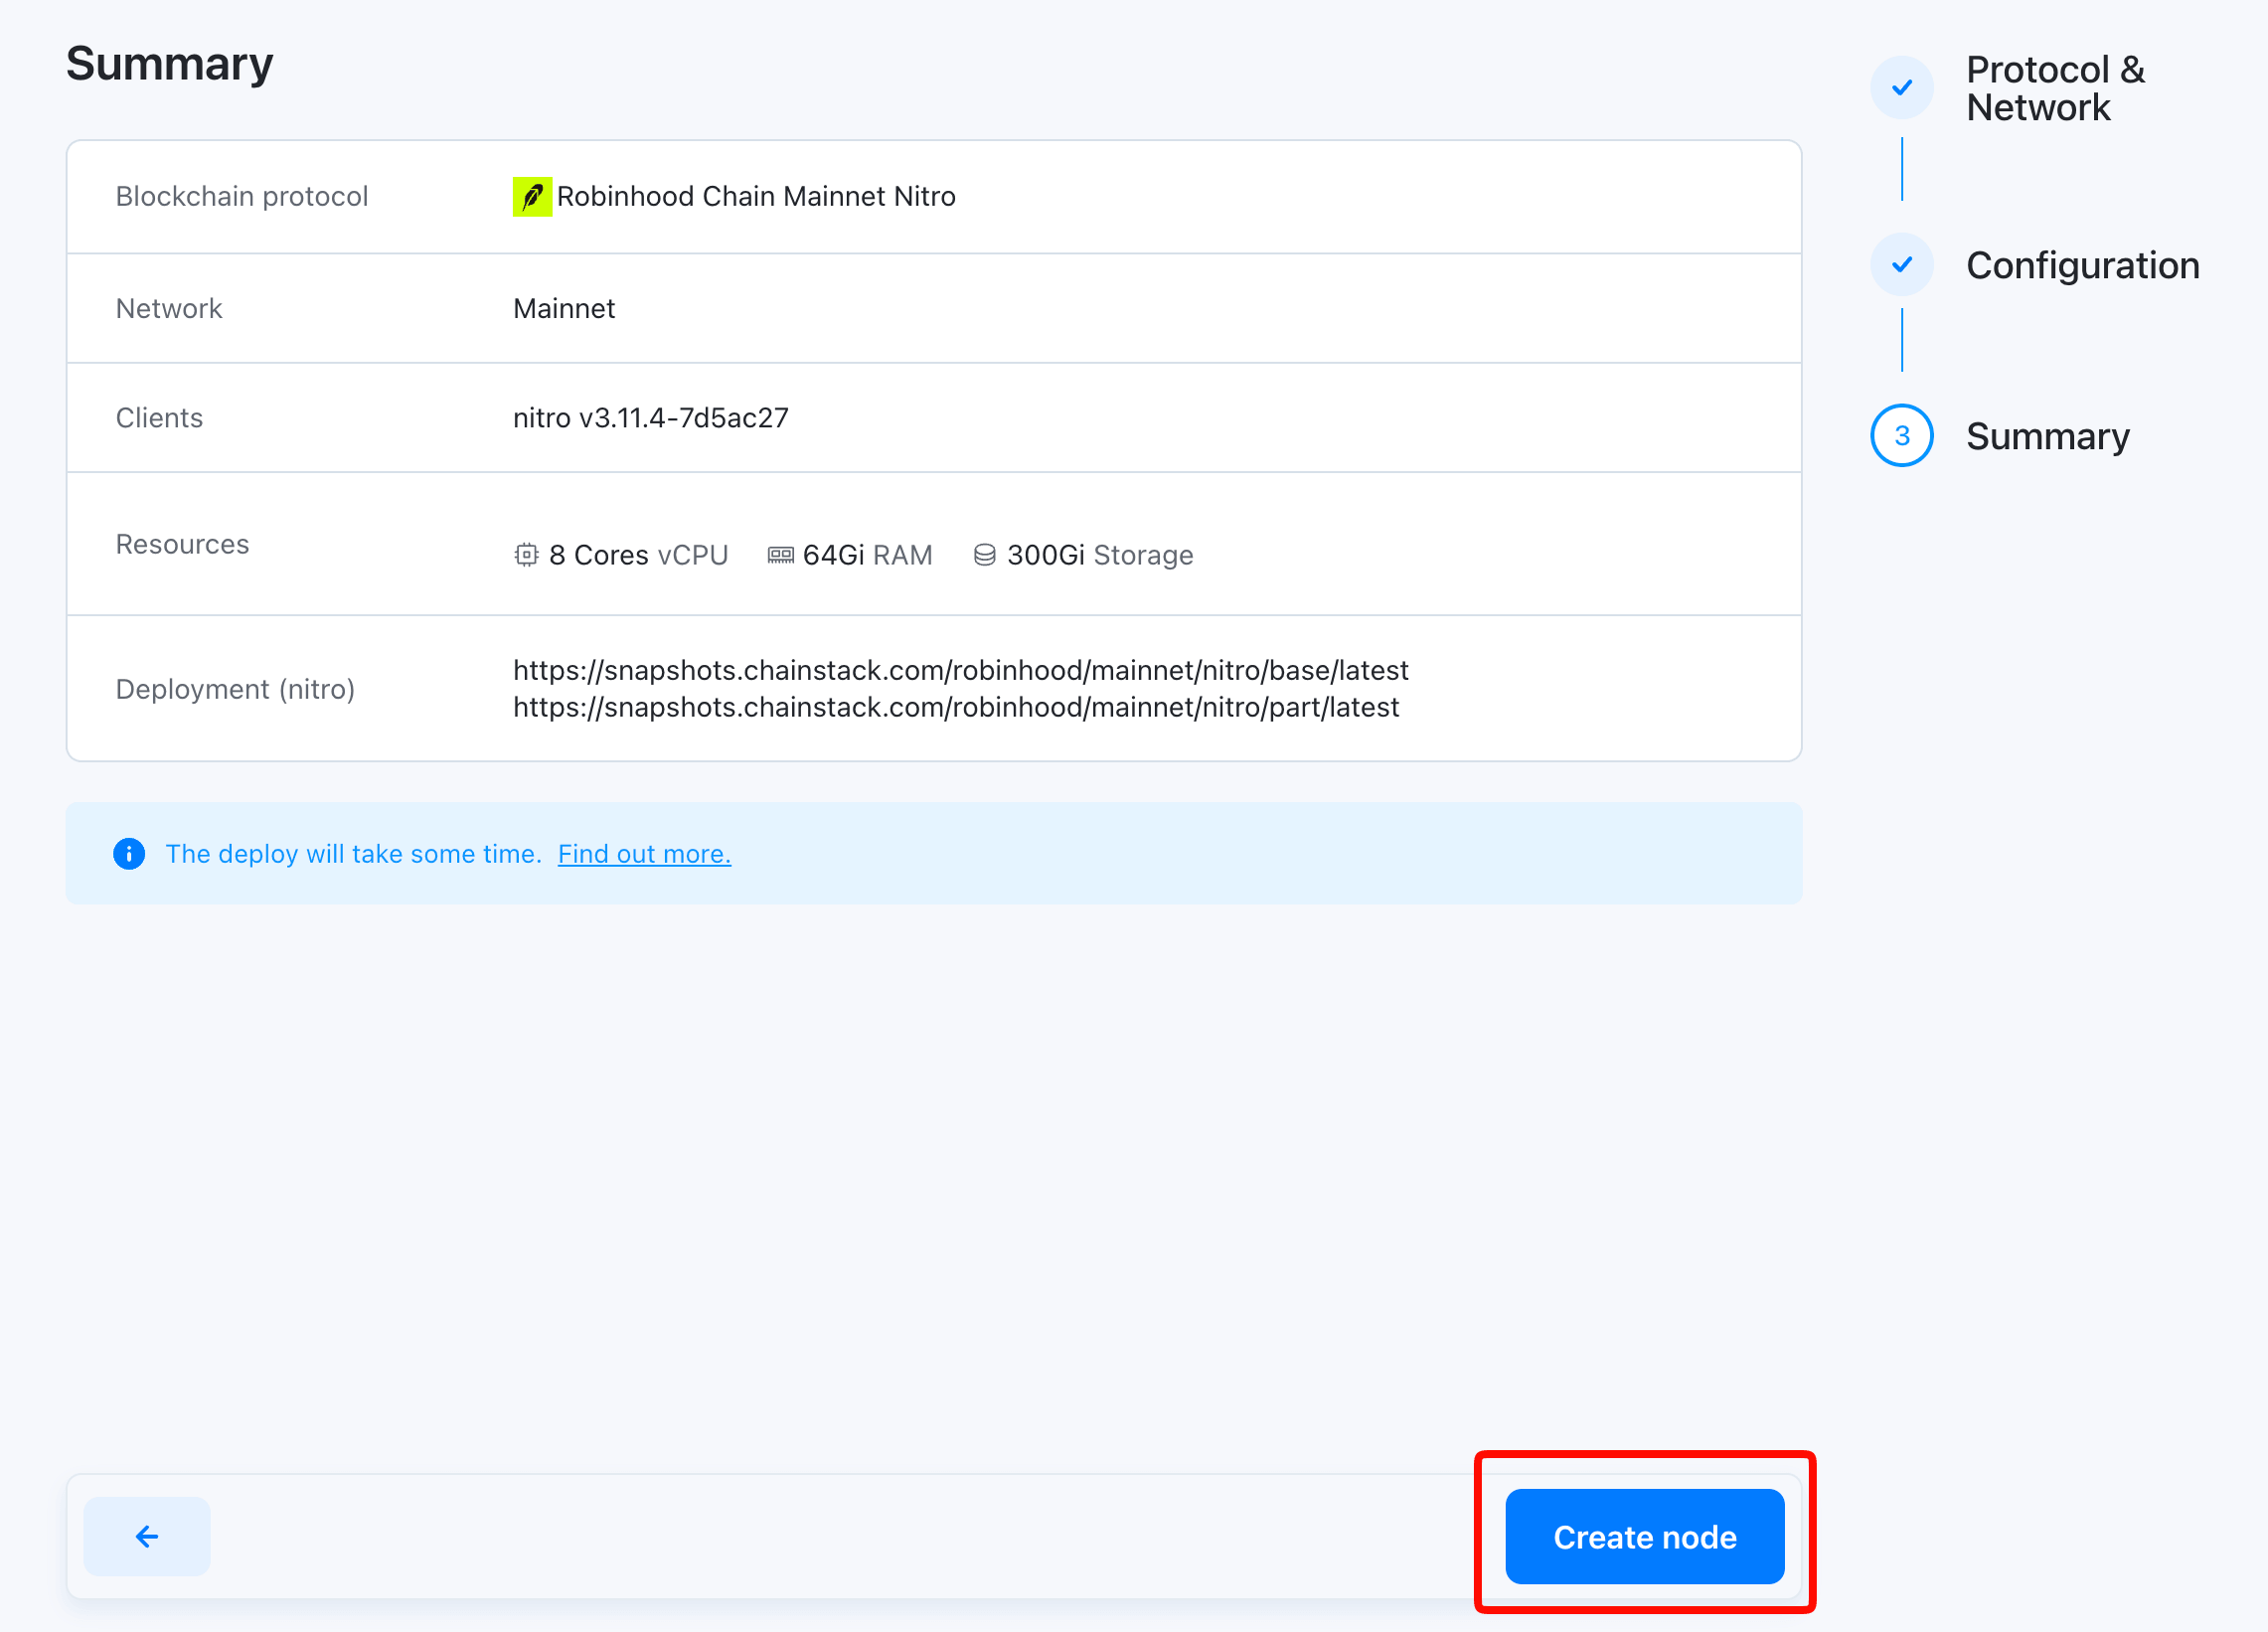
The preset determines the client and resource allocation. Confirm that the node’s persistent volume can accommodate snapshot extraction before starting.
The deployment will move through bootstrapping and then show Running. That status means the workload has started; the node may still be catching up with the chain.
7. Connect to the node and verify synchronization
Open the node details to find its connection information. Self-Hosted node endpoints are internal Kubernetes addresses, so applications outside the cluster need an access route.
For a local test, list the workload services on EC2:
kubectl get svc -n control-panel-deploymentsIdentify the service belonging to your Robinhood Chain deployment. Nitro uses port 8547 for HTTP JSON-RPC. Forward that service, replacing the placeholder:
kubectl port-forward -n control-panel-deployments \
  svc/YOUR_ROBINHOOD_SERVICE 8547:8547 \
  --address 127.0.0.1
From another terminal on your computer, open a second tunnel:
ssh -i chainstack-aws.pem -N \
  -L 8547:127.0.0.1:8547 \
  ubuntu@YOUR_EC2_PUBLIC_IP
Check the network:
curl -sS http://localhost:8547 \
  -H 'Content-Type: application/json' \
  --data '{"jsonrpc":"2.0","id":1,"method":"eth_chainId","params":[]}'
For mainnet, expect:
{"jsonrpc":"2.0","id":1,"result":"0x1237"}Check synchronization:
curl -sS http://localhost:8547 \
  -H 'Content-Type: application/json' \
  --data '{"jsonrpc":"2.0","id":2,"method":"eth_syncing","params":[]}'
A synchronized node returns false. Also request the latest block number and compare it with the Robinhood Chain explorer:
curl -sS http://localhost:8547 \
  -H 'Content-Type: application/json' \
  --data '{"jsonrpc":"2.0","id":3,"method":"eth_blockNumber","params":[]}'
Check repeatedly to confirm that the block height advances and remains close to the network head.
Troubleshooting your deployment
| Symptom | What to check |
|---|---|
| Control Panel opens, but login fails | Keep both tunnels active and confirm the backend URL is reachable from your browser. |
| Pods remain pending | Inspect pod events for insufficient CPU, memory, or unbound persistent volume claims. |
| Bootstrap runs out of disk space | Account for both the snapshot archive and extracted chain data. |
| Node runs but falls behind | Check Ethereum execution and Beacon API connectivity, upstream quotas, and disk performance. |
| Application cannot reach the RPC endpoint | Check whether it is using an internal Kubernetes address without a tunnel or another access route. |
For Kubernetes diagnostics, start with:
kubectl get pods -n control-panel-deployments

kubectl get events -n control-panel-deployments \
  --sort-by=.metadata.creationTimestamp
The Self-Hosted troubleshooting guide covers installation and workload failures.
Move from the walkthrough to production
Once the node follows the chain head, connect a development application and test the RPC methods your workload needs.
For production, replace the temporary tunnels with a persistent access design. Keep administrative access private, protect application RPC access, monitor disk capacity and synchronization lag, and plan recovery for both the Control Panel and blockchain data.
Include EC2, storage performance, data transfer, backups, and Ethereum upstream usage in your cost estimate. A single-server deployment also has a shared failure point: losing the instance interrupts both management and RPC access.
Chainstack Self-Hosted gives you a consistent deployment and management workflow while you operate the infrastructure in your AWS account. Start with the Self-Hosted documentation, verify your node against the chain head, and size the next deployment around your application’s measured workload.