Ethereum
 Solana
 Hyperliquid
 Arbitrum
 Base
Base BNB Smart Chain
 Tempo
Tempo Avalanche
 Aptos
Aptos TRON
TRON Ronin
Ronin zkSync Era
 Optimism
 Sonic
Sonic Polygon
 Unichain
 Fantom
 Gnosis Chain
 Sui
Sui Avalanche Subnets
 Polygon CDK
 Starknet Appchains
 zkSync Hyperchains


Solana: Transactions, Execution, Fees, and Runtime
In the previous article, we explored how Solana messages are structured, why the original format eventually became a bottleneck, and how the v0 model with Address Lookup Tables expanded the number of accounts developers can reference. We established the message as the core description of intent on Solana.
Now we go deeper into what happens next.
This part of the series explains Solana transaction execution, covering serialization, signature verification, account loading, fees, and runtime execution. We follow a transaction from serialization to signature checks, account loading, compute budgeting, parallel execution, and atomic state commit; explaining why blockhashes expire, where fees come from, and why simulation can diverge from real execution.
Once a message is assembled, it begins a long path: serialization, signature collection, blockhash validation, fee computation, account loading, execution scheduling, and atomic state updates. Every step is designed to maximize throughput without compromising deterministic execution. This is also where many of the developer-facing questions emerge: how wallets sign, why expired blockhashes protect the network, how the runtime applies parallelism safely, and why simulations sometimes differ from live results.
This article traces the full lifecycle of Solana transactions from the moment a message becomes a signed transaction to its final committed state on the ledger — end to end, step by step.
What is a Solana Transaction?
To interact with Solana, you submit a transaction. As we discussed in the previous post, a transaction doesn’t hold raw instructions directly; it holds a message that defines which instructions will run, which accounts they require, and which recent blockhash anchors the transaction to the current chain state.
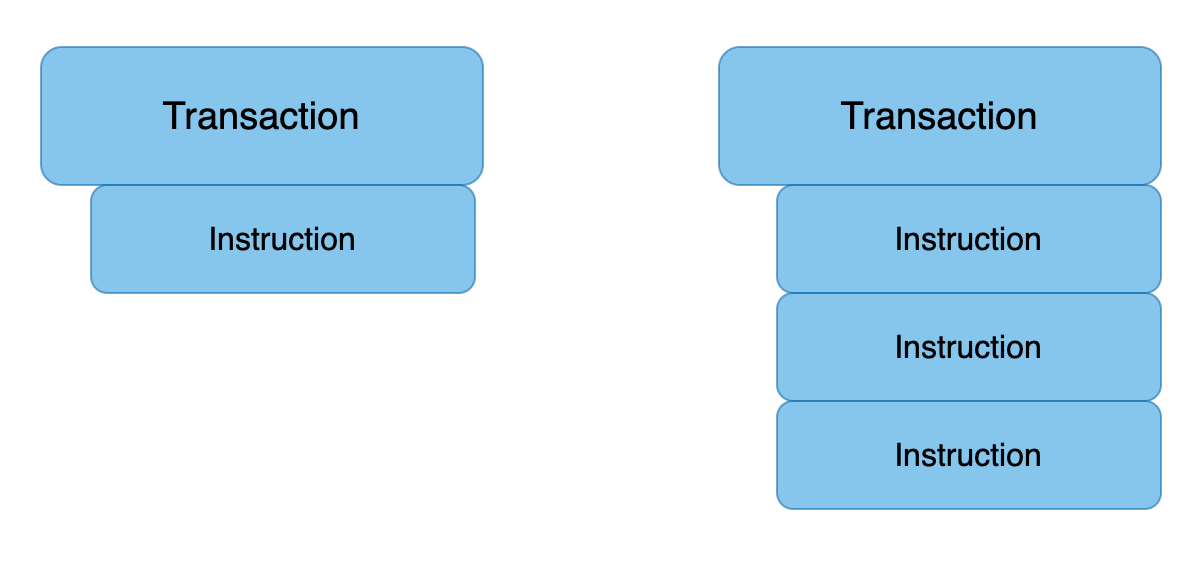
Each instruction inside that message represents a specific operation the network should perform. In the example below, the first transaction contains a message with a single instruction, while the second contains a message with three instructions that will execute sequentially: instruction 1, then instruction 2, then instruction 3.
The transaction object looks like that:
signatures: An array of signaturesmessage: Transaction information, including the list of instructions to be processed
pub struct Transaction {
#[serde(with = “short_vec”)]
pub signatures: Vec<Signature>,
pub message: Message,
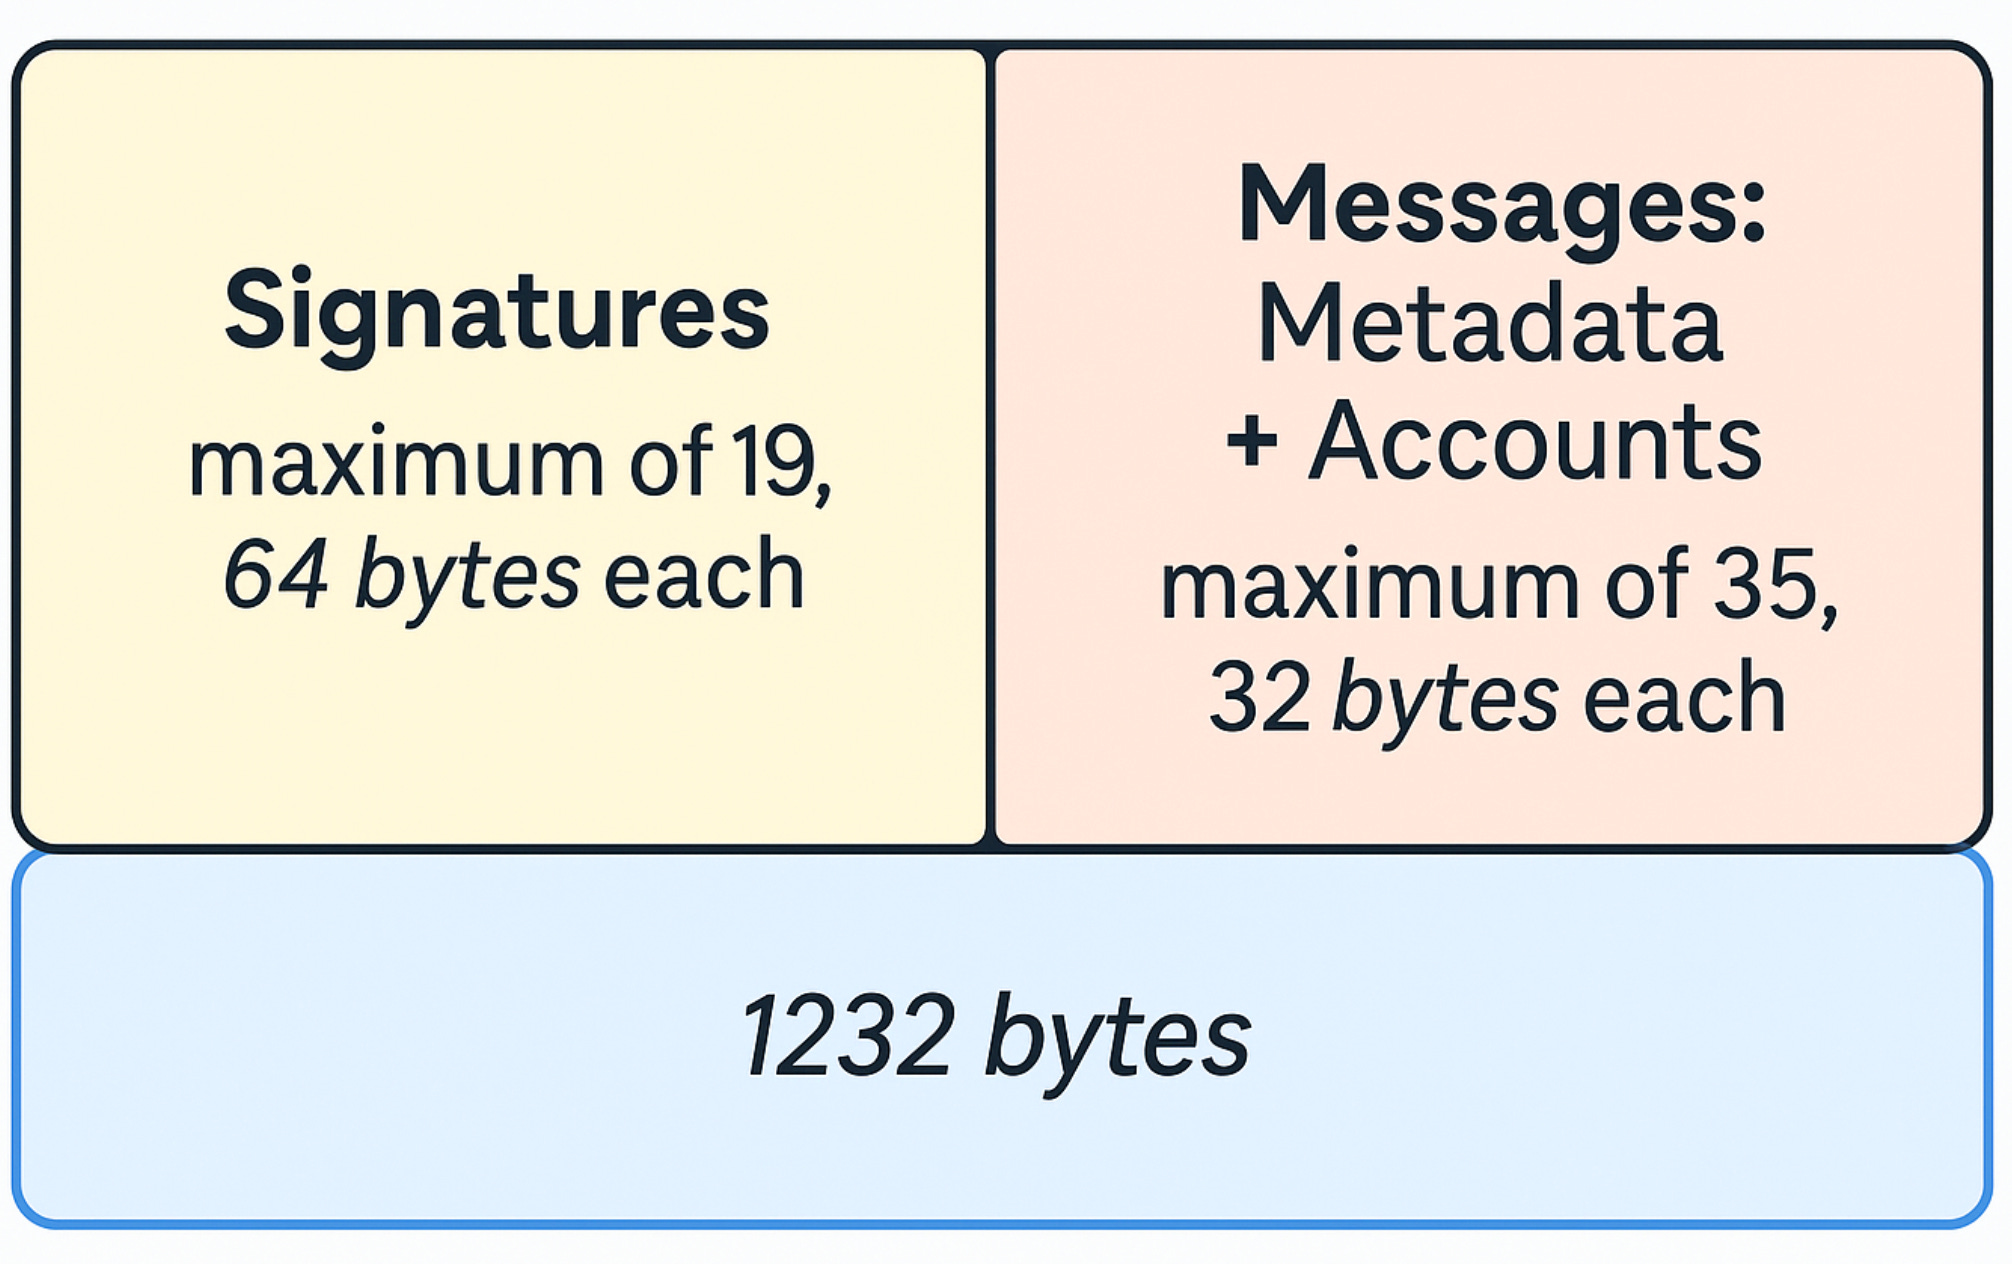
}Transactions have a total size limit of 1232 bytes. This limit includes both the signatures array and the message struct.
Signatures
The transaction holds an array of 64-byte signatures.
Each one is produced by signing the transaction’s Message with the private key of an account that appears as a required signer. Every signer referenced by any instruction must provide a corresponding signature in this array.
The first signature always comes from the fee-payer. This is also the transaction’s primary signature the one you use to look up the transaction on explorers and RPC endpoints.
The signature struct looks like that:
pub struct Signature(GenericArray<u8, U64>);Transactions Are Atomic
A Solana transaction is an all-or-nothing operation.
Even if a message contains multiple instructions, the runtime treats the entire set as a single atomic unit. This means:
- All instructions succeed → state is committed
- Any instruction fails → nothing is committed
There is no partial success.
This is why Solana must know every account that will be touched before execution begins. It allows the runtime to lock those accounts, validate the message, and ensure that the entire transaction can be applied in one deterministic step.
Atomicity is also what makes Solana composable. You can pack multiple program calls into a single transaction (e.g., swap → transfer → stake), and the chain guarantees the entire sequence either completes or doesn’t happen at all.
Transaction Fees
Every Solana transaction includes a fee paid in SOL. This fee has two components: a base fee and an optional prioritization fee.
The base fee compensates validators for executing the transaction, while the prioritization fee allows a user to pay extra to increase the likelihood that the current leader will include their transaction in the block.
What is the base Fee
Solana charges a base fee of 5,000 lamports per signature in a transaction. The fee-payer the first signer in the message is responsible for covering this amount, and only System Program–owned accounts are eligible to pay it.
The network divides the base fee into two equal parts:
- Half is burned, reducing the total SOL supply.
- Half is given to the validator that included the transaction.
What is the prioritization fee
A prioritization fee is an optional amount you can add to improve the likelihood that the current leader includes your transaction. The validator receives 100% of this fee.
You set the prioritization fee by specifying a compute unit (CU) limit and a CU price on the transaction.
The fee is computed as:
Prioritization fee = CU limit × CU priceNote: Solana only charges a prioritization fee when you explicitly set one using the ComputeBudgetProgram. If you do not include a compute budget instruction, then:
- CU price = 0
- Prioritization fee = 0
- Only the base fee is charged (5,000 lamports per signature)
This value helps determine how your transaction ranks against others in the leader’s queue. Solana derives a transaction’s overall priority using:
Priority = (Prioritization fee + Base fee) / (1 + CU limit + Signature CUs + Write lock CUs)A higher priority increases the chance your transaction is selected during contention.
Compute Unit Limit
By default, Solana allocates 200,000 compute units per instruction and up to 1.4 million compute units per transaction.
You can override these defaults by adding a
SetComputeUnitLimit instruction from the ComputeBudgetProgram.
A practical way to choose an appropriate limit is:
- Simulate the transaction to see how many CUs it actually consumes.
(coming soon in the next blogs) - Add X% overhead to avoid unexpected failures.
It’s important to note that the prioritization fee uses the requested CU limit, not the compute units the transaction ultimately consumes.
If you set the limit too high (or rely on the large default), you may end up paying for unused compute capacity.
Compute Unit Price
The compute unit price is an optional amount, specified in micro-lamports, that you’re willing to pay per requested compute unit.
You can think of it as a tip that incentivizes the current leader to include your transaction ahead of others.
To set a CU price, include a
SetComputeUnitPrice instruction from the ComputeBudgetProgram.
If you do not specify a CU price, it defaults to zero, and the transaction will not pay a prioritization fee, only the base fee.
Note: Compute Budget program instructions are ignored when calculating the prioritization fee. You can see this here.
Example: lets take a look at this transaction
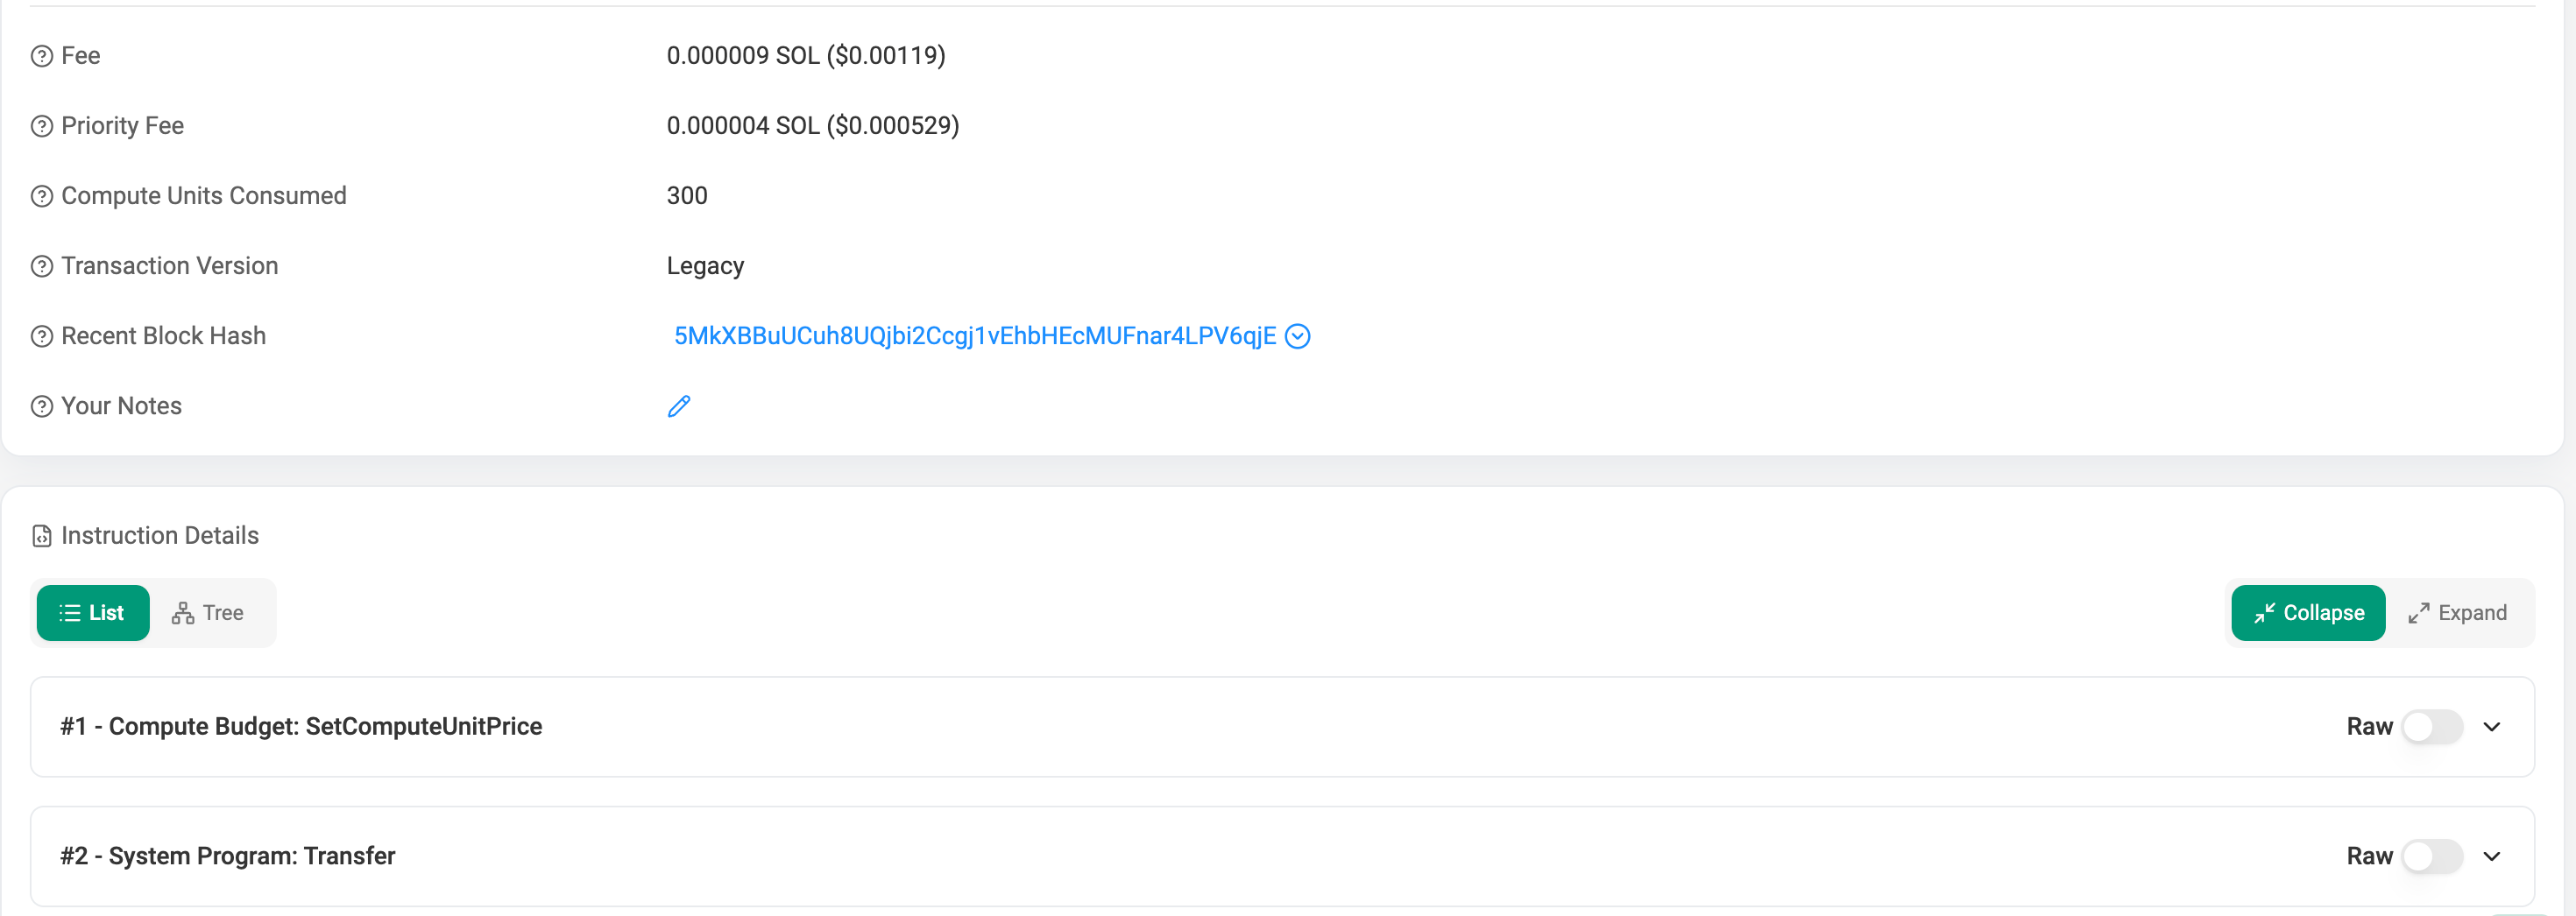
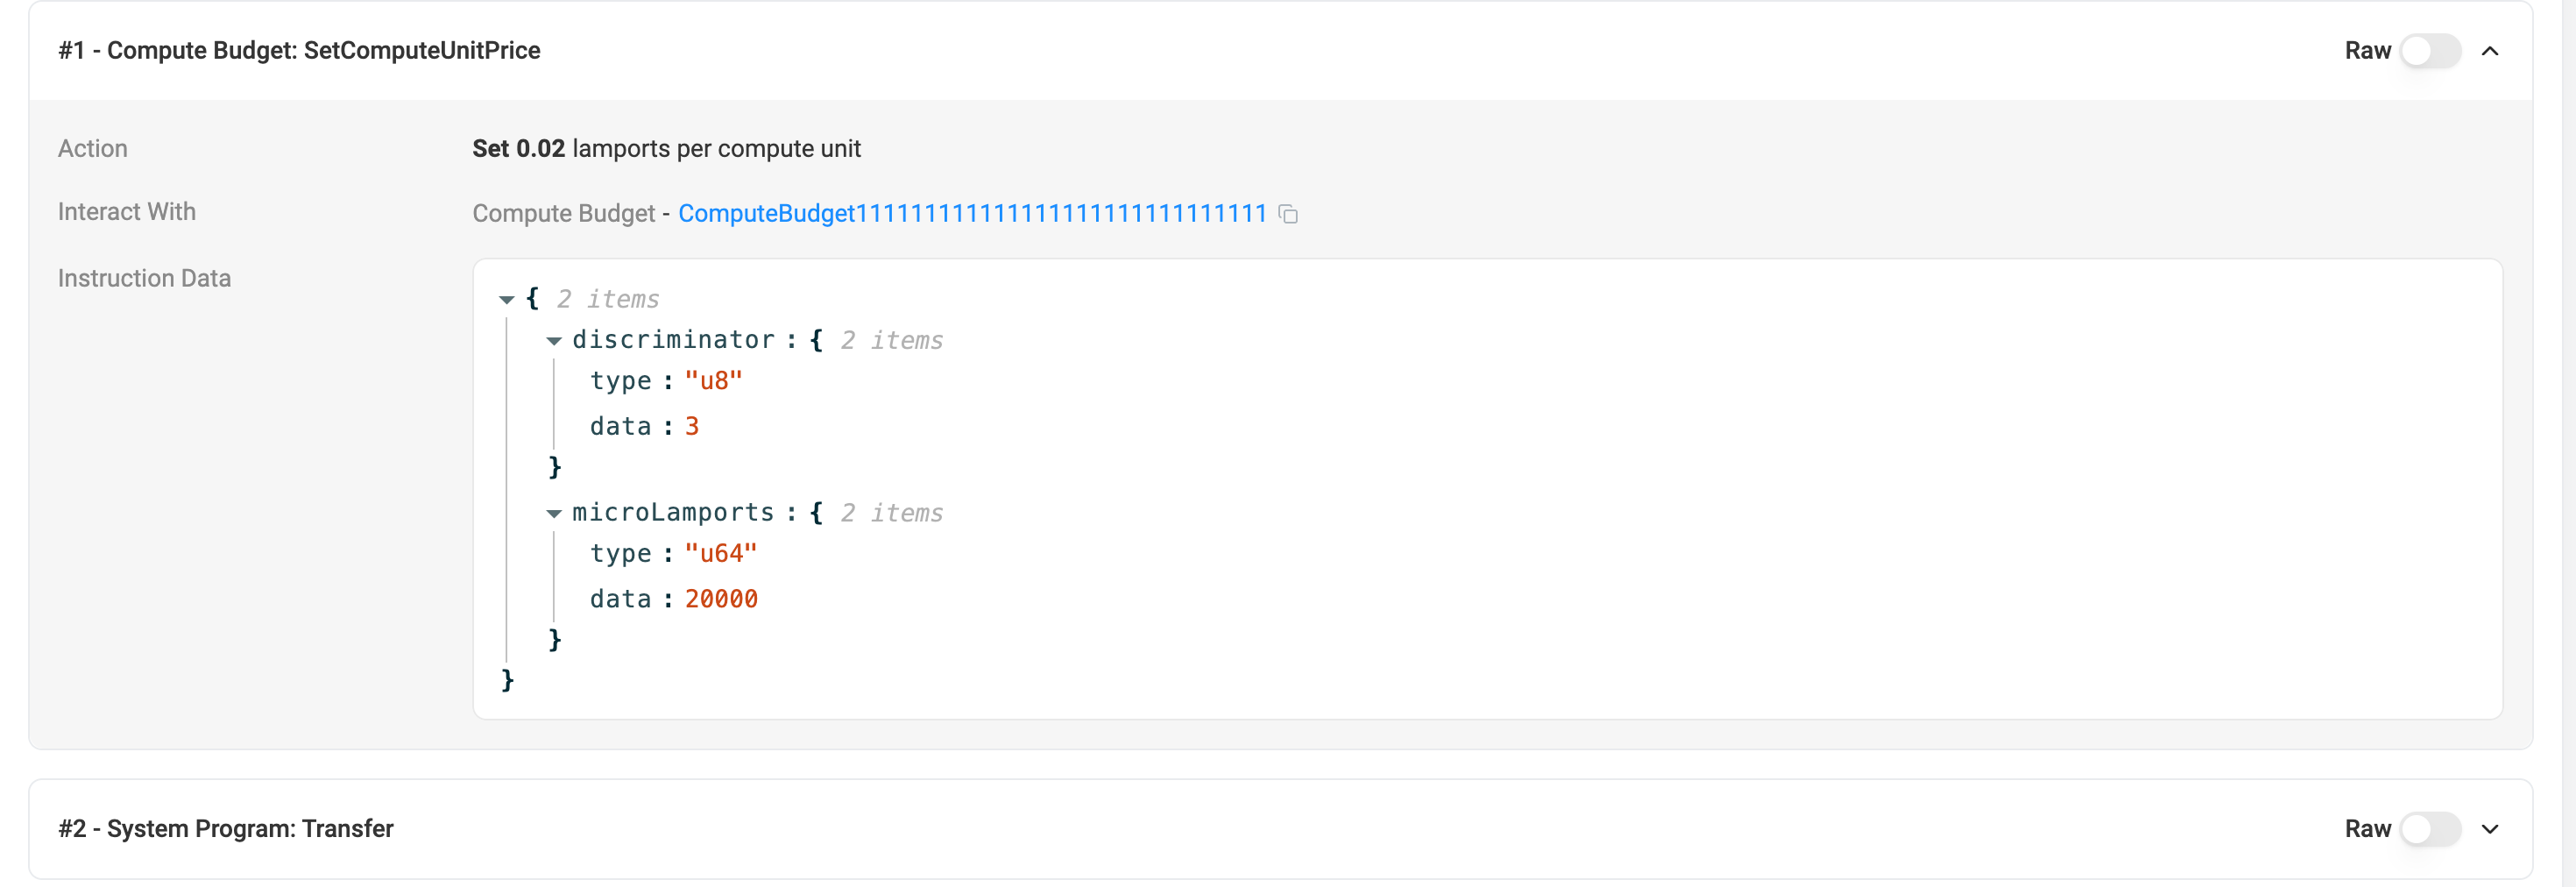
We see that the Priority fee here is 0.000004 SOL, and the total fee is 0.000009 SOL
lets understand how it is computed:
as we said before, By default, Solana allocates 200,000 compute units per instruction.
In this transaction we have here 2 instructions, but as said previously the
ComputeBudgetInstructions are omitted from the calculation, so we end up only with 1 instruction and a price of 20000 micro-lamports which is 0.02 lamports/CU.
so the price will be: 200,000 * 0.02 = 4000 lamports, which is 0.000004 SOL.
In addition we have 1 transaction signer on the transfer instruction, which is costs 0.000005 SOL.
Total fee = BaseFee + PriorityFee = 0.000004 + 0.000005 = 0.000009How the Wallet Actually Signs
A common point of confusion is how a signer can sign a message when the message itself already includes that signer’s account. This feels circular at first, how can the wallet include the signer in the message before the signer has produced the signature?
The key is understanding that the message contains the signer’s public key, not their signature.
The signature is added after the message is finalized.
Here’s how the process actually works:
1. The wallet builds the complete message first
Before any signature exists, the wallet constructs the message in its final form:
- the message header (signer counts),
- all account public keys,
- the recent blockhash,
- the compiled instructions.
At this stage, the message already includes the signer’s public key, because the runtime needs to know:
- which accounts must sign,
- the order of signer accounts,
- which signature corresponds to which key.
No signatures exist yet.
The message is simply a byte array describing exactly what will be executed.
2. The signer signs the message bytes
Once the message is fully constructed, the wallet signs the exact serialized message bytes:
signature = Ed25519_sign(private_key, message_bytes)Any change to the message, however small invalidates the signature.
Because the message contains only public keys, signing it has no circular dependency.
It’s like signing a legal document that lists your name:
your name is part of the document, but your signature is added afterward.
3. The signature is inserted into the transaction
After signing, the signature is placed into the transaction’s signature array according to the signer’s position in account_keys:
- signature at index 0 → first signer (fee-payer)
- signature at index 1 → second signer
- etc.
The signature does not modify the message.
The message is now locked, changing it would break every signature.
Transaction packs all this data into its structure and sends the built transaction to the node.
Overview
- Messages never contain signatures, only public keys.
- Signatures are created over the final message, not before it.
- Signatures live outside the message, in the transaction wrapper.
This separation allows:
- deterministic signing,
- canonical verification,
- simple replay protection,
- and lightweight transactions.
There is no circular dependency, signers sign the message, and the message simply identifies who the signers are.
How Solana Executes a Transaction
Up to this point, we’ve focused on how a transaction is constructed, how messages are formed, how signatures are produced, how fees are calculated, and how the wallet packages everything together.
Once a validator receives a transaction, Solana processes it through a series of steps that ensure the transaction is valid, safe to run in parallel, and either fully succeeds or fully fails.
1. Signature Verification
- The validator hashes the message.
- Each signature is checked against its corresponding public key.
- Any invalid signature → the transaction is immediately rejected.
2. Account Loading
- All accounts listed in the message (and ALTs, if used) are fetched.
- The runtime checks:
- account existence
- ownership rules
- signer flags
- read/write permissions
- If anything is invalid → the transaction stops here.
3. Account Locking
- Writable accounts get a write lock.
- Read-only accounts get a read lock.
- These locks ensure no conflicting transactions execute in parallel.
- If required accounts are already locked → the transaction may be delayed or skipped.
4. Instruction Execution
- Instructions run in order, one by one.
- Each instruction:
- invokes the target program
- updates compute usage
- may perform CPIs
- If any instruction fails → the entire transaction fails.
5. Compute Budget Enforcement
- The runtime tracks consumed compute units.
- If the CU limit is exceeded:
- execution stops
- the transaction fails
- the fee-payer still pays the fee
6. Atomic Commit or Rollback
- If all instructions succeed:
- account changes are committed atomically
- locks are released
- If any instruction fails:
- no state changes are applied
- the transaction is recorded as failed
- the fee is still charged
Summary
A Solana transaction is more than a signed bundle of instructions. It’s a structured request that moves through a precise execution pipeline. The message defines what should happen, signatures authorize who approved it, and the runtime ensures everything is valid, safe to run in parallel, and fully atomic.
You’ve seen how fees are calculated, how compute budgets influence prioritization, how wallets sign messages, and how validators process transactions from signature checks to final commit. Together, these pieces form the foundation of Solana’s high-throughput, parallel execution model.
Understanding this flow gives you the tools to reason about transaction behavior, debug failures, and write programs that interact with the network reliably and efficiently.
Learn more about Solana architecture from our articles
- Architecture & Parallel Transactions
- Account Model and Transactions
- Anchor Accounts: Seeds, Bumps, PDAs
- Instructions and Messages
- Transaction, Serialization, Signatures, Fees, and Runtime Execution
- SPL Token Program Architecture
Reliable Solana RPC infrastructure
Getting started with Solana on Chainstack is fast and straightforward. Developers can deploy a reliable Solana node within seconds through an intuitive Console — no complex setup or hardware management required.
Chainstack provides low-latency Solana RPC access and real-time gRPC data streaming via Yellowstone Geyser Plugin, ensuring seamless connectivity for building, testing, and scaling DeFi, analytics, and trading applications. With Solana low-latency endpoints powered by global infrastructure, you can achieve lightning-fast response times and consistent performance across regions.
Start for free, connect your app to a reliable Solana RPC endpoint, and experience how easy it is to build and scale on Solana with Chainstack – one of the best RPC providers.