Ethereum
 Hyperliquid
 Solana
 Arbitrum
 BNB Smart Chain
 Base
Base Polygon
 TRON
TRON Sui
Sui Robinhood


How to migrate your blockchain RPC endpoints to Chainstack
Your RPC provider sits between your app and every chain it touches. Every call you make — reading state, submitting transactions, listening for events — goes through it. So when that provider is slow, unreliable, or missing support for the chain or method you need, you feel it immediately. Your users feel it too.
Most developers switch providers for one of three reasons: they hit a rate limit wall they can’t negotiate around, they need a chain or node type that isn’t supported, or the reliability just isn’t there anymore. Whatever brought you here, the migration itself doesn’t have to be painful — but it does need to be done in the right order. Skip the planning step and you’ll find out what you missed in production.
This guide walks through the full process: finding every endpoint in your codebase, verifying Chainstack covers what you need, testing before you touch anything live, and making the actual swap cleanly.
What you need before starting
- Access to your codebase — source files,
.env, config files - A Chainstack account — free to start
- Your Chainstack API key — Settings → API Keys
- 30–60 minutes — more if you have a lot of endpoints
Step-by-step guide
Step 1: Find every endpoint in your codebase
The first mistake people make is assuming they know where all their RPC endpoints are. They swap the obvious ones, ship it, and then something breaks in a background job or a config file they forgot about.
Don’t guess. Scan everything — source code, environment files, Hardhat and Foundry configs, Docker files, CI pipelines. RPC URLs end up in surprising places.
- Source code — look for hardcoded
https://orwss://RPC URLs - Environment files —
.env,.env.local,.env.production - Config files —
hardhat.config.js,foundry.toml,truffle-config.js, YAML/JSON - Docker and CI files —
docker-compose.yml, GitHub Actions, CircleCI
These commands will catch most of them:
# Find known provider URLs
grep -r "infura.io\|alchemy.com\|quicknode.com\|ankr.com\|blastapi.io" . \
  --include="*.js" --include="*.ts" --include="*.env" --include="*.json" --include="*.yaml"

# Find anything that looks like an RPC endpoint
grep -rE "https?://[a-zA-Z0-9.-]+\.(io|com|net)/[a-zA-Z0-9]+" . \
  --include="*.js" --include="*.ts"
For each endpoint you find, record the chain and network, the protocol (HTTP, WebSocket, gRPC, Geyser), and the RPC methods your code actually calls — especially if you’re using anything beyond standard reads, like debug_traceTransaction or historical archive queries.
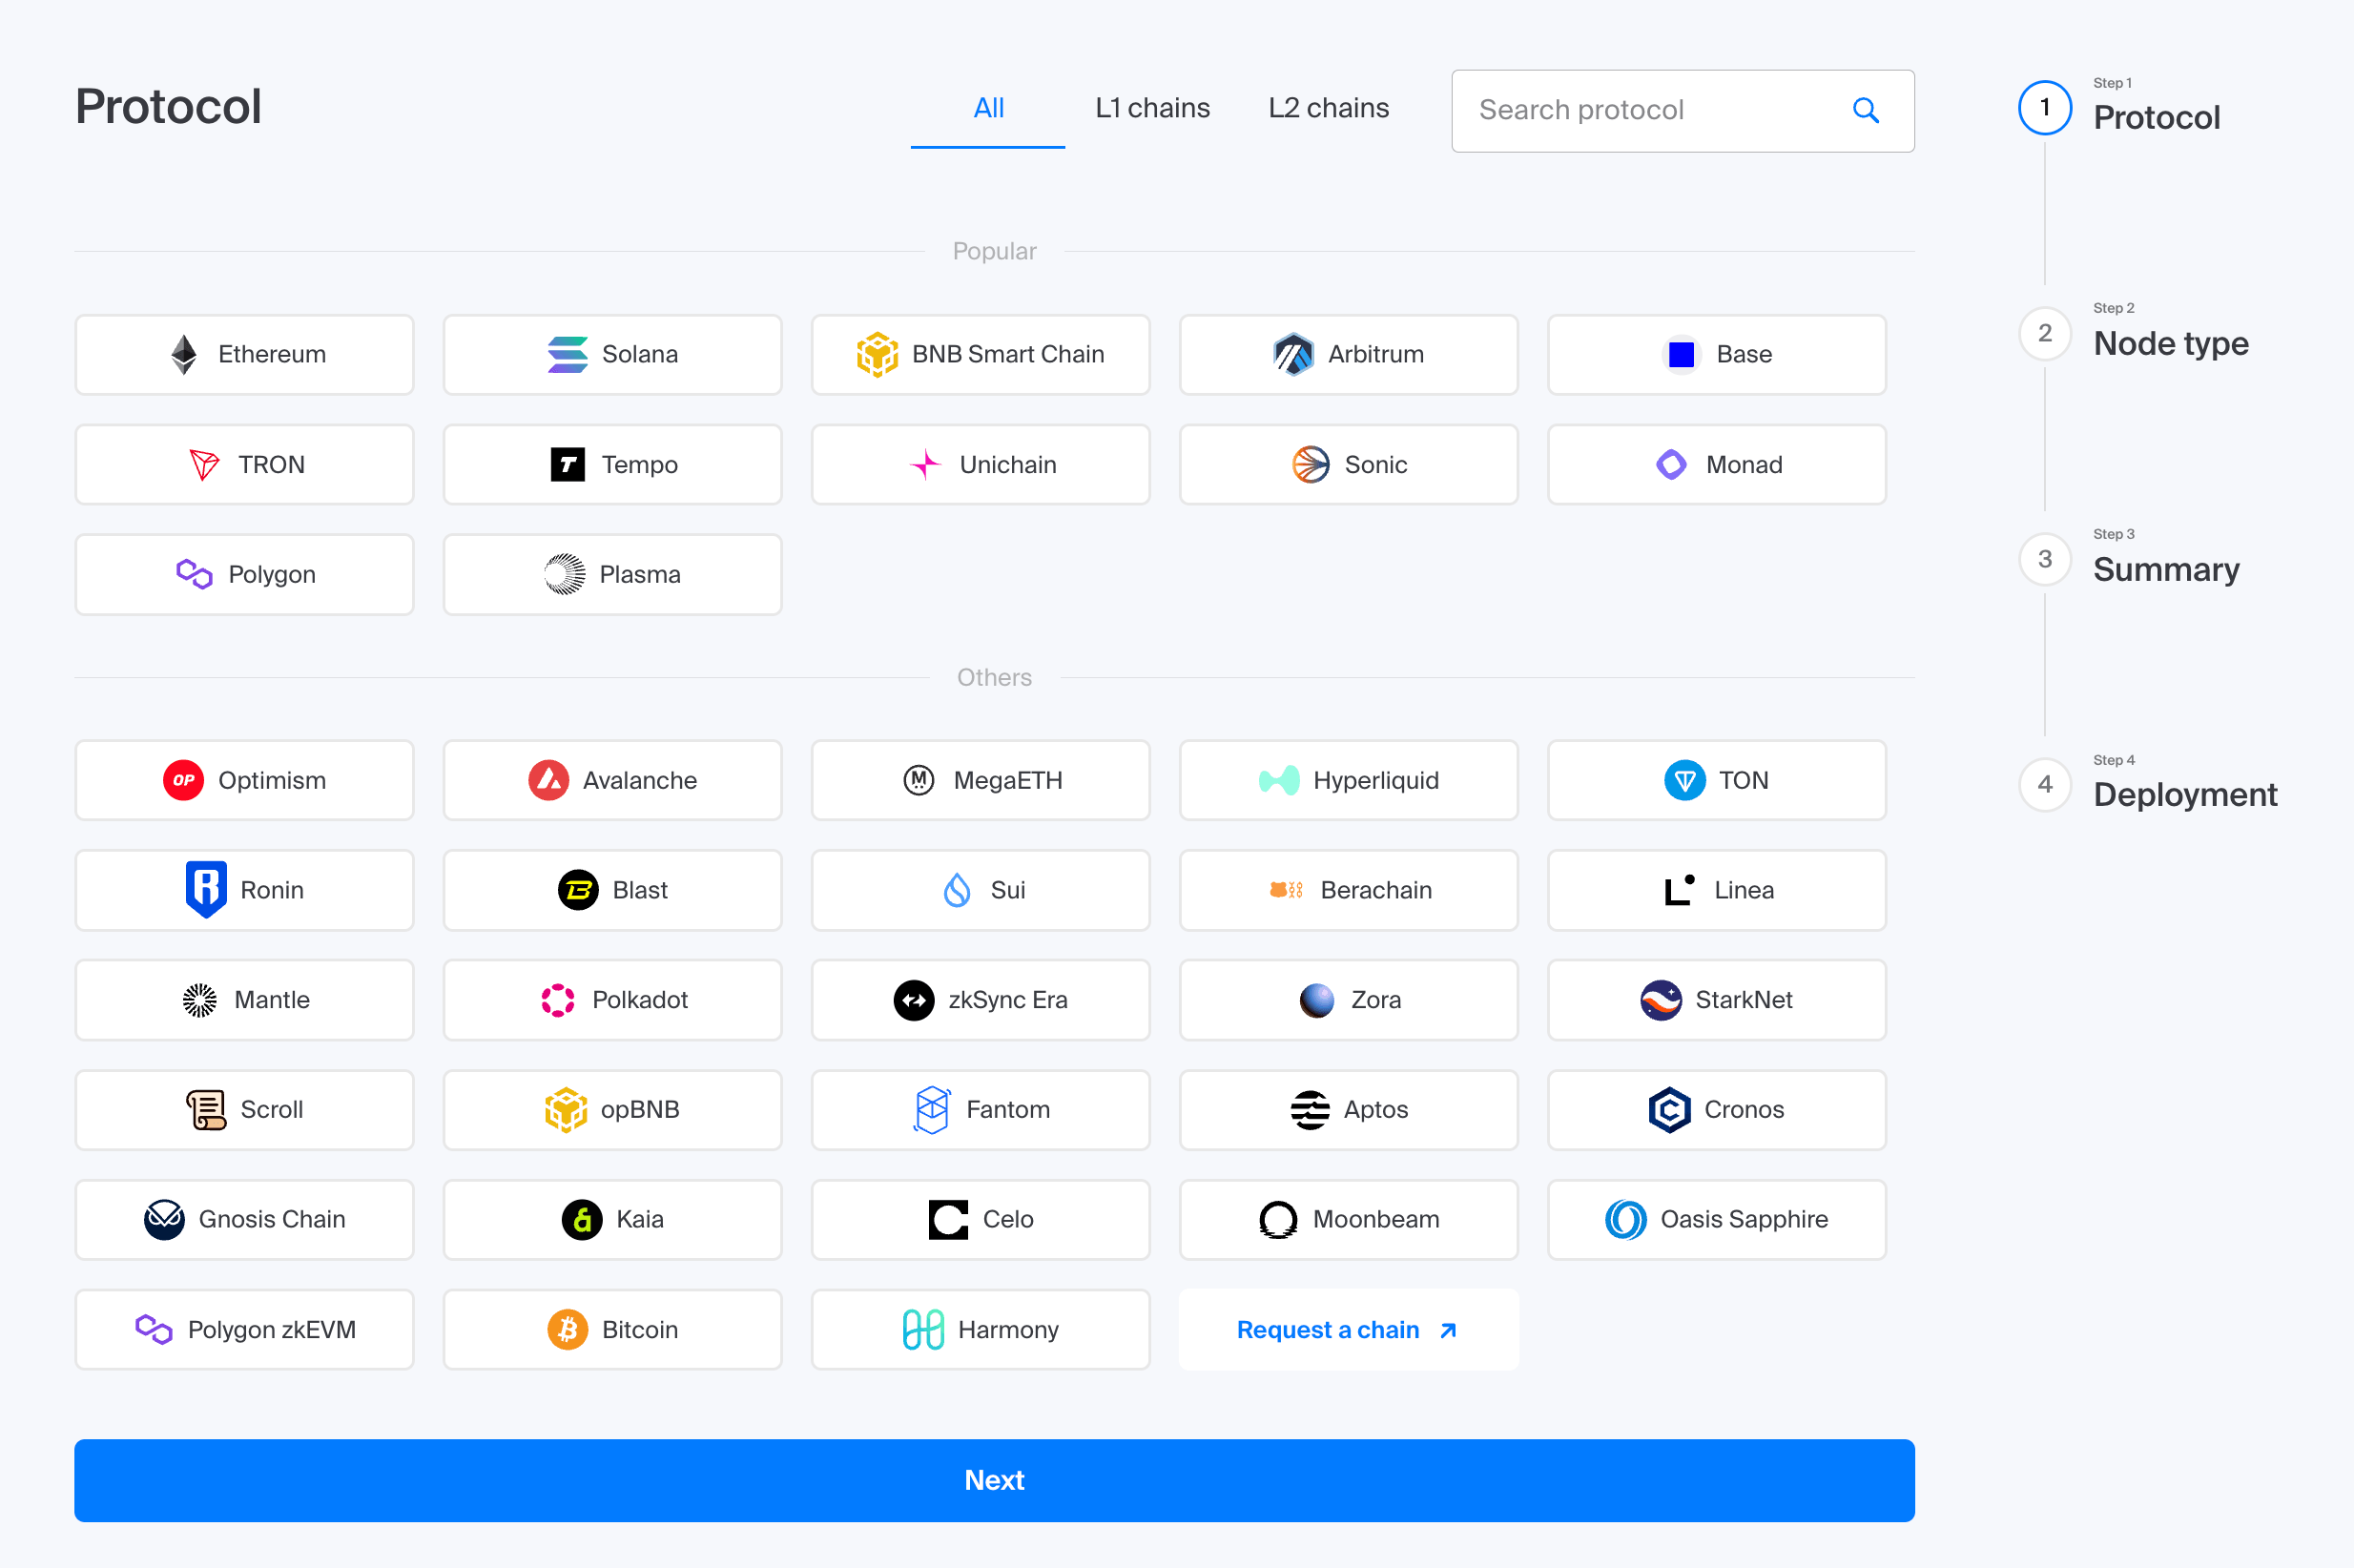
Step 2: Check what Chainstack supports
Before deploying anything, verify that Chainstack covers your chains and node requirements. Don’t rely on memory or assumptions here — the fastest way to waste time is migrating to a node that doesn’t support the methods you need.
The best place to check is the Chainstack docs — look up each chain you found in Step 1 to confirm supported networks, node types, and available methods. If you’re using the Chainstack MCP at https://mcp.chainstack.com/mcp, you can query this programmatically.
Chainstack has four node types. Which one you need depends on what your code does:
- Global Node — load-balanced, routes requests to the closest available location, covers standard queries for most use cases
- Unlimited Node — flat-fee add-on for any existing node, predictable monthly costs with no per-request overage charges, pick an RPS cap that fits your throughput
- Trader Node — regional, low-latency endpoints with Warp transaction support
- Dedicated Node — exclusive compute resources, full customization, debug and trace APIs
WebSocket — verify wss:// is available for that chain
Solana streaming — check Geyser plugin support
gRPC — verify per-chain
Some features can’t be set up via API and need manual configuration in the Chainstack console:
- Dedicated node deployment — contact Chainstack sales
- Solana Yellowstone gRPC Geyser plugin — node Add-ons tab
- Unlimited Node add-on — node Add-ons tab
- MEV protection — node details page
- Warp transactions — node details page
- IP allowlisting / access rules — node Security tab
Queue these up before you start deploying so they don’t block you mid-migration.
Step 3: Test before you swap
If you already have Chainstack nodes deployed, test them against your actual RPC methods before touching production. This is the step most people skip and then regret.
Send real test requests for each method your code uses. A basic call:
curl -X POST \
  -H "Content-Type: application/json" \
  --data '{"jsonrpc":"2.0","method":"eth_blockNumber","params":[],"id":1}' \
  YOUR_CHAINSTACK_ENDPOINT
A debug/trace call:
curl -X POST \
  -H "Content-Type: application/json" \
  --data '{"jsonrpc":"2.0","method":"debug_traceTransaction","params":["0xYOUR_TX_HASH",{}],"id":1}' \
  YOUR_CHAINSTACK_ENDPOINT
If your app makes batch calls or polls at high frequency, test at that throughput too — not just single requests. Record what works, what fails, and any 429 rate limit responses.
Step 4: Plan the migration
With your endpoints inventoried and Chainstack support confirmed, map out the full replacement before writing a single line of code. Every old endpoint gets a specific Chainstack equivalent — either an existing node or one you still need to create.
https://mainnet.infura.io/v3/…→ your Chainstack Ethereum mainnet endpoint — existing nodewss://eth-mainnet.g.alchemy.com/…→ your Chainstack Ethereum mainnet WebSocket endpoint — same nodehttps://polygon-mainnet.g.alchemy.com/…→ need to create — confirm archive requirement firsthttps://solana-api.projectserum.com→ flag: check Geyser — may need Add-on
Stop here and review the plan. Don’t proceed until every endpoint has a mapped replacement, node type requirements are confirmed, and any manual console setup items are queued. Answering these questions now costs minutes. Answering them in production costs much more.
Step 5: Deploy new nodes
For any endpoints that need a new Chainstack node, the fastest path is through the console:
- Log in to console.chainstack.com
- Create or select a project
- Click Add node
- Choose chain → network
- Select Global Node for instant deployment
Once deployed, copy the HTTPS and WSS endpoint URLs from the node details page.
Step 6: Replace the endpoints
The cleanest approach is environment variables — swap the value, not the code.
# before
ETH_RPC_URL=https://mainnet.infura.io/v3/YOUR_KEY

# after
ETH_RPC_URL=YOUR_CHAINSTACK_ENDPOINT
If you have hardcoded URLs in config files, move them to environment variables while you’re here. Future migrations will take minutes instead of hours.
// hardhat.config.js — before
networks: {
  mainnet: { url: "https://eth-mainnet.g.alchemy.com/v2/YOUR_KEY" }
}

// hardhat.config.js — after
networks: {
  mainnet: { url: process.env.ETH_RPC_URL }
}
WebSocket connections follow the same pattern:
// before
const provider = new ethers.WebSocketProvider("wss://eth-mainnet.g.alchemy.com/v2/YOUR_KEY")

// after
const provider = new ethers.WebSocketProvider(process.env.ETH_WS_URL)
Step 7: Verify everything works
Run your full test suite. Then manually confirm the things tests often miss:
- Basic read calls return expected data (
eth_blockNumber,eth_getBalance) debug_trace*ortrace_*calls work if your code uses them- WebSocket connections establish and receive events
- Archive queries return historical data at the correct block
- No
429errors under normal load - Error handling responds correctly to Chainstack’s error format
Monitor for the first 24 hours. Chainstack’s dashboard shows request counts, error rates, and latency per node — use it.
Common issues
| Issue | Fix |
|---|---|
| 401 Unauthorized | Your Chainstack endpoint URL already contains your credentials. No separate Authorization header needed. Copy the full URL from the console. |
| Archive queries returning errors | You’re hitting a full/elastic node. Create an archive node for that chain and update the endpoint. |
debug_traceTransaction not supported | Switch to an archive with debug/trace node. Not all node types expose these methods. |
| WebSocket disconnecting frequently | Add reconnect logic with exponential backoff. Best practice regardless of provider. |
| Method not found on Solana | Some Solana methods require specific node configurations. Search the Chainstack docs for the method name to confirm support and node type. |
What to do if something is unsupported
- Chain not in the docs — it may be available as a dedicated deployment. Contact Chainstack sales.
- Method not in the docs — treat it as unsupported and flag it before migrating. Don’t assume.
- Technical issue with an existing node — open a ticket at support.chainstack.com.
- Something unclear after reading the docs — contact support. Don’t guess.
Wrapping up
A provider migration is one of those tasks that feels risky until you’ve done it once. The risk is real — but it’s concentrated in the planning phase. Find everything, verify support, test on real methods, map it out before you touch code. Do those four things and the actual swap is just find-and-replace.
If you run into anything the docs don’t cover, Chainstack support is the right place to start — not guessing, not assuming, and definitely not finding out in production.